
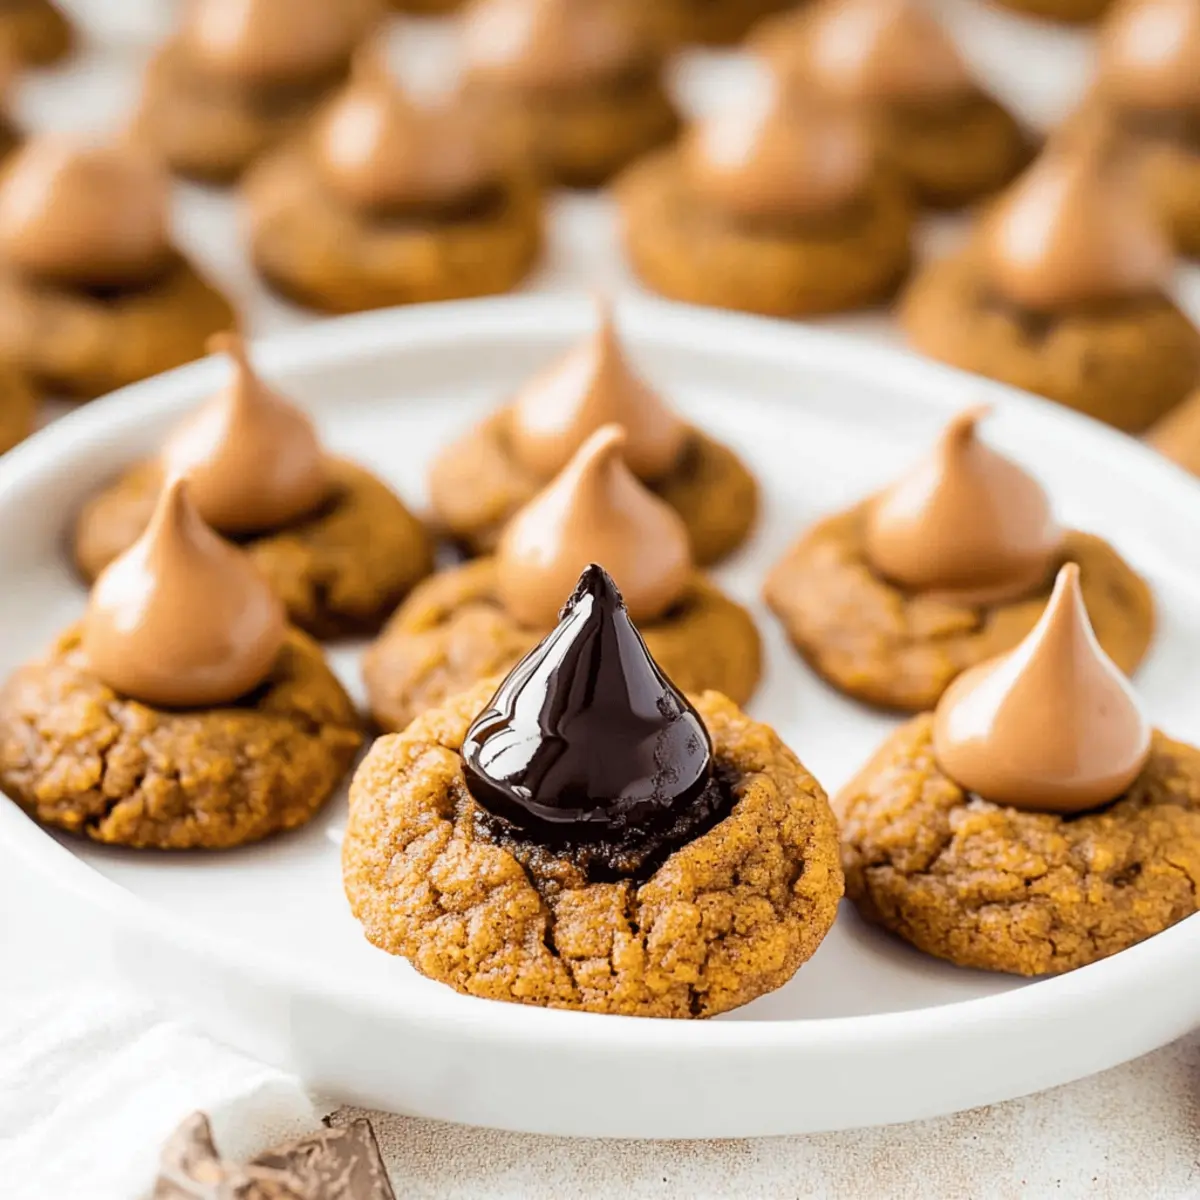
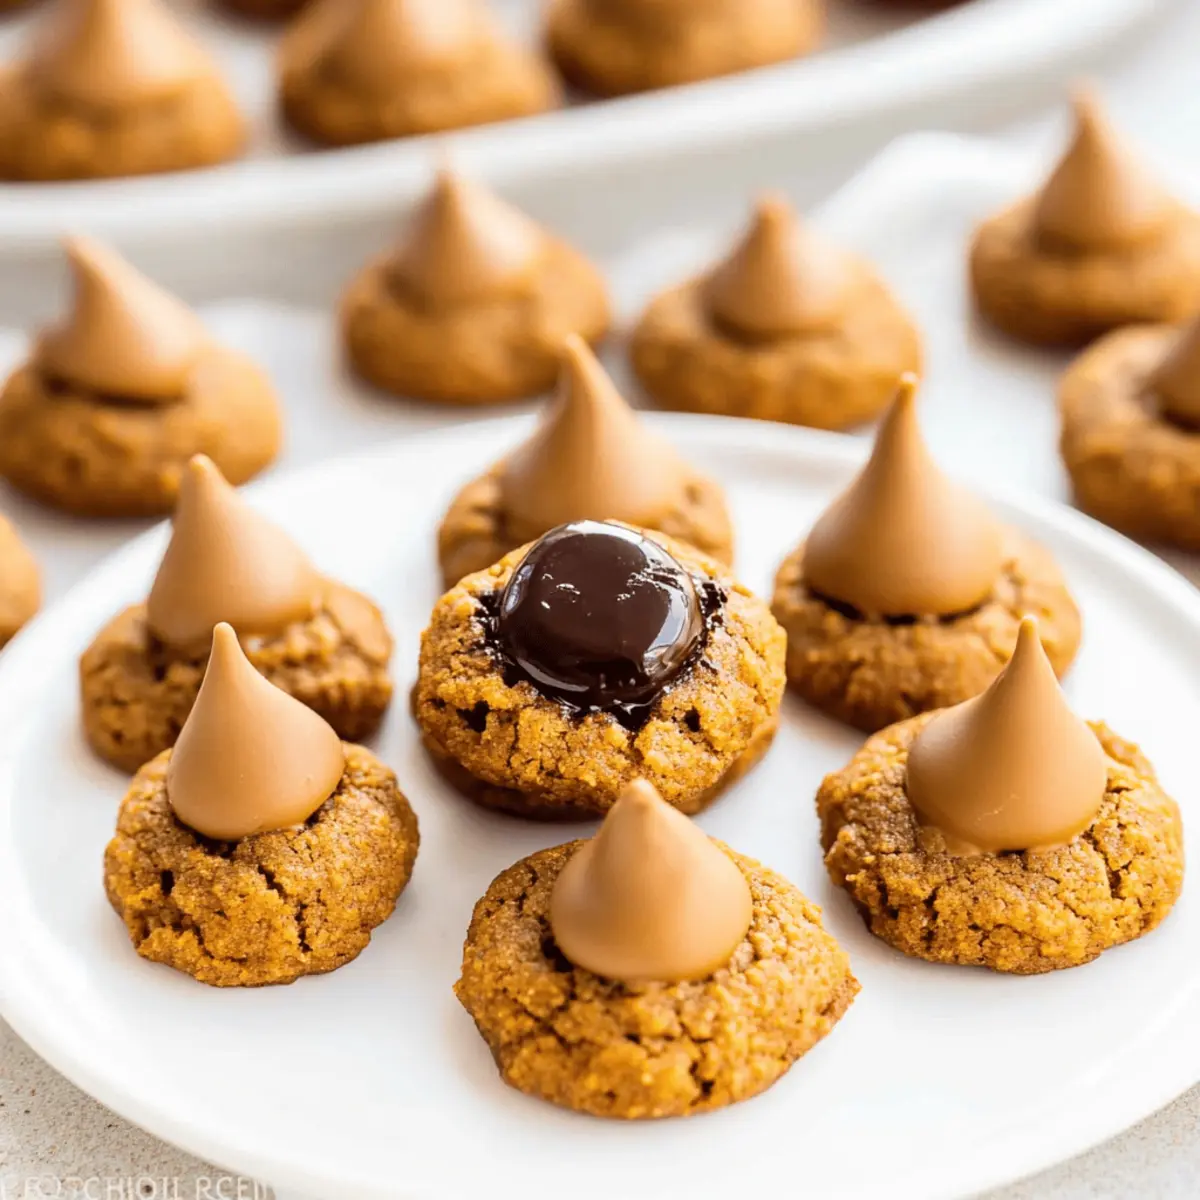
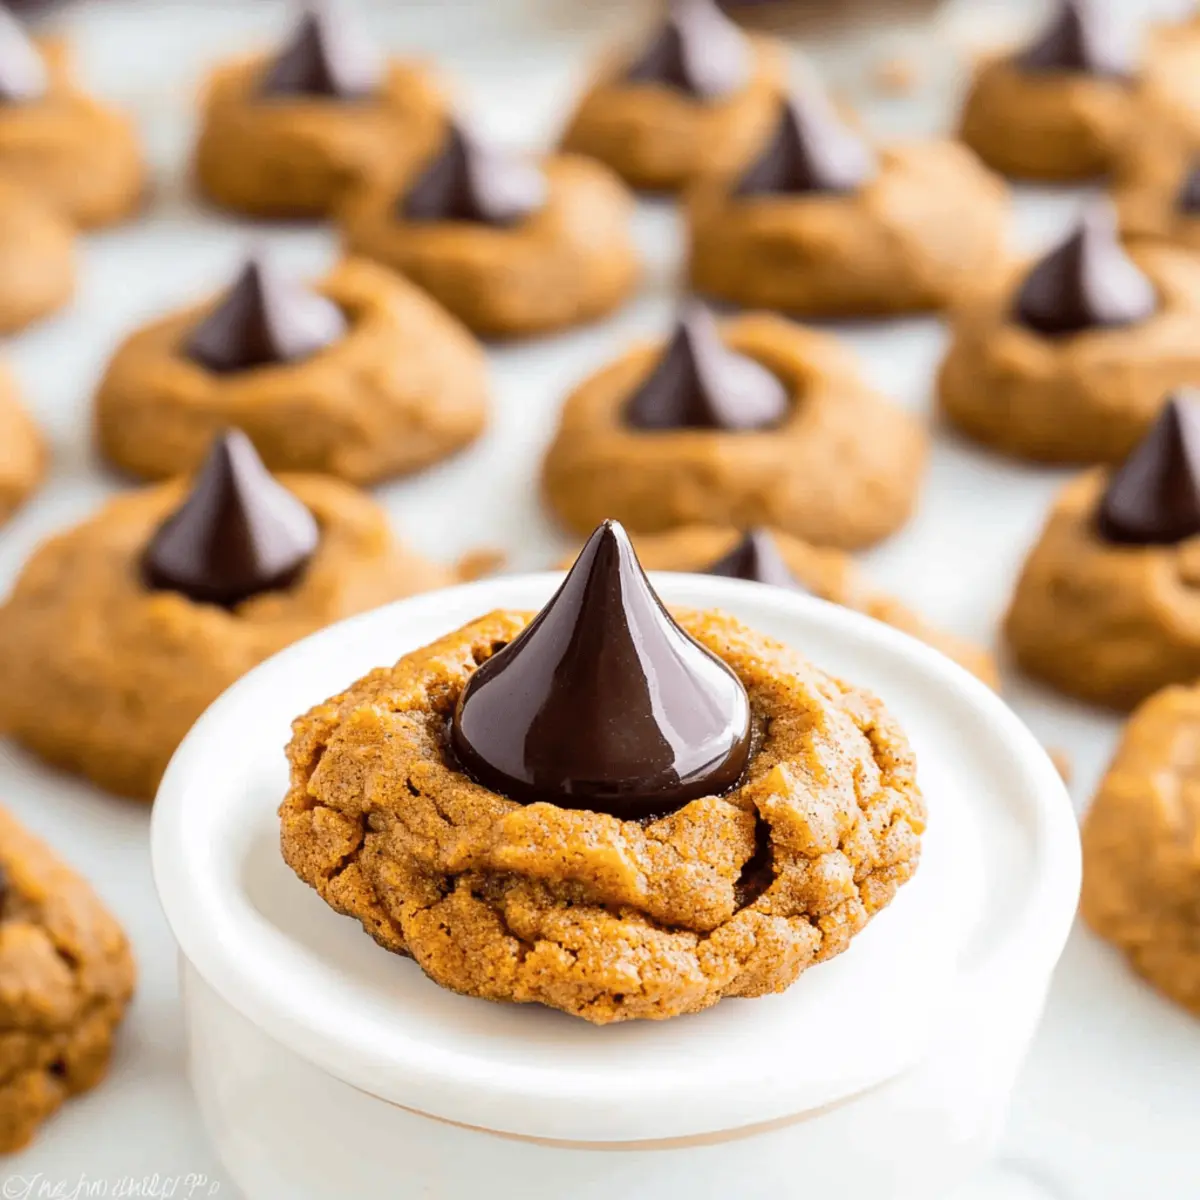
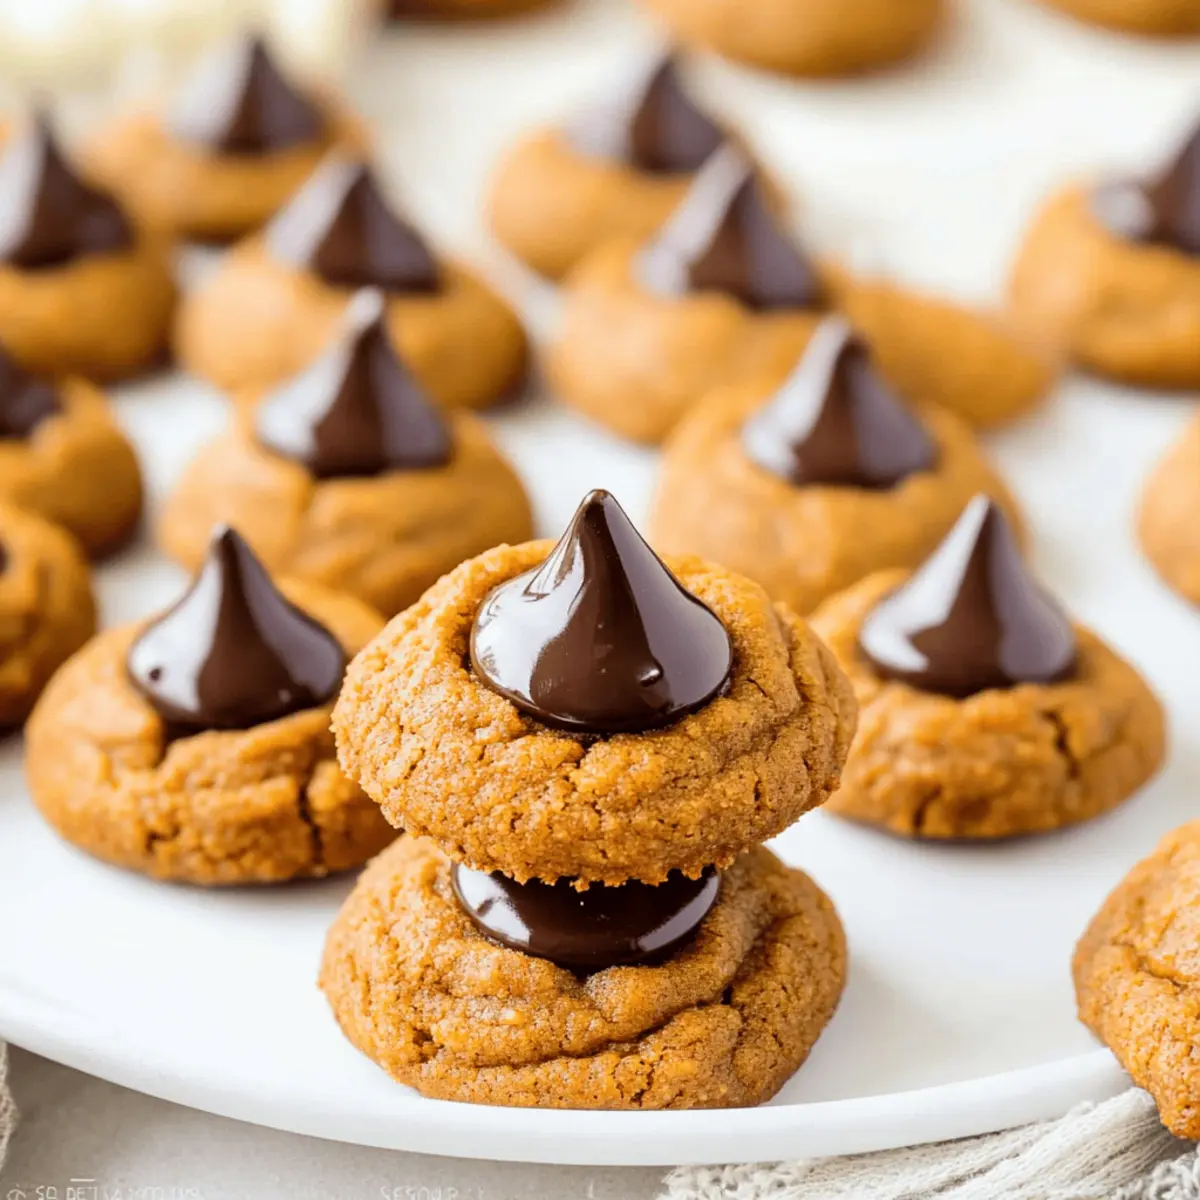
As I stood in the kitchen, the familiar scent of autumn enveloped me—cinnamon swirling with pumpkin bliss. I couldn’t resist whipping up a batch of Healthy Pumpkin Blossoms, soft pumpkin cookies topped with delectable dark chocolate kisses. These delightful treats not only satisfy your sweet tooth but also boast only 61 calories each, making them a guilt-free indulgence as the leaves start to turn. Whether you’re preparing for a cozy gathering or simply need a delicious homemade snack, these gluten-free, vegan cookies are a winning solution. Plus, with no refined sugar and quick prep time, they make for an effortless baking adventure. Ready to fill your home with the comforting aroma of fall? Let’s dive into this scrumptious recipe together!
Why Are Healthy Pumpkin Blossoms So Amazing?
Deliciously Chewy: These cookies offer a perfect balance of soft, chewy texture with a delightful melt-in-your-mouth experience from the dark chocolate kisses.
Guilt-Free Indulgence: At just 61 calories each, they let you savor festive flavors without the guilt associated with many traditional treats.
Quick & Easy: With a straightforward preparation process and minimal ingredients, they are perfect for busy home bakers looking to create something special.
Versatile Options: Feel free to experiment by substituting applesauce for pumpkin purée or using different flavored chocolate kisses for a fun twist. You can enjoy these cookies alongside a warm glass of almond milk or serve them at your next gathering.
Fall’s Favorite Flavor: Capture the essence of autumn with the warm spices of cinnamon and pumpkin, making these cookies a popular choice for seasonal treats.
Perfect for Everyone: Gluten-free, vegan, and made without refined sugar, these Healthy Pumpkin Blossoms cater to a variety of dietary preferences, making them a hit for any audience.
Healthy Pumpkin Blossoms Ingredients
• Here’s what you’ll need to create these delightful cookies!
For the Cookie Base
- White Whole Wheat Flour – Provides structure and a mild sweetness; regular whole wheat flour can be used but may alter the cookie’s texture.
- Cinnamon – Adds warmth and spice; feel free to adjust the amount to suit your taste preferences.
- Pumpkin Purée – Keeps cookies soft and moist, replacing eggs; be sure to avoid pumpkin pie mix to ensure no added sugars.
- Pure Maple Syrup – Naturally sweetens the cookies without refined sugar; remember to chill the dough due to its liquid content.
- Butter/Coconut Oil – Adds richness and moisture; only a tablespoon is needed, and coconut oil keeps the recipe dairy-free.
For the Topping
- Dark Chocolate Kisses – The perfect finishing touch that gives a burst of sweetness; consider using caramel-filled or pumpkin spice versions for a twist!
Step‑by‑Step Instructions for Healthy Pumpkin Blossoms
Step 1: Combine Dry Ingredients
In a mixing bowl, whisk together the white whole wheat flour and cinnamon until well blended. This will form the dry ingredient base for your Healthy Pumpkin Blossoms. Make sure there are no lumps and the mixture is uniform in color, which will take about 1-2 minutes.
Step 2: Mix Wet Ingredients
In a separate bowl, combine the pumpkin purée, melted butter or coconut oil, and pure maple syrup. Whisk these ingredients together until smooth and fully incorporated, creating a rich batter that will ensure the cookies remain soft and moist. This should take about 3-4 minutes of mixing, creating a vibrant, creamy mixture.
Step 3: Combine Mixtures
Gradually add the dry ingredients from the first bowl into the wet mixture, stirring gently until just blended. Avoid overmixing, as it can alter the texture of the Healthy Pumpkin Blossoms. The dough should be thick yet slightly sticky, indicating it’s ready for the next step.
Step 4: Chill the Dough
Cover the bowl with plastic wrap and refrigerate the dough for at least 30 minutes. Chilling is crucial here to ensure the dough firms up and becomes easier to handle, preventing it from being overly sticky during baking. Take this time to preheat your oven!
Step 5: Preheat the Oven
As the dough chills, preheat your oven to 350°F (175°C). While the oven heats, line a baking sheet with parchment paper to prevent sticking. This preparation will set you up for a smooth baking process once your dough is ready to scoop.
Step 6: Shape the Cookies
Once chilled, remove the dough from the refrigerator. Using a spoon or a cookie scoop, drop rounded spoonfuls onto the prepared baking sheet. Flatten each dough ball slightly with the back of your spoon—this helps them bake evenly and gives the Healthy Pumpkin Blossoms a nice shape, preventing them from puffing up too much.
Step 7: Bake the Cookies
Place the baking sheet in the oven and bake for 10 to 12 minutes. Keep a close eye on them; the edges should be set, but the centers will remain soft. This internal softness is key for achieving the chewy texture that defines your Healthy Pumpkin Blossoms.
Step 8: Add Chocolate Kisses
As soon as the cookies come out of the oven, immediately press a chocolate kiss into the center of each cookie while they’re still warm. The heat from the cookies will slightly melt the kisses, creating a luscious topping. Allow them to cool on the baking sheet for a few minutes before transferring to a wire rack.
What to Serve with Healthy Pumpkin Blossoms
There’s something magical about pairing treats with comforting sides to create a cozy fall feast.
- Creamy Almond Milk: A glass of this nutty beverage beautifully counterbalances the sweetness of the cookies, making each bite truly satisfying.
- Pumpkin Spice Latte: A warm, spiced drink that amplifies the autumn flavors in the cookies, creating an unforgettable snacking experience.
- Mixed Green Salad: Fresh greens tossed with a light vinaigrette offers a crisp contrast to the buttery softness of the Healthy Pumpkin Blossoms, enhancing your palate.
- Apple Slices with Nut Butter: Juicy, crisp apple slices spread with almond or peanut butter provide a delightful crunch that complements the richness of the cookies.
- Vanilla Coconut Chia Pudding: A creamy, lightly sweet chia pudding adds a refreshing twist while maintaining the cozy vibes of your fall dessert.
These delightful pairings not only accentuate the flavors of the Healthy Pumpkin Blossoms but also ensure a heartwarming meal full of seasonal joy!
Healthy Pumpkin Blossoms: Fun Variations
Customization is where the real magic happens; let your creativity shine with these fun twists!
-
Applesauce Swap: Replace pumpkin purée with applesauce for a fruity take that adds a different flavor profile.
-
Nut Flour Variation: Use almond or coconut flour to cater to nut-free or gluten-free diets. Adjust the liquid for consistency!
-
Spiced Pumpkin Kisses: Try topping with pumpkin spice chocolate kisses for a seasonal flavor boost, enhancing the autumn experience.
-
Coconut Connection: Substitute regular butter with coconut oil for a dairy-free delight; the subtle coconut flavor fits beautifully with pumpkin.
-
Sweet Potato Surprise: Swap pumpkin purée for sweet potato purée for a deliciously different taste—still soft, sweet, and perfect for fall.
-
Extra Crunch: Add chopped nuts or seeds to the dough for a delightful crunch; walnuts or pumpkin seeds complement the flavors wonderfully.
-
Heat It Up: Mix in a pinch of cayenne or chili powder for a surprising spicy kick that balances the sweetness of your cookies.
If you’re looking to explore more delightful fall recipes, try out these deliciously cozy options like Pumpkin French Toast or indulge in some sweet treats with Pumpkin Smores Cookies. Each twist can transform your Healthy Pumpkin Blossoms into a unique treat!
Expert Tips for Healthy Pumpkin Blossoms
-
Chill the Dough: Ensure you chill the dough for 30 minutes to achieve the right consistency; this prevents stickiness and results in the perfect cookie texture.
-
Use Fresh Ingredients: Always use fresh pumpkin purée for the best flavor; avoid canned pumpkin pie filling, as it contains added sugars and spices that can skew the taste.
-
Don’t Overmix: When combining wet and dry ingredients, mix just until incorporated; overmixing can make the cookies tough, losing their chewy charm.
-
Flatten Properly: Make sure to flatten the dough balls before baking, as these Healthy Pumpkin Blossoms do not spread much. This helps achieve an even shape and texture.
-
Get Creative: Feel free to experiment with different dark chocolate varieties or even make substitutions, such as adding nuts, to customize the flavors to your liking.
Make Ahead Options
These Healthy Pumpkin Blossoms are perfect for meal prep enthusiasts! You can prepare the dough up to 24 hours in advance by storing it in an airtight container in the refrigerator. To maintain their quality, make sure to chill the dough for at least 30 minutes before shaping the cookies. You can also portion the dough into individual scoops and freeze them for up to 3 months; just be sure to wrap them well to prevent freezer burn. When ready to bake, simply preheat your oven, place the frozen cookie dough on a lined baking sheet, and add a couple of extra minutes to the baking time. Enjoy effortless, delicious cookies with this simple make-ahead strategy!
How to Store and Freeze Healthy Pumpkin Blossoms
Airtight Container: Store cookies in an airtight container at room temperature for up to 1 week to maintain their soft, chewy texture.
Refrigeration: For extended freshness, you can refrigerate Healthy Pumpkin Blossoms in a sealed container for up to 2 weeks without compromising flavor.
Freezer Storage: Freeze individual cookies in a single layer on a baking sheet before transferring to a zip-top bag or airtight container for up to 3 months.
Reheating: To enjoy warm cookies, reheat frozen cookies in the oven at 350°F (175°C) for about 5-7 minutes, allowing the chocolate kisses to soften again.
Healthy Pumpkin Blossoms Recipe FAQs
How do I select the best pumpkin purée?
Absolutely! When choosing pumpkin purée, opt for 100% pure pumpkin and avoid pumpkin pie filling, which contains added sugars and spices. Look for a smooth texture and vibrant color; fresh purée from a pumpkin can offer superior flavor.
How should I store my Healthy Pumpkin Blossoms?
Store these delightful cookies in an airtight container at room temperature for up to 1 week. If you want to maintain their freshness even longer, refrigerate them in a sealed container, where they can last for up to 2 weeks without compromising flavor.
Can I freeze Healthy Pumpkin Blossoms?
Very much! To freeze, first, lay the cookies in a single layer on a baking sheet and place them in the freezer until solid. Once frozen, transfer them to a zip-top bag or an airtight container, where they can last for up to 3 months. When you’re ready to enjoy, reheat them at 350°F (175°C) for about 5-7 minutes to soften the chocolate kisses.
What should I do if my cookie dough is too sticky?
If your dough ends up overly sticky, don’t fret! Chill the dough for an additional 15–20 minutes in the refrigerator, as the cool temperature will make it easier to shape. A sprinkle of flour on your hands can also help when forming the cookie balls before baking.
Are there any dietary considerations for these cookies?
Yes indeed! Healthy Pumpkin Blossoms are gluten-free and vegan, made without refined sugar, making them suitable for various dietary preferences. However, always check the labels of any chocolate kisses or alternative ingredients you choose, as they might contain allergens like dairy or nuts.
Healthy Pumpkin Blossoms: Chewy Cookies with Dark Chocolate
Ingredients
Equipment
Method
- Combine the white whole wheat flour and cinnamon in a mixing bowl and whisk until well blended.
- In a separate bowl, mix the pumpkin purée, melted butter or coconut oil, and pure maple syrup until smooth.
- Gradually add the dry ingredients to the wet mixture, stirring gently until just combined.
- Cover the bowl and refrigerate the dough for at least 30 minutes.
- Preheat your oven to 350°F (175°C) and line a baking sheet with parchment paper.
- Scoop rounded spoonfuls of the dough onto the prepared baking sheet and flatten each slightly.
- Bake for 10 to 12 minutes, until the edges are set but the centers remain soft.
- Press a chocolate kiss into the center of each warm cookie and let cool on the baking sheet.
Leave a Reply