
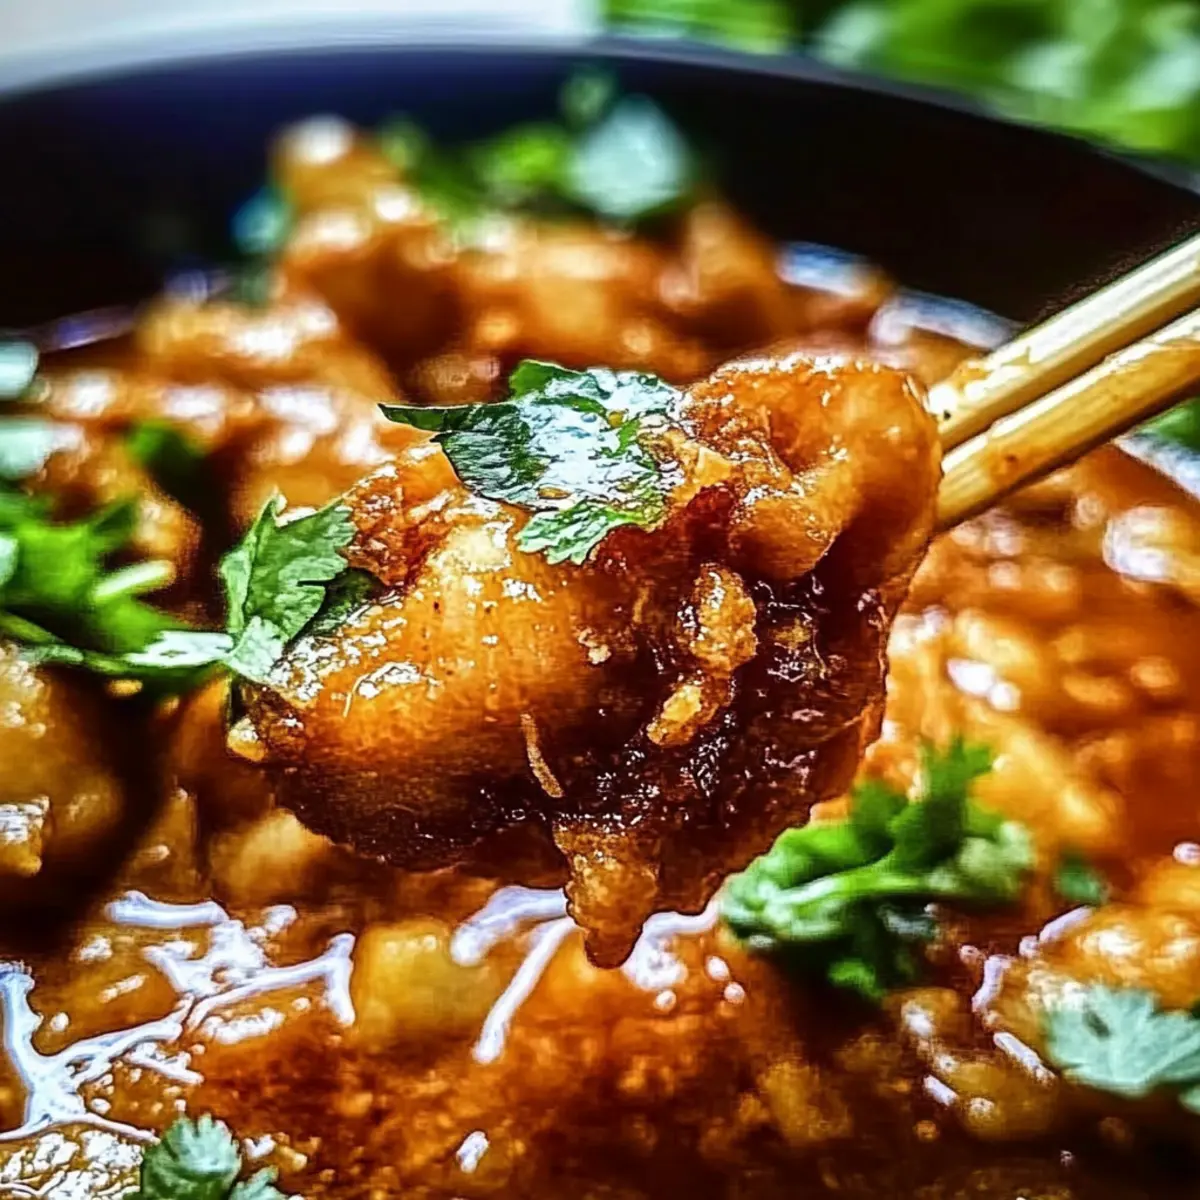
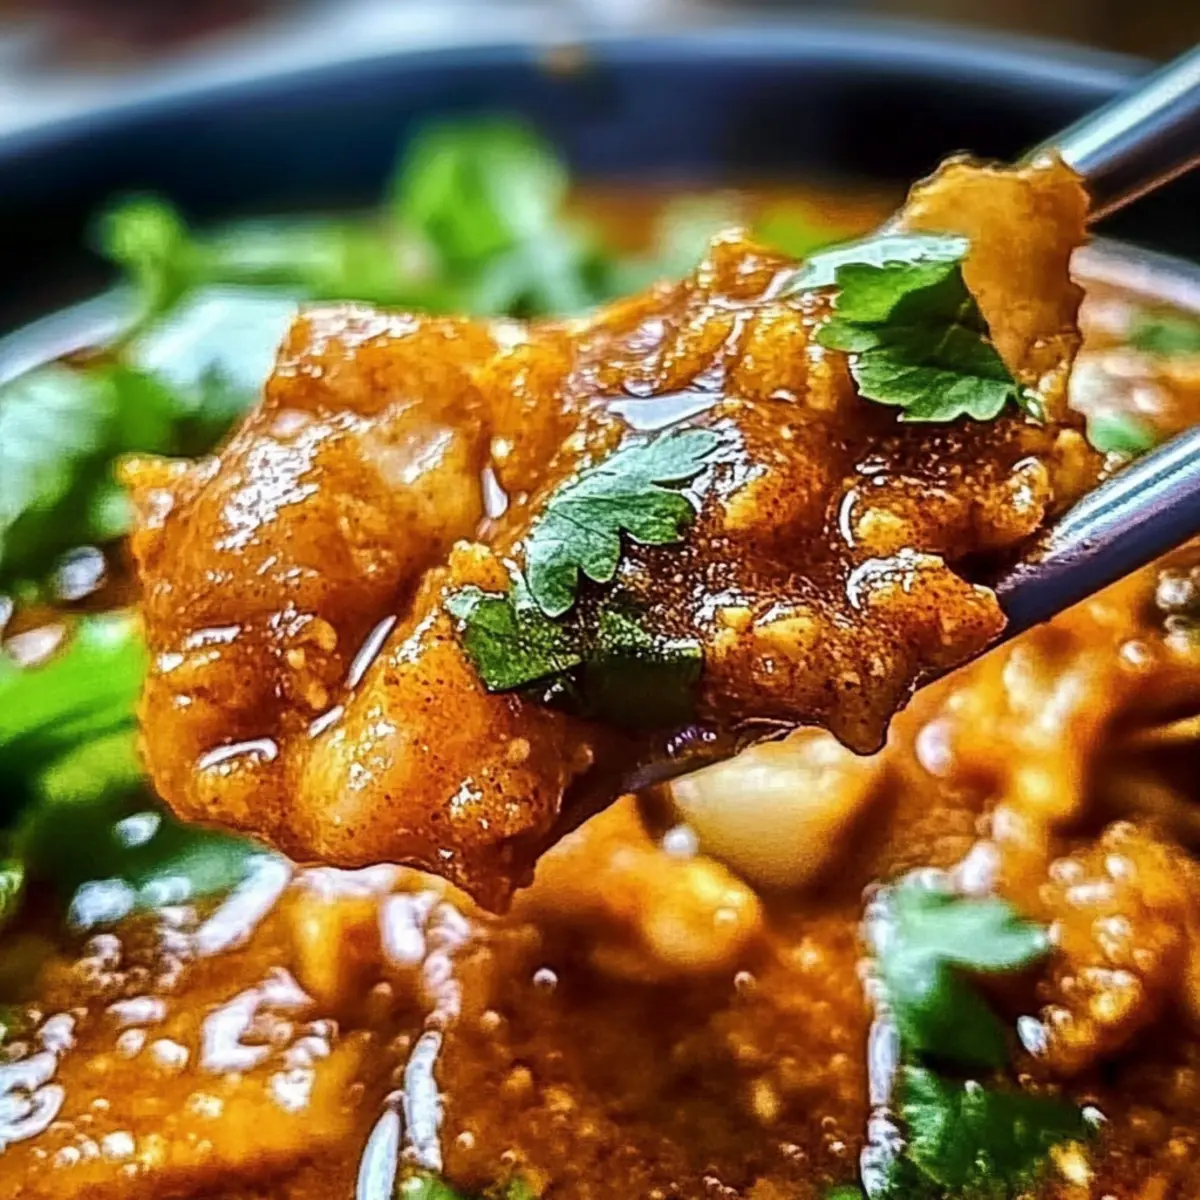
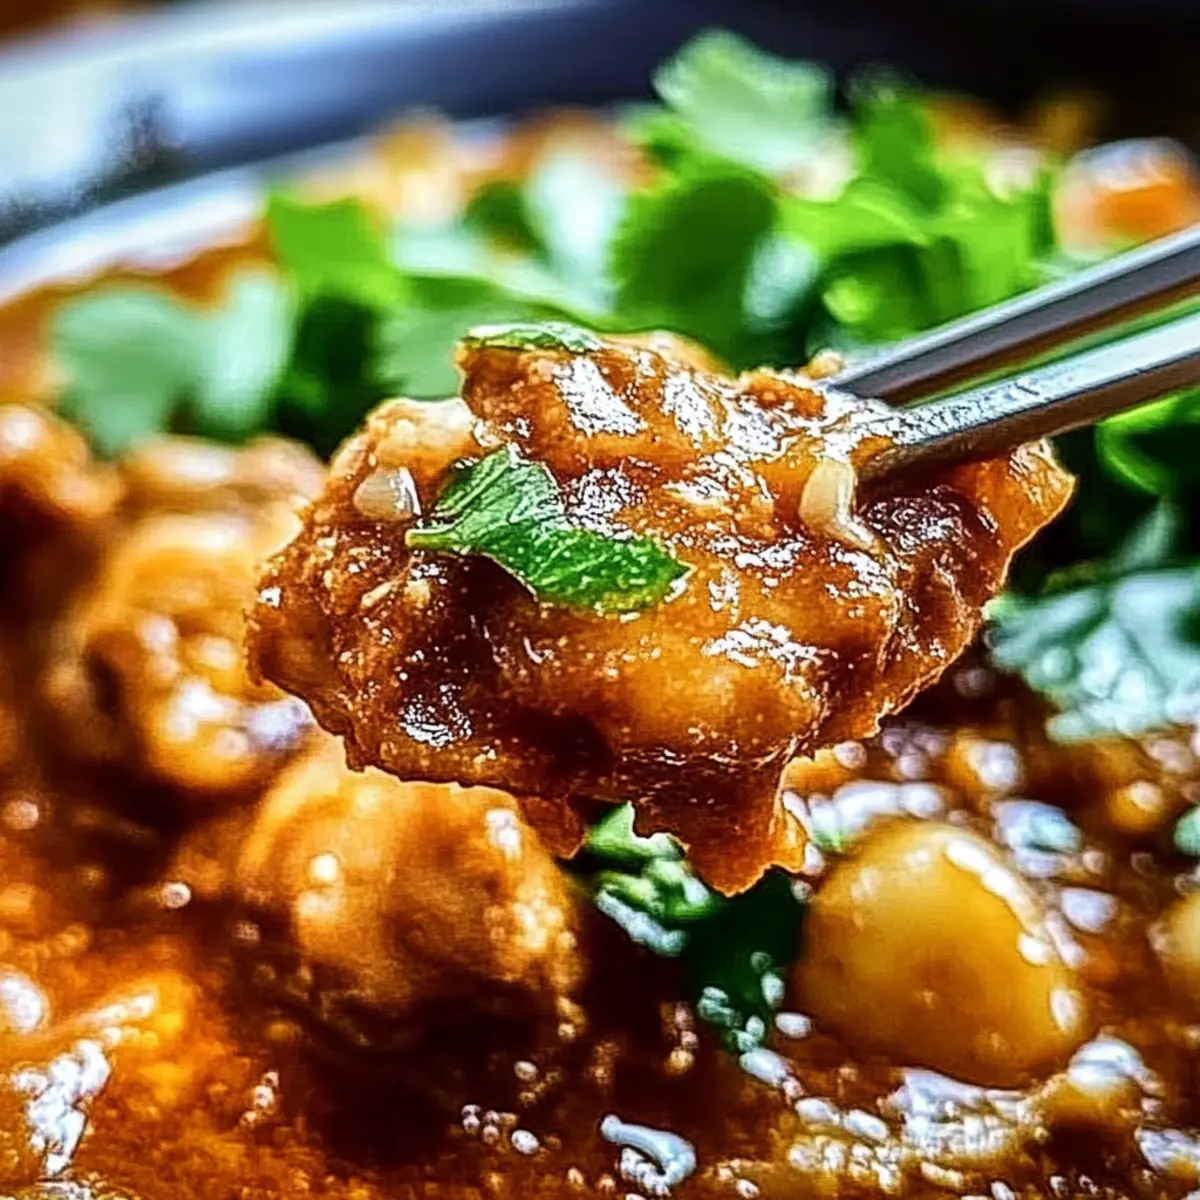
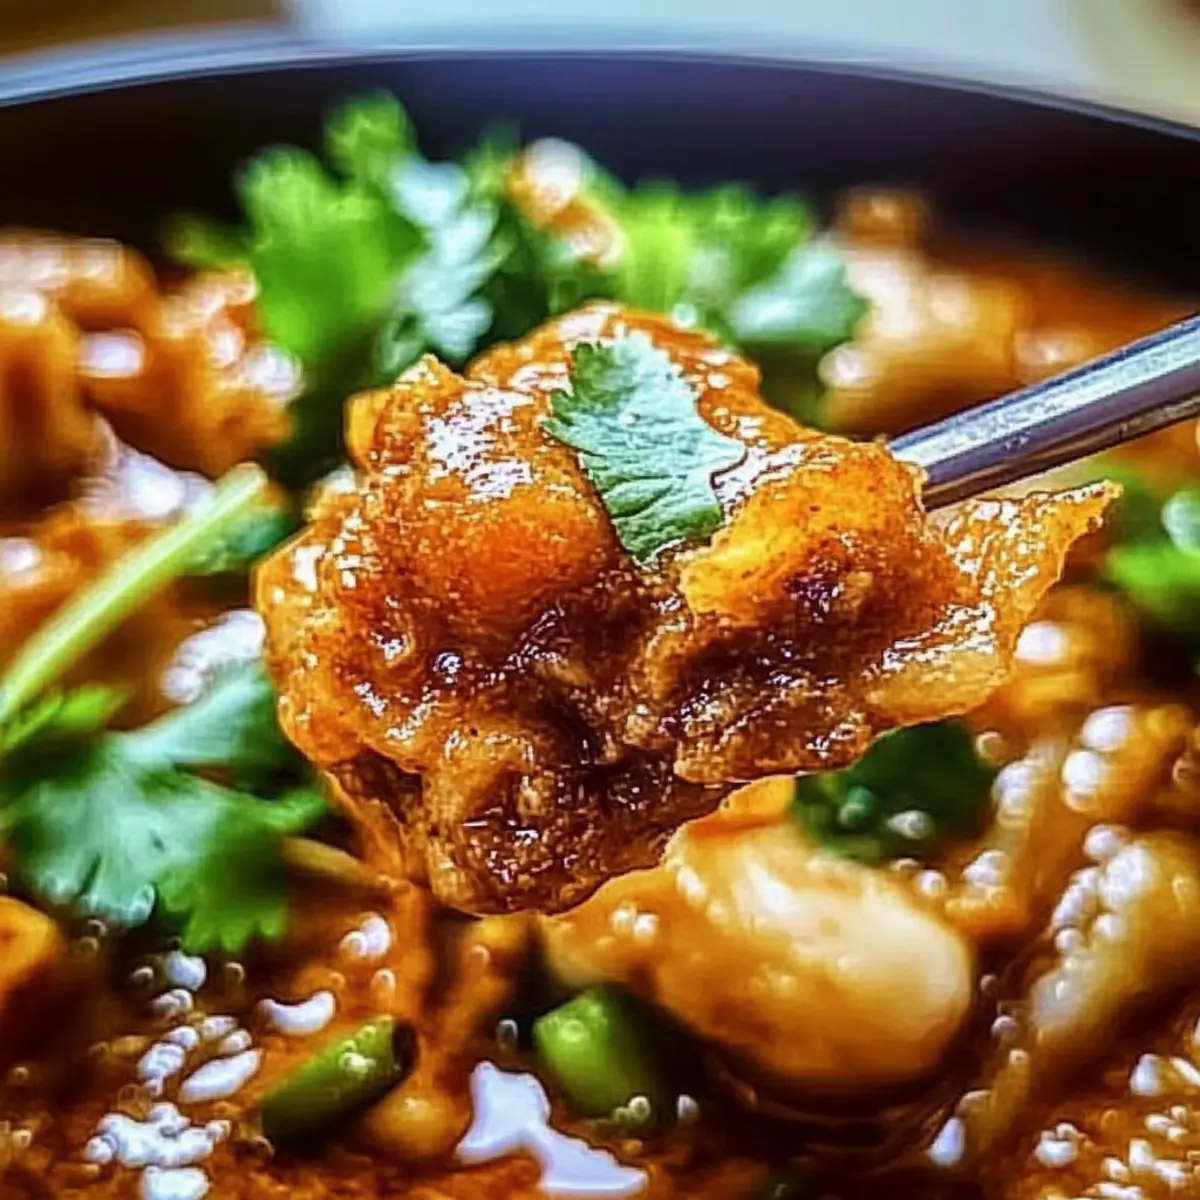
As I stood in my kitchen, the tantalizing aroma of spices wafted through the air, transporting me straight to a bustling street market in Singapore. This Creamy Crispy Singapore Butter Chicken is my go-to comfort food, celebrating the delightful blend of buttery richness and a satisfying crunch. In just 30 minutes, you can whip up this indulgent dish that’s perfect for impressing family or friends without the fuss of lengthy preparations. The tender marinated chicken is enveloped in a velvety sauce that effortlessly pairs with everything from fluffy rice to your favorite veggie sides. Curious how to bring this delicious taste of Asia into your home? Let’s dive into the recipe that will make you the star of dinner time!
Why is this Butter Chicken so Special?
Irresistible Crunch: The combination of crispy golden chicken and a velvety sauce is simply heavenly.
30-Minute Wonder: Perfect for busy weeknights, you can enjoy this indulgent meal without wasting hours in the kitchen.
Flavor Explosion: The medley of spices and creamy coconut milk offers a delightful depth that will transport your taste buds right to Singapore!
Versatile Pairing: Enjoy it with steamed rice or try pairing with your favorite veggies for a well-rounded meal.
Crowd-Pleaser: Whether it’s a cozy dinner or a gathering, this dish is sure to impress everyone—just like my Ranch Crusted Chicken does!
Easily Adaptable: Switch out chicken for shrimp or tofu, and you have quick options to suit any dietary preference.
Singapore Butter Chicken Ingredients
For the Chicken
- Boneless Chicken Thighs – Tender and juicy, perfect for frying.
- Buttermilk – Marinates chicken for flavor and tenderness; you can substitute with regular milk mixed with lemon juice.
- Turmeric Powder – Adds earthy flavor and vibrant color with no direct substitution needed.
- Chili Powder – Gives heat and enhances flavor; adjust according to your spice tolerance or swap with paprika for milder heat.
- Salt – Essential for marinating and seasoning; opt for kosher or sea salt for better flavor distribution.
For the Coating
- All-Purpose Flour – Provides a crispy coating for the chicken; gluten-free flour can be used as a substitute.
- Breadcrumbs (Panko) – Creates an extra crispy texture; prefer panko for the best crunch, but regular breadcrumbs can work too.
For the Sauce
- Unsalted Butter – Adds richness to the sauce; ghee can be substituted for a unique flavor.
- Vegetable Oil – Essential for frying; light oils like canola or sunflower are great choices.
- Garlic Cloves – Bring depth and aroma to the sauce; fresh is best, but garlic powder can be a substitute.
- Ginger – Imparts a fresh zest; ground ginger can replace fresh but will change the texture.
- Red Curry Paste – Offers a spicy kick and flavor complexity; adjust the amount for your preference or use curry powder as an alternative.
- Coconut Milk – Provides creaminess to the sauce; heavy cream can be used for a richer option.
- Soy Sauce – Adds that umami flavor; use tamari for gluten-free needs or coconut aminos for a soy-free choice.
- Sugar – Balances the flavors in the sauce; honey or a sugar substitute can work too.
- Salt to Taste – Additional seasoning for the sauce; adjust as necessary based on soy sauce and butter saltiness.
- Fresh Cilantro – A fresh garnish; substitute with green onions or omit if desired.
Step‑by‑Step Instructions for Creamy Crispy Singapore Butter Chicken
Step 1: Marinate the Chicken
In a mixing bowl, combine boneless chicken thighs with buttermilk, turmeric powder, chili powder, and salt. Ensure the chicken is evenly coated and let it marinate for at least 30 minutes in the refrigerator. This step infuses the chicken with flavor and tenderness while you prepare the rest of the ingredients.
Step 2: Prepare the Coating
Once marinated, set up a breading station by placing all-purpose flour and panko breadcrumbs in separate shallow dishes. First, dredge each piece of chicken in the flour, shaking off any excess. Next, coat the floured chicken thoroughly with panko breadcrumbs for that extra crispy layer, ensuring every surface is covered.
Step 3: Heat the Oil
In a large skillet, heat about half an inch of vegetable oil over medium-high heat. Test if the oil is hot enough by dropping in a small piece of breaded chicken; it should sizzle immediately. This step is crucial to achieve that desired crispy exterior while frying the chicken until it is golden brown.
Step 4: Fry the Chicken
Carefully add the breaded chicken pieces to the hot oil, making sure not to overcrowd the pan. Fry for about 4-5 minutes on each side, or until they are golden brown and crispy. Once cooked, transfer the chicken to a plate lined with paper towels to absorb excess oil, keeping it warm while you prepare the sauce.
Step 5: Sauté Aromatics
In the same skillet, reduce the heat to medium and add unsalted butter. Allow it to melt before sautéing minced garlic and ginger for 1-2 minutes until fragrant. This step builds a rich base for the sauce that complements the crispy chicken beautifully.
Step 6: Make the Sauce
Add red curry paste to the skillet, stirring to combine with the garlic and ginger. Cook for 1 minute to release the flavors, then pour in coconut milk, soy sauce, sugar, and additional salt to taste. Mix well to create a creamy and aromatic sauce that will elevate your Creamy Crispy Singapore Butter Chicken.
Step 7: Combine Chicken and Sauce
Return the fried chicken to the skillet, gently coating it in the luscious sauce. Allow everything to simmer together for an additional 2-3 minutes, so the chicken absorbs the flavors while the sauce thickens slightly. Your Creamy Crispy Singapore Butter Chicken is now ready to be served!
Make Ahead Options
These Creamy Crispy Singapore Butter Chicken bites are perfect for busy weeknights! You can marinate the chicken with buttermilk, turmeric powder, chili powder, and salt up to 24 hours in advance, ensuring maximum flavor and tenderness. Additionally, you can bread the chicken and refrigerate it for up to 3 days before cooking, which helps maintain its crispy texture. Simply fry the chicken when you’re ready to serve, and follow the sauce-making instructions as directed. This allows you to enjoy a delicious, restaurant-quality meal with minimal effort, making dinner time feel effortless!
What to Serve with Creamy Crispy Singapore Butter Chicken
Elevate your dining experience with delightful sides that perfectly complement the rich flavors of this beloved dish.
-
Steamed Jasmine Rice: The light, fluffy texture of jasmine rice absorbs the delicious sauce, balancing the creaminess of the chicken beautifully.
-
Crispy Roasted Broccoli: This adds a crunchy, vibrant element to your meal, while the slight bitterness of broccoli contrasts perfectly with the buttery sauce. Toss with olive oil and garlic before roasting for extra flavor!
-
Coconut Lime Quinoa: The nutty taste paired with tangy lime leaves your taste buds dancing. This refreshing side pairs perfectly with the creamy richness of the butter chicken.
-
Garlic Naan Bread: A classic accompaniment, garlic naan is perfect for scooping up the sauce, bringing a wholesome flavor that elevates the meal to restaurant quality.
-
Mango Chutney: A sweet and tangy addition, this tropical condiment enhances the creamy sauce with a burst of fresh flavor, making each bite sing!
-
Cucumber Raita: Cool and creamy, this yogurt-based dish soothes the heat from the spices and adds a refreshing touch to each mouthful.
-
Iced Thai Tea: This sweet, creamy drink perfectly washes down the richness of the butter chicken while complementing its herbal notes—it’s a delightful pair!
-
Fruit Salad: A light and colorful fruit salad can cleanse the palate beautifully, adding a burst of freshness that rounds off the meal. Consider using tropical fruits for cohesion with the butter chicken!
Expert Tips for Creamy Crispy Singapore Butter Chicken
-
Marinate Wisely: Ensure your chicken marinates for at least 30 minutes in buttermilk and spices for maximum tenderness and flavor.
-
Right Oil Temperature: Check that your oil is adequately heated before adding chicken—use a breadcrumb to test; if it sizzles, you’re ready to fry!
-
Avoid Steaming: Don’t overcrowd the pan while frying; this can result in steaming your chicken instead of achieving that crispiness we love in Singapore Butter Chicken.
-
Perfect Coating: For an extra crispy finish, ensure the chicken is thoroughly coated with panko breadcrumbs. Press them in gently for better adherence.
-
Simmer for Flavor: Allow the combined chicken and sauce to simmer for a few minutes for the flavors to meld beautifully, enhancing the dish’s overall richness.
-
Adjust Spice Level: Feel free to tweak the amount of red curry paste according to your preference to achieve your ideal heat level in this creamy comfort dish.
Singapore Butter Chicken Variations
Feel free to switch things up and make this dish your own with delightful twists and substitutions!
-
Lean Chicken: Substitute chicken thighs with chicken breasts for a lighter, leaner version without sacrificing flavor. Thinner cuts cook faster, so keep an eye on them in the skillet!
-
Seafood Delight: Swap the chicken for shrimp or scallops for a seafood take on this dish. Just adjust the cooking time; seafood requires less time to cook and offers a fresh taste that complements the sauce beautifully.
-
Vegetarian Option: Use firm tofu instead of chicken for a satisfying vegetarian adaptation. Simply press the tofu to remove excess moisture, then coat and fry as directed for that crispy texture.
-
Creamy and Rich: Replace coconut milk with heavy cream for a decadent twist on the sauce. This will add a luxurious texture while keeping the comforting essence that makes this dish so special.
-
Extra Flavor Boost: Add a tablespoon of lime juice or zest to the sauce for a zesty brightness. The tanginess pairs beautifully with the rich flavors, enhancing the overall dish.
-
Vegan-Friendly: Substitute ghee with coconut oil and use a plant-based heavy cream for a completely vegan version. This way, you can enjoy all the comforting flavors without dairy.
-
Spice it Up: Increase the amount of red curry paste or add some sliced fresh chilies to amp up the heat. If you prefer a milder version, mellow it down with a little extra coconut milk.
-
Gluten-Free: Use gluten-free breadcrumbs and flour to make this recipe suitable for those with gluten sensitivities. You won’t lose the crunch factor—just a simple switch to ensure everyone can enjoy!
Transform your cooking into an adventure! Consider trying this Creamy Crispy Singapore Butter Chicken with variations that suit your tastes or dietary needs, and pair it with delightful sides like my tasty Garlic Parmesan Chicken Pasta or Chopped Chicken Bacon for a truly unforgettable meal.
Storage Tips for Singapore Butter Chicken
- Fridge: Store leftovers in an airtight container for up to 3 days. Make sure to cool the chicken completely before sealing to prevent condensation.
- Freezer: Freeze individual portions of the Singapore Butter Chicken in airtight containers or freezer bags for up to 2 months, ensuring you remove as much air as possible to avoid freezer burn.
- Reheating: To reheat, place in a skillet over medium heat, adding a splash of water or coconut milk to the sauce to restore its creaminess. Heat gently, stirring until warmed through.
- Storing Sauce Separately: If possible, store any leftover sauce separately from the chicken to maintain its crispiness and freshness for longer.
Creamy Crispy Singapore Butter Chicken Recipe FAQs
What type of chicken is best to use for this recipe?
Absolutely! I recommend using boneless chicken thighs, as they remain tender and juicy even after frying. While you can substitute chicken breasts if you prefer a leaner option, thighs really shine when it comes to flavor and texture in this recipe.
How long can I store leftovers in the fridge?
You can store any leftover Creamy Crispy Singapore Butter Chicken in an airtight container in the refrigerator for up to 3 days. Just be sure the chicken has cooled completely before sealing to avoid condensation that can make it soggy.
Can I freeze this dish?
Yes, you can freeze it! To freeze, place individual portions of the chicken in airtight containers or freezer bags, removing as much air as possible. It should stay good for up to 2 months. When you’re ready to enjoy it, simply reheat it in a skillet over medium heat.
What if the sauce is too thick when reheating?
No worries! If your sauce thickens too much after being stored, simply add a splash of coconut milk or water while reheating to restore its creamy texture. Stir gently and heat until warmed through.
Are there any dietary considerations for this recipe?
It’s important to note that this dish contains dairy from the buttermilk and butter. If you are lactose intolerant or vegan, you can make easy substitutions. Use coconut milk instead of buttermilk (by mixing regular coconut milk with some lemon juice for tanginess) and use oils instead of butter. Additionally, for gluten sensitivities, opt for gluten-free breadcrumbs and flour.
How can I tell when the chicken is done frying?
To achieve that perfect crispy texture, fry the chicken until it’s golden brown and reaches an internal temperature of 165°F (74°C). Typically, this will take about 4-5 minutes on each side. If you’re unsure, you can always cut into a piece to check—just make sure the juices run clear!
Crispy Singapore Butter Chicken: Creamy Comfort in 30 Minutes
Ingredients
Equipment
Method
- In a mixing bowl, combine boneless chicken thighs with buttermilk, turmeric powder, chili powder, and salt. Let it marinate for at least 30 minutes.
- Set up a breading station with all-purpose flour and panko breadcrumbs. First, dredge chicken in flour and then coat with panko breadcrumbs.
- Heat vegetable oil in a skillet over medium-high heat until hot. Test with a small piece of chicken to see if it sizzles.
- Fry the breaded chicken pieces for about 4-5 minutes on each side until golden brown. Transfer to a paper towel-lined plate.
- In the same skillet, reduce heat and add unsalted butter. Sauté minced garlic and ginger until fragrant.
- Add red curry paste, stir, then pour in coconut milk, soy sauce, sugar, and additional salt. Mix well.
- Return the fried chicken to the skillet and simmer for an additional 2-3 minutes to absorb the sauce's flavors.
Leave a Reply