
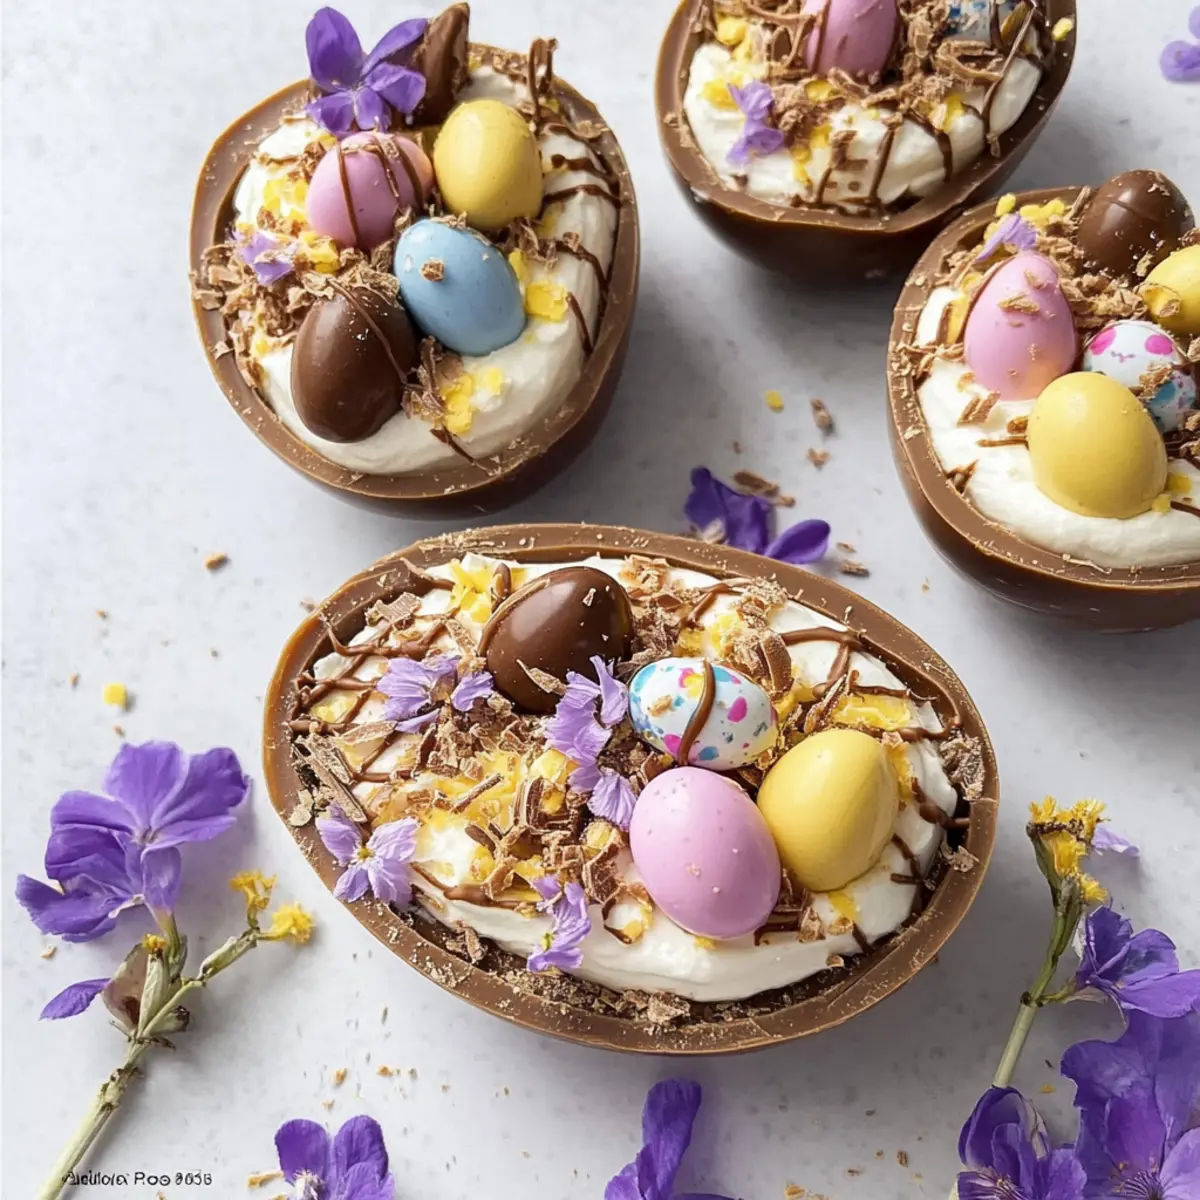
Easter is around the corner, and I can’t help but feel that familiar excitement as I think about the treats that make it special! This year, I’m bringing something truly delightful to the table: a No-Bake Easter Egg Cheesecake. Nestled inside hollow chocolate eggs, this festive dessert features a buttery crumb base and a rich, creamy filling that’s unbelievably easy to whip up. Not only does it deliver on the fun factor, it’s also a make-ahead dream, giving you more time to savor those precious moments with family and friends. Imagine unveiling these playful cheesecake nests at your Easter gathering—who could resist? Let’s dive in and create this adorable treat that promises to steal the spotlight! What fun twist would you add to your own version?
Why is this cheesecake so special?
Festive Flavors: The combination of chocolate and creamy cheesecake creates a delightful treat everyone will adore, making it perfect for Easter celebrations.
No-Bake Simplicity: No need to turn on the oven—this recipe saves time and hassle, allowing you to focus on family and fun.
Versatile Options: Fill either chocolate egg shells or transform broken shells into cheesecake jars for a whimsical presentation with every bite.
Crowd-Pleaser: With its playful appearance and rich flavors, this dessert is sure to impress guests of all ages.
Make-Ahead Convenience: Prepare this cheesecake 1-2 days in advance, ensuring you have more time for festive activities with your loved ones.
For more delightful dessert ideas, check out this Millionaires Cheesecake Indulge for another show-stopping option!
- Ingredients
Easter Egg Cheesecake Ingredients
For the Chocolate Shells
• Hollow Chocolate Eggs – These delicious treats serve as the perfect edible container for your cheesecake, making dessert a fun surprise!
For the Crust
• Graham Cracker or Digestive Biscuits (3/4 cup / 75 g) – These create a buttery crumb base; feel free to swap for digestive biscuits if desired.
• Butter (2 tbsp / 30 g) – Helps bind the crumb mixture together; make sure it’s melted for a smooth and cohesive mix.
For the Cheesecake Filling
• Cream Cheese (1 1/2 cups / 340 g) – The star ingredient of your filling; be sure to use full-fat for that creamy delight!
• Powdered (Confectioners’) Sugar (1/2 cup / 60 g) – Adds just the right amount of sweetness to the rich cheesecake base.
• Heavy (Double/Whipping) Cream (3/4 cup / 170 g) – Whipped to stiff peaks, this lightens the filling and creates a dreamy texture.
• Vanilla Extract (1 tsp) – A dash to enhance and round out the flavors of the cheesecake.
For the Decoration
• Melted Chocolate – Drizzle over the filled chocolate eggs for a decadent touch.
• Mini Chocolate Eggs – Use these for garnish, bringing a festive flair to your Easter Egg Cheesecake!
Now that you have all the ingredients ready, you’re one step closer to creating a delightful no-bake Easter Egg Cheesecake that will be the centerpiece of your celebration!
Step‑by‑Step Instructions for Easter Egg Cheesecake
Step 1: Prepare Chocolate Eggs
Carefully split the hollow chocolate eggs in half by dipping a knife in hot water for easier cutting. Gently run the warm knife around the edge of each egg to create a clean break; this ensures your Easter Egg Cheesecake has a sturdy shell for filling.
Step 2: Make Cookie Base
In a mixing bowl, combine crushed graham crackers or digestive biscuits with melted butter. Stir until the mixture is well combined and resembles wet sand, ensuring even coating. This crumb base will provide a deliciously crunchy foundation for your cheesecake, enhancing its overall texture.
Step 3: Assemble Base
Take the cookie mixture and firmly press it into the bottom of each chocolate eggshell, creating an even layer about half an inch thick. Use your fingers or a small flat utensil to compact the crumbs well. Once done, refrigerate the shells for 15 minutes to allow the base to firm up, making it ready for the filling.
Step 4: Mix Cheesecake Filling
In a large mixing bowl, beat the cream cheese with powdered sugar and vanilla extract until the mixture is smooth and well combined, about 2-3 minutes. In a separate bowl, whip the heavy cream until stiff peaks form; gently fold the whipped cream into the cream cheese mixture. This creates a light and airy filling for the Easter Egg Cheesecake.
Step 5: Fill Eggs
Spoon the cheesecake filling into each prepared chocolate eggshell, smoothing the tops with a spatula for an even finish. Ensure the filling reaches the tops of the shells, making them look inviting and delicious. This step is crucial as it showcases the delightful creamy filling and makes a perfect treat for your Easter celebration.
Step 6: Decorate & Chill
Drizzle melted chocolate over the filled egg halves for a decorative touch, and top with mini chocolate eggs for that festive flair. Once decorated, place the Easter Egg Cheesecake halves back in the fridge and allow them to chill for at least 2 hours. This chilling time helps set the cheesecake and melds all the delightful flavors together.
Expert Tips for Easter Egg Cheesecake
-
Handle with Care: When preparing chocolate eggs, use a warm knife to avoid breakage and ensure clean, smooth cuts for your Easter Egg Cheesecake.
-
Room Temperature Cream Cheese: Always let your cream cheese come to room temperature before mixing; this prevents clumps and results in a smoother filling.
-
Chill Thoroughly: Allow your cheesecakes to chill for at least 2 hours after decorating; this helps the filling firm up and enhances the flavor.
-
Flexible Filling: If your chocolate eggs break, don’t despair! Use the same filling in jars for a delightful twist that’s equally festive and fun.
-
Creative Variations: Feel free to infuse your cheesecake filling with flavors like citrus zest or crushed candies, making your Easter Egg Cheesecake uniquely yours.
Storage Tips for Easter Egg Cheesecake
Fridge: Store your Easter Egg Cheesecake in an airtight container for up to 3 days; this will keep it fresh and delicious for your family to enjoy.
Freezer: For longer storage, freeze the cheesecake for up to 3 months; be sure to wrap it tightly in plastic wrap and aluminum foil to prevent freezer burn.
Thawing: When ready to serve, transfer the frozen cheesecake to the refrigerator overnight to allow it to thaw gently, ensuring a delightful texture when enjoyed.
Make-Ahead: As a make-ahead treat, prepare your cheesecake 1-2 days in advance, so you can focus on celebrating with loved ones!
What to Serve with No-Bake Easter Egg Cheesecake?
A festive dessert deserves an equally delightful array of accompaniments, elevating your meal to a cherished celebration.
-
Fresh Berries: Ripe strawberries, blueberries, or raspberries add a refreshing zest; their tartness beautifully balances the sweetness of the cheesecake.
-
Whipped Cream: Light and airy, a dollop of whipped cream on top brings extra indulgence while enhancing the dessert’s creamy texture.
-
Mint Leaves: Bright green mint leaves are not only visually appealing but also offer a burst of freshness that contrasts the rich flavors.
-
Chocolate Sauce: A drizzle of warm chocolate sauce around the plate invites a luscious indulgence; this enriches the chocolate element of the cheesecake.
-
Iced Coffee: A chilled glass of iced coffee creates a perfect pairing, its bold flavors complementing the dessert while satisfying caffeinated cravings.
-
Cute Easter Cookies: Serve alongside whimsical Easter-themed cookies to create a festive atmosphere—think bunnies, eggs, and colorful sugar delights!
-
Sparkling Lemonade: Refreshing and fizzy, sparkling lemonade adds a splash of joy and a citrusy contrast, making each bite of cake feel even more festive.
-
Mini Fruit Tarts: Lively mini fruit tarts hold a vibrant medley of fruit flavors and textures, creating a delightful harmony with your cheesecake.
-
Chocolate Milkshake: For a truly indulgent treat, pair this cheesecake with a rich chocolate milkshake—the ultimate guilty pleasure for chocolate lovers!
Each of these companions promises to make your No-Bake Easter Egg Cheesecake an unforgettable sweet ending to your holiday feast.
Easter Egg Cheesecake Variations
Feel free to sprinkle your creativity into this delightful recipe, making it uniquely yours and enhancing its playful charm!
-
Nutty Twist: Add crushed nuts, such as walnuts or almonds, to the cookie base for an extra crunch and flavor depth. It blends beautifully with the creamy filling and gives an unexpected surprise!
-
Flavor Infusion: Stir in citrus zest, like lemon or orange, into the cheesecake filling for a refreshing lift. The bright notes make each bite feel brighter and more festive.
-
Chocolate Lovers: Mix in crushed mini chocolate eggs or candy bars into the filling for an indulgent surprise. Each mouthful becomes a treasure trove of rich flavors, bursting with sweetness.
-
Dairy-Free: Swap cream cheese with a plant-based alternative and use coconut cream instead of heavy cream for a deliciously dairy-free treat. You’ll still enjoy a creamy texture, but with a lighter twist!
-
Different Sweeteners: If you’re looking to cut down on sugar, consider using a natural sweetener like honey or maple syrup instead of powdered sugar. Just adjust to taste for a subtly sweet filling.
-
Boozy Delight: For the adults, add a splash of your favorite liqueur, such as Irish cream or Amaretto, to the filling mixture. It adds a sophisticated touch that can elevate your Easter brunch to the next level!
-
Jars for All: If you opt to create cheesecake jars instead of filling eggs, consider layering fresh fruit or a berry compote between the cheesecake layers. This adds delightful flavor and a pop of color, making your dessert visually stunning!
For more delectable ideas, try this whimsical Strawberry Crunch Cheesecake for another sweet twist!
Embrace the fun and create your own signature Easter Egg Cheesecake that everyone will adore!
Make Ahead Options
These No-Bake Easter Egg Cheesecakes are a fantastic option for busy home cooks looking to save time during the holiday rush! You can prepare the cheesecake filling up to 24 hours in advance and store it in the refrigerator. Ideally, make the chocolate egg shells and the cookie base ahead as well for smoother assembly. Just assemble the cheesecake by filling the chilled chocolate shells and decorating with melted chocolate and mini eggs no more than 2 hours before serving. To maintain their quality, keep them refrigerated until it’s time to unveil your delightful, festive treats. This ensures the cheesecakes remain just as delicious and visually appealing!
Easter Egg Cheesecake Recipe FAQs
How do I choose the right hollow chocolate eggs?
Absolutely! When selecting hollow chocolate eggs for your Easter Egg Cheesecake, look for eggs that are thick and evenly molded. Avoid any with dark spots or cracks, as they may break during filling. Usually available around Easter, check your local stores or online for a variety of options to suit your taste!
What’s the best way to store leftover Easter Egg Cheesecake?
To keep your Easter Egg Cheesecake fresh, store it in an airtight container in the fridge for up to 3 days. If it’s not completely gone within that time, you can freeze it! Wrap each cheesecake half tightly in plastic wrap, followed by aluminum foil to prevent freezer burn, and it can last for up to 3 months.
How should I freeze my Easter Egg Cheesecake?
Certainly! For freezing, wrap the filled chocolate eggs in plastic wrap, and then in aluminum foil for extra protection. Place them in a sturdy, freezer-safe container. When you’re ready to enjoy, transfer the cheesecake to the fridge for an overnight thaw. This gentle method preserves the creamy texture beautifully!
What if my chocolate egg shells break during preparation?
Very understandable! If your chocolate eggs crack or break, don’t worry! Simply transform the cheesecake filling into individual jars. Layer the buttery cookie crumb base at the bottom of each jar, then spoon the cheesecake filling on top. This whimsical dessert presentation is just as delightful and perfect for sharing!
Can I modify this recipe for dietary restrictions?
Of course! To make the Easter Egg Cheesecake more inclusive, consider using gluten-free biscuits for the crust. Those with dairy allergies can try using a dairy-free cream cheese alternative. Just make sure it has a similar consistency for the best results. Feel free to experiment, and enjoy a festive treat that everyone can enjoy!
Can I make this cheesecake in advance?
Absolutely! The Easter Egg Cheesecake can be prepared 1-2 days ahead of time. Just follow all the instructions, then store it in the refrigerator until you’re ready to serve. It’s a fantastic make-ahead dessert that allows you to enjoy more quality time with your loved ones during the festivities!
Delicious No-Bake Easter Egg Cheesecake for Sweet Celebrations
Ingredients
Equipment
Method
- Carefully split the hollow chocolate eggs in half by dipping a knife in hot water for easier cutting. Gently run the warm knife around the edge of each egg to create a clean break.
- In a mixing bowl, combine crushed graham crackers or digestive biscuits with melted butter. Stir until the mixture resembles wet sand.
- Take the cookie mixture and firmly press it into the bottom of each chocolate eggshell, creating an even layer about half an inch thick. Refrigerate for 15 minutes.
- In a large mixing bowl, beat the cream cheese with powdered sugar and vanilla extract until smooth, about 2-3 minutes. In a separate bowl, whip the heavy cream until stiff peaks form; gently fold into the cream cheese mixture.
- Spoon the cheesecake filling into each prepared chocolate eggshell, smoothing the tops with a spatula for an even finish. Ensure filling reaches the tops of the shells.
- Drizzle melted chocolate over the filled egg halves and top with mini chocolate eggs. Chill for at least 2 hours to set.
Leave a Reply