
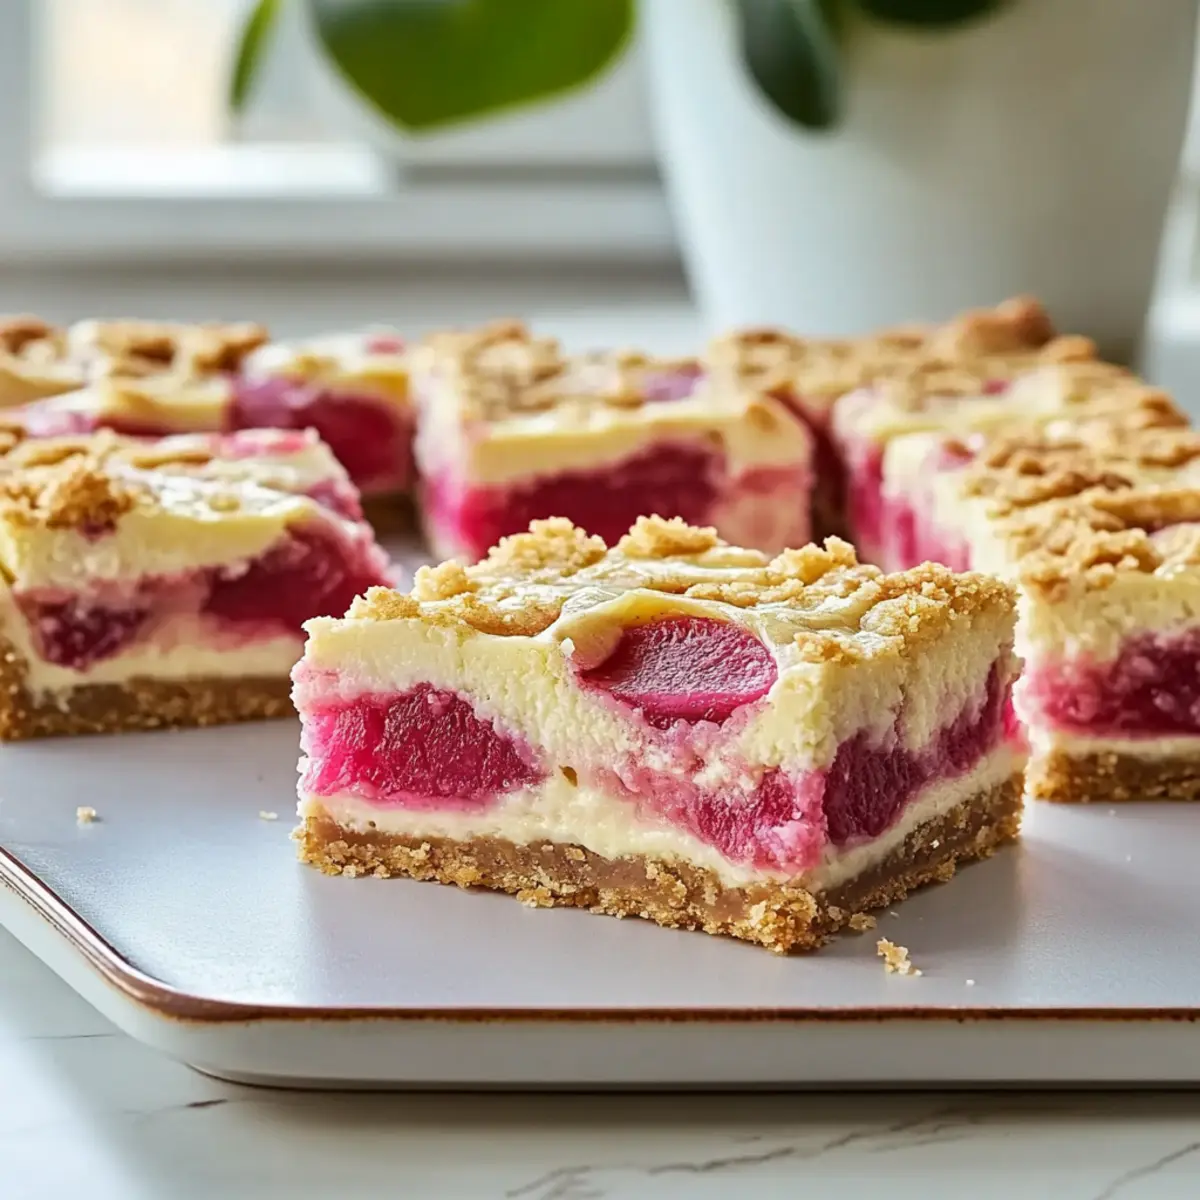
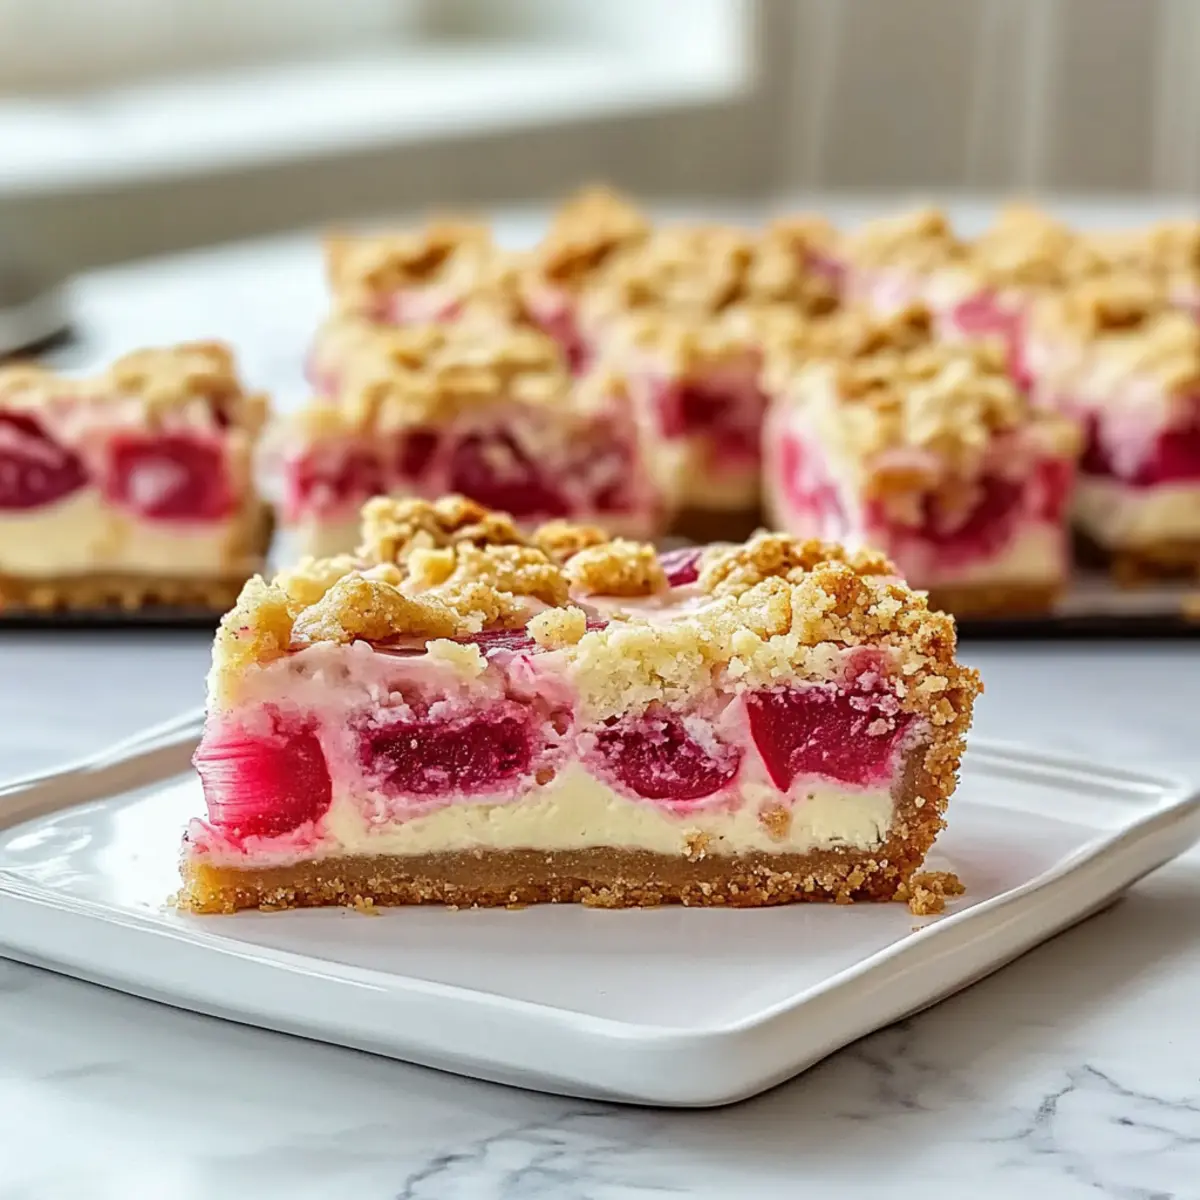
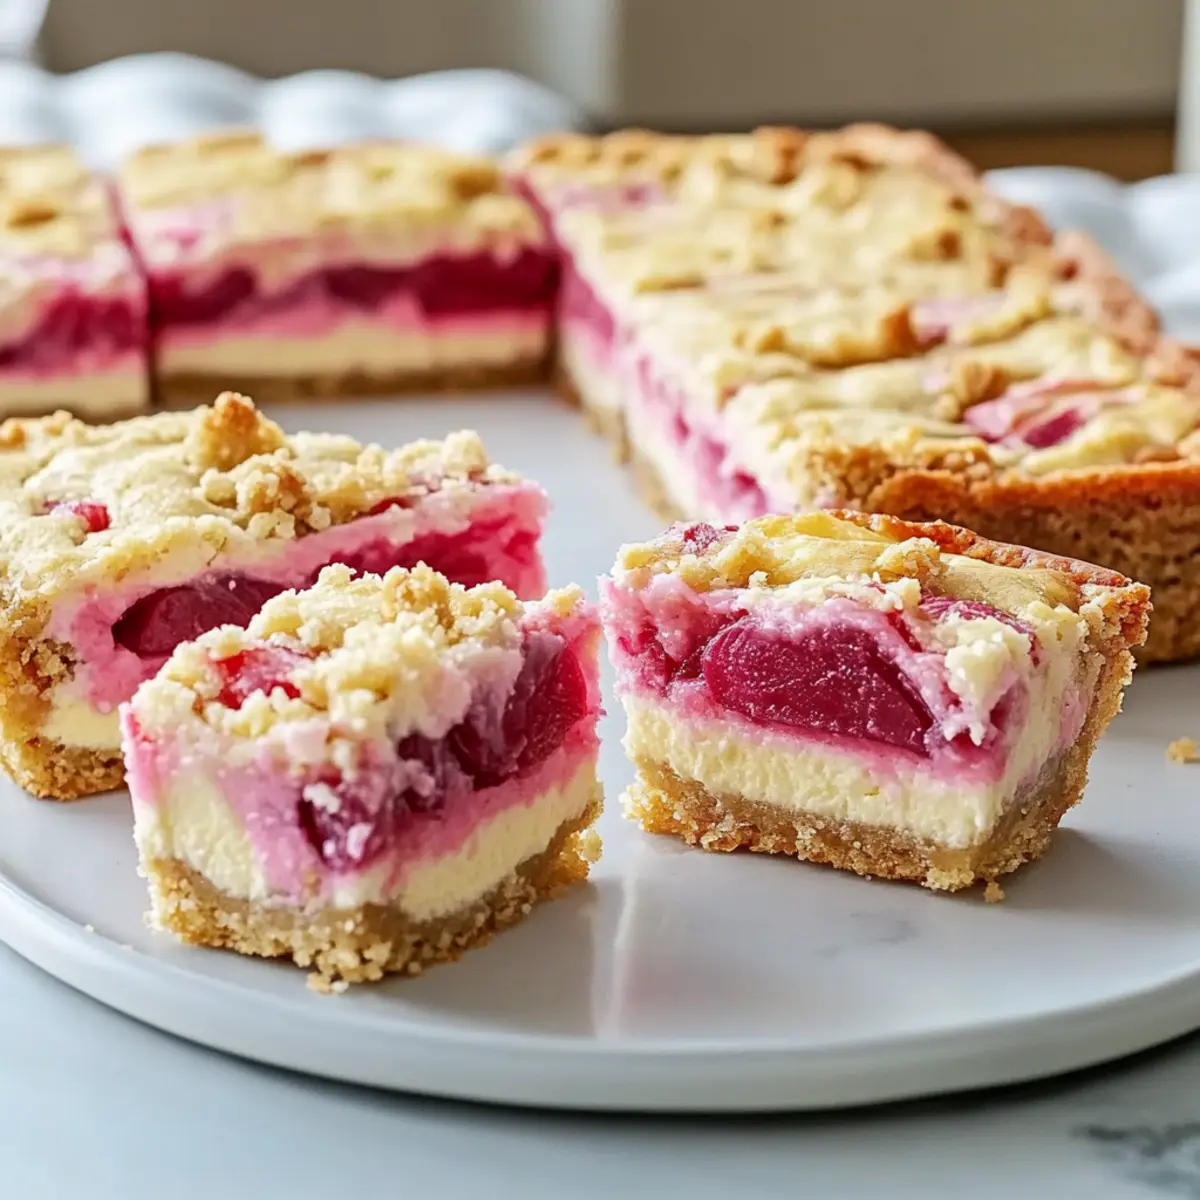
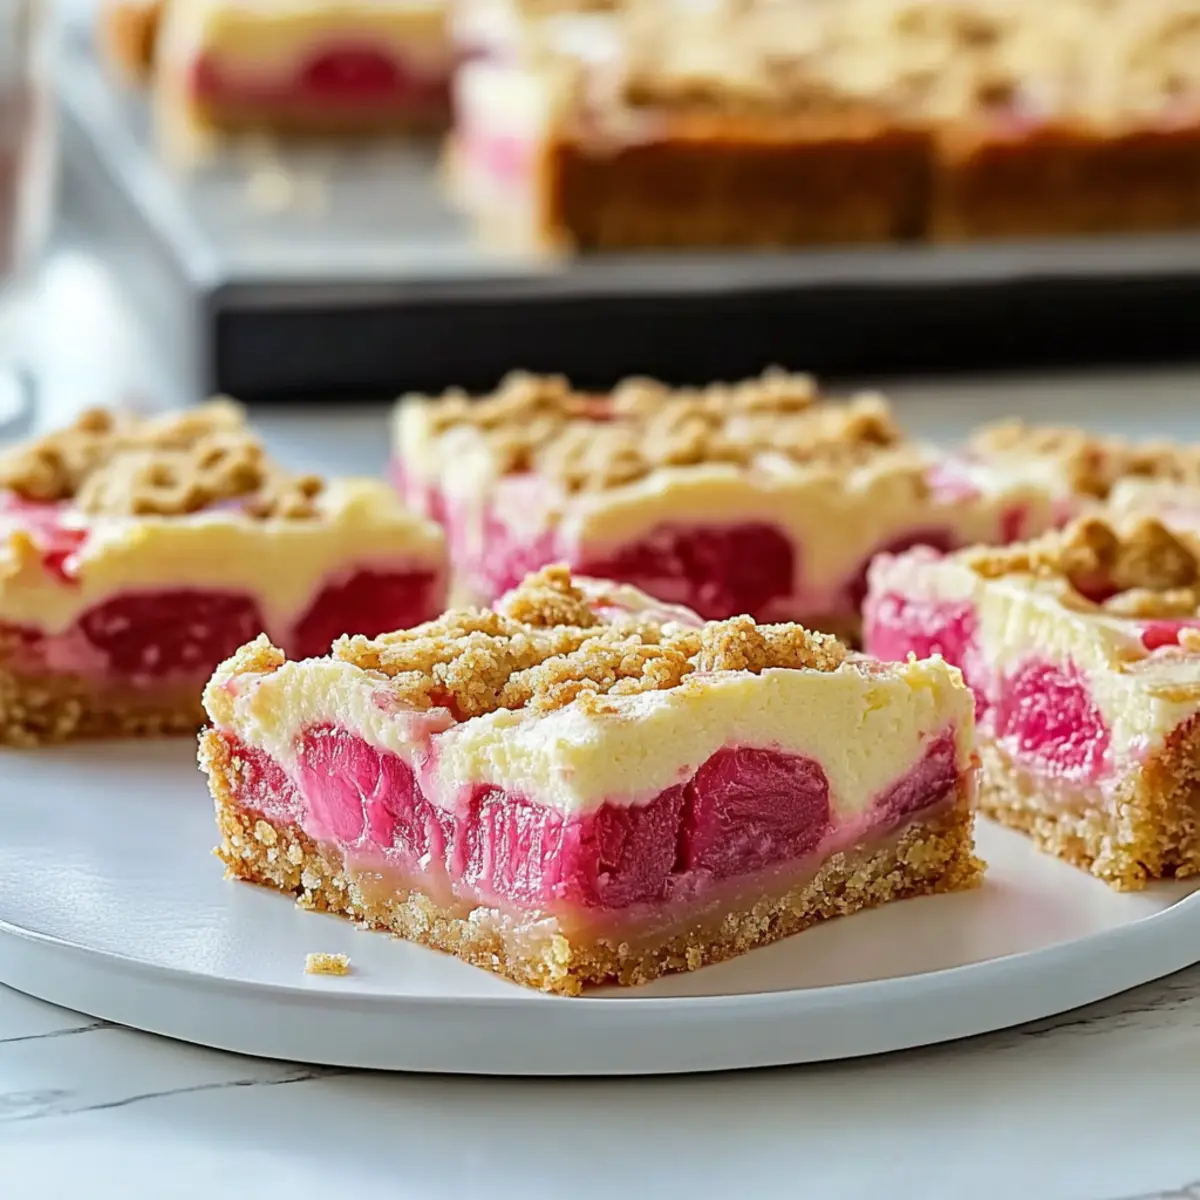
The aroma of spring wafted through my kitchen as I sliced into these Creamy Rhubarb Cheesecake Bars with Buttery Crumble Topping. There’s something undeniably magical about rhubarb—its tartness dances perfectly with the creamy cheesecake layer, creating a delightful treat that’s not only luscious but also offers a satisfying crunch from the crumble. What I love most about this recipe is how impressively simple it is; you can prepare a show-stopping dessert without spending all day in the kitchen. These bars are a crowd-pleaser, perfect for gatherings, or simply as a sweet way to brighten up a quiet afternoon. Have you ever tasted a dessert that captures the essence of spring? Let’s dive into this delicious creation together!
Why are these Cheesecake Bars a Must-Try?
Impressive Simplicity: Crafting these delicious bars is a breeze! With just a few straightforward steps, you’ll have a stunning dessert that looks and tastes gourmet.
Vibrant Flavors: The tartness of rhubarb perfectly contrasts with the creamy cheesecake, creating a flavor explosion that’s impossible to resist.
Versatile Delight: Not in the mood for rhubarb? Feel free to switch it up by using berries in your bars, like in my Strawberry Crunch Cheesecake or Lemon Zucchini Bars!
Crowd-Pleasing Treat: These bars are perfect for sharing at gatherings, making them an ideal choice for potlucks or family get-togethers.
Textural Bliss: With a creamy cheesecake filling, a tart rhubarb layer, and a crunchy crumble on top, each bite offers a delightful mix of textures that will leave everyone wanting more.
Creamy Rhubarb Cheesecake Bars Ingredients
-
For the Crust and Crumble
-
All-purpose flour – This ingredient provides the necessary structure for your crust and crumble. Substitution: You can use gluten-free flour for a gluten-free version.
-
Granulated sugar – Adds a touch of sweetness to both the crust and the crumble. Substitution: Consider coconut sugar for a lower glycemic index option.
-
Unsalted butter (melted) – Contributes richness and binds the crust beautifully. Substitution: To make it dairy-free, opt for melted coconut oil instead.
-
For the Rhubarb Layer
-
Diced rhubarb – The star of the show, offering a delightful tartness. Preparation note: Always prefer fresh rhubarb; if using frozen, make sure to thaw and drain it well.
-
Granulated sugar (for rhubarb) – Enhances the natural sweetness of the rhubarb layer.
-
For the Cheesecake Filling
-
Cream cheese (softened) – Provides that creamy texture we love in cheesecake bars. Note: Full-fat cream cheese yields the best results.
-
Eggs – Essential for establishing the structure of the cheesecake layer.
-
Vanilla extract – Adds a rich depth of flavor to the cheesecake filling.
-
Sour cream – Contributes to the creaminess and offers a subtle tang that complements the cheesecake.
Step‑by‑Step Instructions for Creamy Rhubarb Cheesecake Bars
Step 1: Preheat and Prepare the Baking Pan
Begin by preheating your oven to 350°F (175°C). While it warms up, take a 9×13-inch baking pan and line it with parchment paper, allowing some overhang for easy removal later. This step ensures your Creamy Rhubarb Cheesecake Bars will bake evenly and release effortlessly when it’s time to serve.
Step 2: Make the Crumble Mixture
In a medium-sized mixing bowl, combine all-purpose flour, ½ cup of granulated sugar, and melted unsalted butter. Stir until the mixture becomes crumbly and resembles wet sand, which indicates it’s ready. Remember to reserve one cup of this mixture to use as the crumble topping later. Set the reserved crumble aside while you move on to the crust.
Step 3: Form the Crust
Press the remaining crumb mixture firmly into the bottom of your prepared baking pan to form a solid crust. Ensure it’s evenly distributed and compact, as this will provide a sturdy base for your Creamy Rhubarb Cheesecake Bars. Once packed down, you can start on the rhubarb layer that will sit atop this delicious crust.
Step 4: Prepare the Rhubarb Layer
Take your diced rhubarb and toss it in a bowl with 2 tablespoons of granulated sugar. This step enhances the tartness and brings out the natural sweetness of the rhubarb. Spread the sugared rhubarb evenly over the crust, making sure it’s well distributed so each bite of the cheesecake bars has a delightful zing of flavor.
Step 5: Mix the Cheesecake Filling
In a clean mixing bowl, beat together the softened cream cheese and ½ cup of granulated sugar until the mixture is creamy and smooth. This may take 3-5 minutes using an electric mixer. Then, add in the eggs, vanilla extract, and sour cream, mixing thoroughly until the filling is completely lump-free — this ensures a velvety texture for your Creamy Rhubarb Cheesecake Bars.
Step 6: Assemble the Bars
Carefully pour the creamy cheesecake filling over the rhubarb layer in the baking pan. Using a spatula, spread it into an even layer, ensuring the rhubarb is completely covered. This step is crucial as it locks in the tartness while providing a luscious, creamy contrast to the dessert. Now, let’s finish this delightful assembly.
Step 7: Top with Crumble
Now it’s time to sprinkle the reserved crumble mixture evenly over the cream cheese filling. This will create a delicious, crunchy topping once baked. Ensure that the topping is distributed well so each bar can have a satisfying crunch along with the creamy and tart layers beneath.
Step 8: Bake the Bars
Place the pan in your preheated oven and bake for 45-50 minutes. Keep an eye on them — the edges should be golden brown and the center will appear set but slightly jiggly. This visual cue is perfect for knowing when your Creamy Rhubarb Cheesecake Bars are done, ensuring they maintain a soft and creamy texture.
Step 9: Cool and Refrigerate
Once baked, remove the bars from the oven and let them cool completely in the pan. After cooling, transfer the pan to the refrigerator for at least 2 hours. This chilling time is essential, as it allows the flavors to meld and makes slicing into perfect squares much easier.
What to Serve with Creamy Rhubarb Cheesecake Bars
There’s nothing quite like a delightful spread of flavors to accompany these creamy rhubarb cheesecake bars.
-
Fresh Berries: The natural sweetness and burst of flavor from fresh berries create a beautiful balance against the tart rhubarb. Serve them on the side for a refreshing contrast.
-
Lightly Sweetened Whipped Cream: A dollop of whipped cream adds a soft, airy texture that complements the dense cheesecake, enhancing the overall indulgence of the dessert.
-
Mint Tea: A soothing mint tea provides a fragrant and refreshing sip, perfectly cutting through the richness of the cheesecake bars, offering a delightful finish to your meal.
-
Zesty Lemon Sorbet: The tangy zing of lemon sorbet is a refreshing palate cleanser, and its icy texture pairs wonderfully with the creamy richness of the bars, creating an inviting experience.
-
Almond Biscotti: Crunchy almond biscotti adds a delightful crunch that contrasts beautifully with the creamy cheesecake. It’s perfect for a sweet nibble alongside or as a dipping treat.
-
Caramel Drizzle: A warm caramel drizzle over the bars amplifies the sweetness while adding a rich layer of flavor that envelops each bite in decadence, making them even more irresistible.
-
Sparkling Water with Lime: A bubbly sparkling water with a squeeze of lime provides a light, zesty refreshment that complements the flavors of rhubarb and helps cleanse your palate.
-
Chocolate-Covered Strawberries: These decadent bites offer a sweet contrast to the tartness of the rhubarb, creating a joyful burst of flavor that makes every bite a wonderful celebration of indulgence.
How to Store and Freeze Creamy Rhubarb Cheesecake Bars
Fridge: Store your cheesecake bars in an airtight container for up to 4 days. This keeps them fresh and preserves their delightful creamy texture.
Freezer: For longer storage, wrap the bars tightly in plastic wrap, then place them in a freezer bag or container. They can be frozen for up to 2 months.
Thawing: When you’re ready to enjoy your frozen creamy rhubarb cheesecake bars, simply transfer them to the refrigerator. Let them thaw overnight before serving for the best texture and flavor.
Reheating: If desired, you can warm individual servings in the microwave for a few seconds to enjoy a warm, creamy treat!
Expert Tips for Creamy Rhubarb Cheesecake Bars
- Use Fresh Rhubarb: Fresh rhubarb gives the best flavor and texture. If using frozen, ensure it’s thawed and well-drained to avoid a soggy crust.
- Chill Thoroughly: Allow the bars to cool completely and refrigerate for at least 2 hours before slicing. This step is key for clean cuts and a firm texture.
- Even Crust Hazard: If your crust looks uneven, don’t fret! Embrace its rustic charm and label them as “artisan” to add character to your presentation.
- Crumble Consistency: Make sure your crumble mixture resembles wet sand for easy spreading. A dry crumble won’t adhere well and can lead to a crumbly topping instead of a crunchy one.
- Cutting Technique: Use a sharp knife and clean your blade between cuts for beautiful slices of your creamy rhubarb cheesecake bars. Passion deserves presentation!
Make Ahead Options
These Creamy Rhubarb Cheesecake Bars are perfect for meal prep, making life easier for busy home cooks! You can prepare the crust and crumble topping up to 24 hours in advance; simply store them in airtight containers in the refrigerator to maintain freshness. The rhubarb layer can also be prepped and combined with sugar, then stored for up to 3 days. When you’re ready to bake, assemble the layers in your pan and follow the original baking instructions. This way, you can have delicious, homemade cheesecake bars with minimal effort when you’re short on time, so you can impress your guests or satisfy your sweet tooth with ease!
Creamy Rhubarb Cheesecake Bars Variations
Feel free to make these delightful bars your own—there’s magic in customization!
- Gluten-Free: Use a gluten-free flour blend to ensure everyone can enjoy these delicious bars.
- Dairy-Free: Substitute melted coconut oil for butter and dairy-free cream cheese to create a luscious vegan option. A rich, creamy vegan cheesecake? Yes, please!
- Sweetness Swap: Replace granulated sugar with honey or maple syrup for a natural sweetener that brings its own unique flavor.
- Spiced Up: Add a pinch of ground ginger or cinnamon to the crumble for a warm spice note that beautifully complements the tart rhubarb.
- Berry Bliss: Switch out the rhubarb for berries like cherries, blueberries, or raspberries for a twist that lends a sweet and juicy flavor. Imagine the vibrant color and freshness!
- Nutty Crunch: Incorporate chopped nuts like pecans or almonds into the crumble for an extra layer of texture and flavor that brings delightful crunch to each bite.
- Chocolate Drizzle: After cooling, top your cheesecake bars with a drizzle of melted dark chocolate for an indulgent touch that chocolate lovers will adore.
- Citrus Zest: Add lemon or orange zest to the cheesecake filling for a bright, zesty twist that enhances its flavors and adds uplifting notes.
These variations are not just a way to customize but also an invitation to explore your own creativity in the kitchen. Whether you’re planning a gathering or treating yourself, there’s something exciting for everyone. And if you’re looking for other desserts to inspire your next baking adventure, check out my Millionaires Cheesecake Indulge or try some lovely Summer Peach Bars to bring seasonal freshness to your table!
Creamy Rhubarb Cheesecake Bars Recipe FAQs
How do I select ripe rhubarb?
Absolutely! When choosing rhubarb, look for firm stalks with a vibrant color—deep pink or red is ideal. Avoid any that are wilted, have dark spots all over, or appear limp. Fresh rhubarb should be crisp and firm to the touch.
How should I store leftover cheesecake bars?
For optimal freshness, store your Creamy Rhubarb Cheesecake Bars in an airtight container in the refrigerator for up to 4 days. This way, you can enjoy their rich creamy texture while maintaining the delightful contrast with the tart rhubarb layer.
Can I freeze these cheesecake bars?
Yes, you can! To freeze your creamy rhubarb cheesecake bars, wrap them tightly in plastic wrap and then place them in a freezer-safe container or bag—this protects them from freezer burn. They will maintain their quality for up to 2 months. When you’re ready to indulge, simply transfer them to the refrigerator to thaw overnight before serving.
What should I do if my crust is too crumbly?
If your crust crumbles too much and doesn’t hold together, it may be due to insufficient butter or not pressing it down firmly enough. To fix it, try adding a bit more melted butter until the mixture is moist enough to hold together. Press it down firmly with your fingers or the bottom of a measuring cup to create a solid base.
Are there any dietary considerations for making these cheesecake bars?
Very! If you need a gluten-free version, simply substitute the all-purpose flour with a gluten-free flour blend. Additionally, you can use dairy-free alternatives for both the cream cheese and butter, like vegan cream cheese and coconut oil, to accommodate dietary restrictions while still enjoying the delicious flavors of these creamy rhubarb cheesecake bars.
Creamy Rhubarb Cheesecake Bars with a Crunchy Crumble Twist
Ingredients
Equipment
Method
- Preheat your oven to 350°F (175°C). Line a 9x13-inch baking pan with parchment paper, allowing some overhang for easy removal later.
- In a medium-sized mixing bowl, combine all-purpose flour, ½ cup of granulated sugar, and melted unsalted butter. Stir until crumbly and resembles wet sand, reserving one cup for topping.
- Press the remaining crumb mixture into the bottom of the prepared baking pan to form a solid crust.
- Toss diced rhubarb with 2 tablespoons of granulated sugar, then spread evenly over the crust.
- In a clean mixing bowl, beat softened cream cheese with ½ cup of granulated sugar until creamy. Add eggs, vanilla extract, and sour cream, mixing until lump-free.
- Pour the cheesecake filling over the rhubarb layer and spread into an even layer.
- Sprinkle the reserved crumble mixture evenly over the cream cheese filling.
- Bake for 45-50 minutes until edges are golden brown and center is set but slightly jiggly.
- Let cool completely in the pan before refrigerating for at least 2 hours.
Leave a Reply