
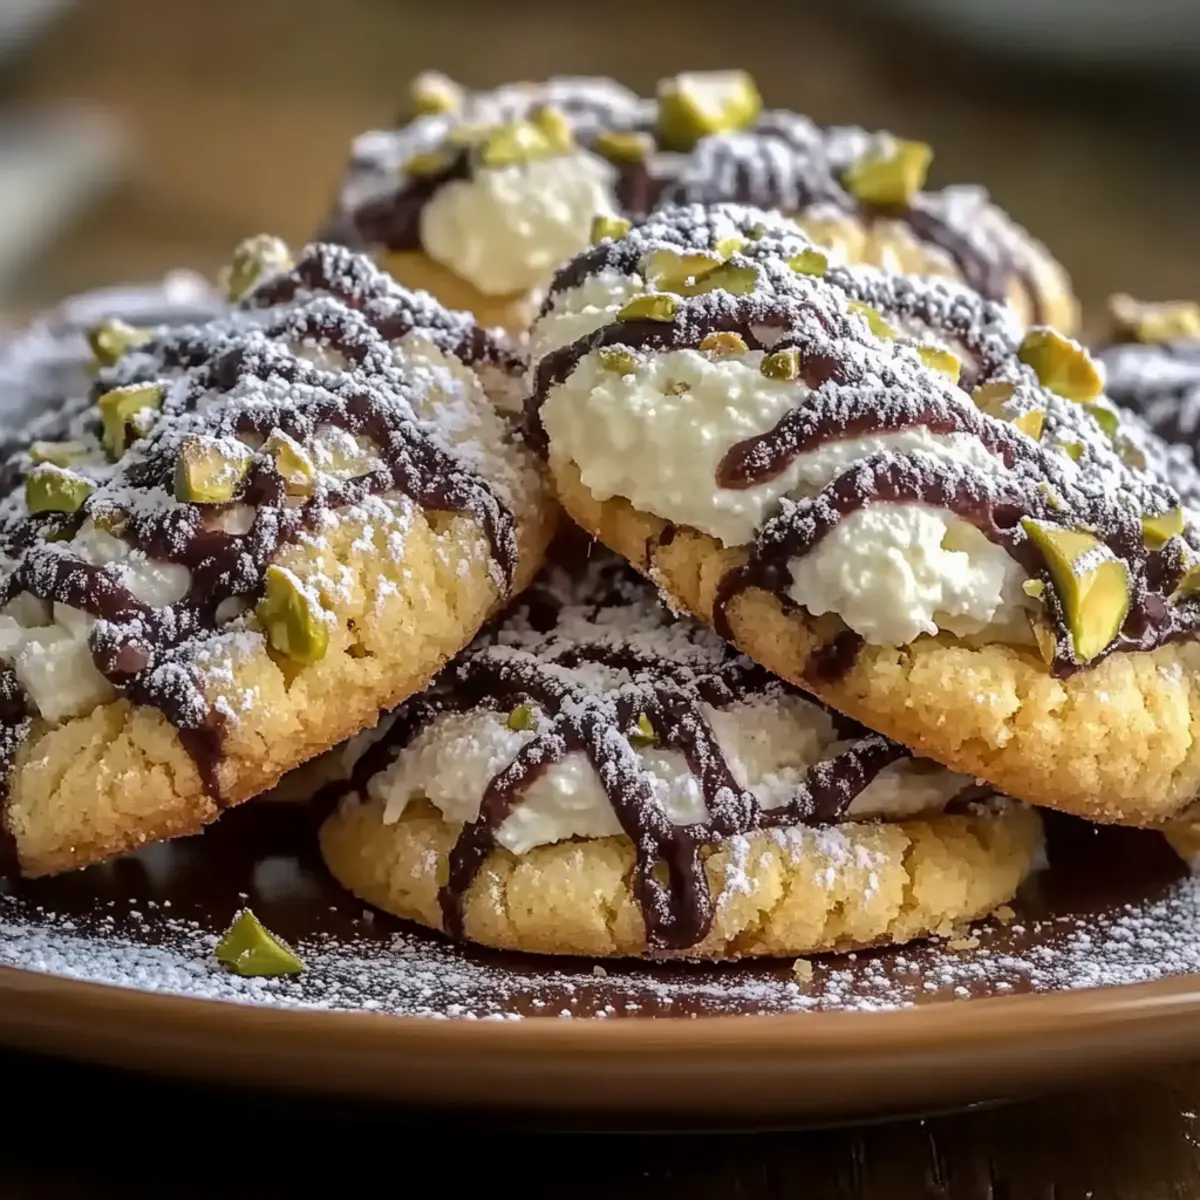
As I was sipping my morning coffee, the scent of citrus and sweet ricotta wafted through the air, igniting memories of family gatherings filled with laughter and indulgence. That’s the magic of these Cannoli Cookies, a delightful Italian-inspired treat that beautifully captures the essence of the classic dessert. With their crispy exterior and creamy, tangy filling, these cookies are more than just a sweet treat—they’re a journey through tradition and comfort. The best part? They are incredibly easy to whip up, making them your new favorite go-to for satisfying those sweet cravings any day of the week. Ready to impress your loved ones with this delicious twist on a timeless favorite? Let’s jump into the recipe!
Why Are These Cannoli Cookies Irresistible?
Easy to Make: With a simple list of ingredients and straightforward steps, you’ll be amazed at how quickly you can bring these treats to life in your kitchen.
Crispy and Creamy: Each cookie delivers that perfect contrast between a crunchy outer layer and a luscious, ricotta-filled center, making them a delightful indulgence.
Versatile Options: Whether you prefer chocolate chips or dried fruit like cranberries, this recipe invites you to play with flavors and personal touches.
Nostalgic Appeal: Every bite takes you back to cherished family gatherings, weaving together memories of laughter and love. For a cozy pairing, consider serving these with coffee or a glass of dessert wine.
Make-Ahead Friendly: Prepare the dough in advance, allowing you to bake fresh cookies whenever the craving strikes. Plus, for more delightful variations, check out these Cinnamon Roll Cookies!
Cannoli Cookies Ingredients
• A delightful mix for a nostalgic treat.
For the Dough
- All-purpose flour – Provides structure; you can use cake flour for an even lighter texture.
- Granulated sugar – Adds sweetness; consider brown sugar for extra moisture and flavor.
- Ricotta cheese – Delivers creaminess; ensure it’s well-drained to maintain cookie crispness.
- Large egg – Binds ingredients and adds richness; replace with a flax egg for a vegan option.
- Vanilla extract – Enhances flavor; swap it with almond extract for a unique twist.
- Lemon zest – Adds brightness and freshness; you can replace it with orange zest for a vibrant twist.
For the Filling
- Mini chocolate chips – Provides sweetness and texture; dark chocolate chips can give a richer flavor.
- Chopped pistachios – Adds crunch and nutty flavor; feel free to substitute with almonds or walnuts.
For Dusting
- Powdered sugar – Perfect for dusting; it can be omitted if you prefer less sweetness.
These Cannoli Cookies offer an easy way to enjoy a beloved Italian classic right at home!
Step‑by‑Step Instructions for Cannoli Cookies
Step 1: Preheat the Oven
Begin by preheating your oven to 350°F (175°C). This ensures that your Cannoli Cookies will bake evenly and come out perfectly crisp. While the oven heats up, gather your mixing bowls and measuring cups to streamline the process ahead.
Step 2: Combine Dry Ingredients
In a large mixing bowl, whisk together the all-purpose flour and granulated sugar until fully combined. This mixture will form the base of your Cannoli Cookies, providing structure and sweetness. Set this aside while you prepare the wet ingredients, ensuring a smooth blend of flavors later.
Step 3: Mix Wet Ingredients
In a separate bowl, mix the ricotta cheese, large egg, vanilla extract, and lemon zest. Whisk until the mixture becomes smooth and creamy, which will add that delightful richness to your dough. This is where the magic starts, so take a moment to enjoy the enticing aroma of citrus and sweet dairy.
Step 4: Form the Dough
Gradually combine the dry flour-sugar mixture with the smooth ricotta mixture, stirring gently until a soft dough forms. Ensure that all the flour is incorporated, but be careful not to overmix, as this can make the cookies tough. The dough should hold together without being sticky—perfect for rolling out!
Step 5: Rest the Dough
Cover the dough with plastic wrap and let it rest at room temperature for about 30 minutes. This resting period is essential, as it allows the gluten to relax, making the dough easier to roll out. The dough may become slightly firmer as it rests, which is ideal for shaping.
Step 6: Roll and Cut the Dough
Once rested, dust a clean surface with flour and roll out the dough to about ¼ inch thick. Use a sharp knife or a pizza cutter to slice the dough into rectangles measuring 2×3 inches. Ensure that your shapes are somewhat uniform to promote even baking in your Cannoli Cookies.
Step 7: Prepare the Filling
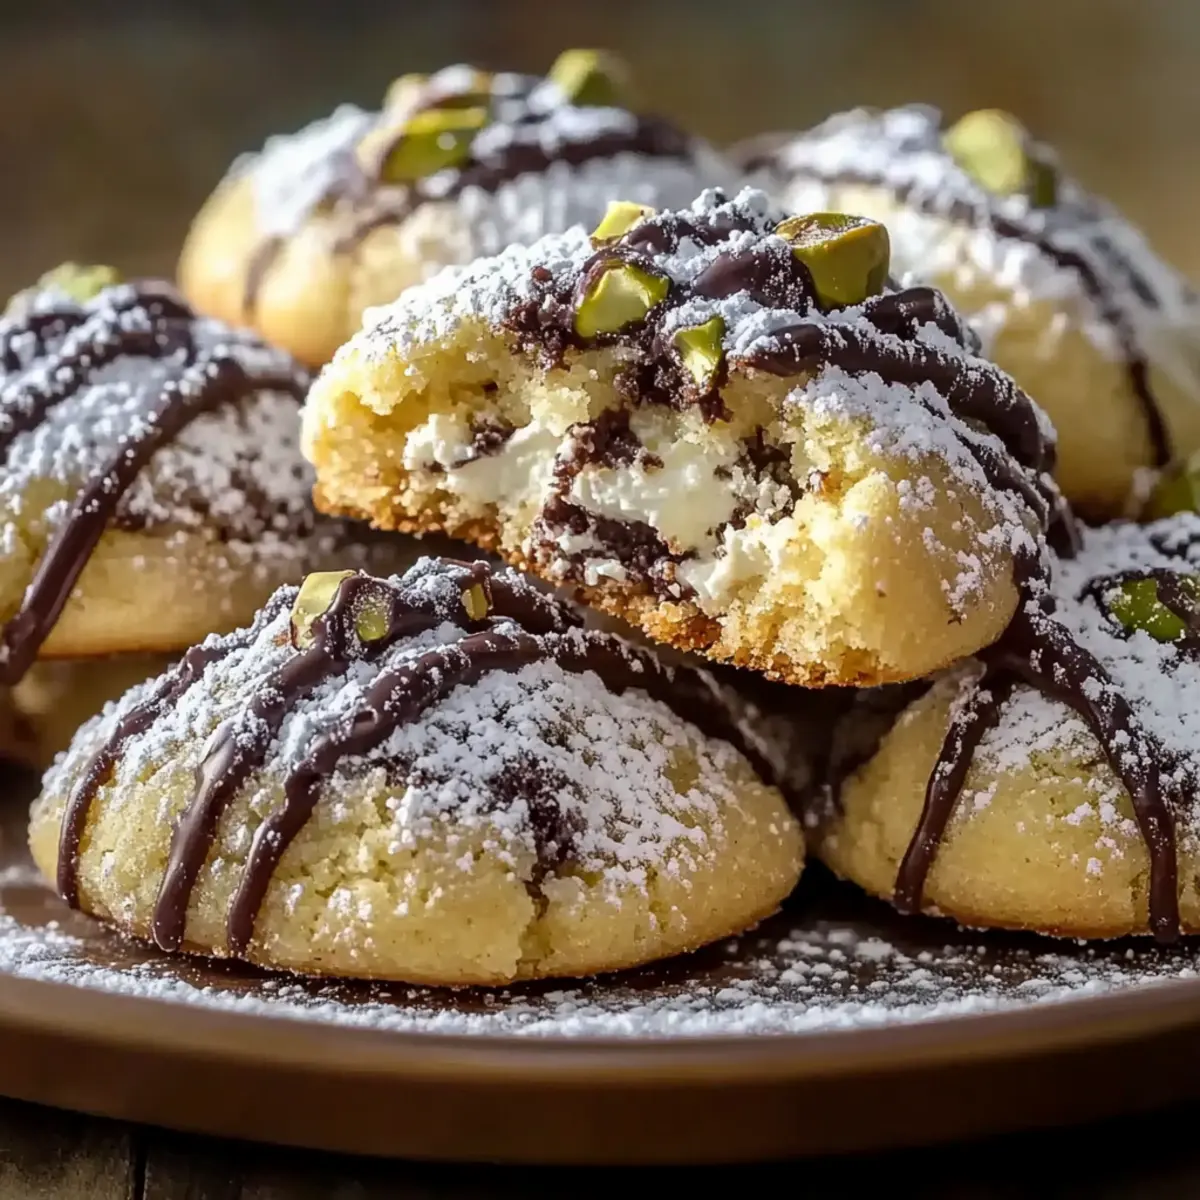
In a medium bowl, combine the remaining ricotta, chocolate chips, and chopped pistachios. Mix well until all ingredients are evenly distributed. The filling should be chunky yet creamy, providing that delicious contrast to the crispy cookie exterior that makes Cannoli Cookies so irresistible.
Step 8: Fill the Cookies
Take a rectangle of dough and place a small spoonful of filling in the center. Fold the dough over to create a pouch, pinching the edges tightly to seal. Repeat this step with the remaining dough and filling, making sure there are no openings where the filling might spill during baking.
Step 9: Bake the Cookies
Arrange the filled cookies on a baking sheet lined with parchment paper, ensuring they are spaced apart. Bake in the preheated oven for 15-18 minutes or until they turn a beautiful golden brown. Keep a close eye on them as they bake, as each oven varies; look for a light crispness on the edges.
Step 10: Cool and Dust
Once baked, remove the cookies from the oven and let them cool briefly on the baking sheet before transferring them to a wire rack. Allow them to cool completely, then dust with powdered sugar for a sweet finish. The transformation of these Cannoli Cookies is now complete and ready to be enjoyed.
Make Ahead Options
These Cannoli Cookies are perfect for busy home cooks wanting to save time during the week! You can prepare the dough up to 24 hours in advance by mixing it and wrapping it tightly in plastic wrap before refrigerating. The filling can also be made a day early and kept in an airtight container in the fridge for up to 3 days. To keep the cookies crisp when you’re ready to bake, shape them directly from the fridge and bake as instructed. This way, you’ll achieve those delightful, restaurant-quality Cannoli Cookies with minimal effort, perfect for when company drops by or when sweet cravings strike!
Cannoli Cookies: Exciting Variations
Feel free to get creative with these Cannoli Cookies and personalize them to your taste preferences!
- Dairy-Free: Substitute ricotta with a plant-based cream cheese or almond-based yogurt for a creamy filling without dairy.
- Healthy Sweetener: Replace granulated sugar with maple syrup or honey. Keep in mind that you might need to adjust the flour to maintain the dough’s consistency.
- Extra Zest: Add a teaspoon of orange zest along with the lemon for a vibrant citrus burst that elevates the cookie flavors.
- Spicy Kick: Mix a pinch of cinnamon or nutmeg into the cookie dough for a warm, aromatic twist. The spices can add depth and enhance the comforting feel of these treats.
- Nutty Surprise: Swap chopped pistachios with toasted hazelnuts or pecans for a different texture and flavor. Each nut brings a unique crunch that could surprise your palate.
- Fruit Fusion: Incorporate dried cherries or apricots into the filling to add a chewy, fruity component that pairs perfectly with the creamy ricotta. This can introduce a fresh twist reminiscent of summer.
- Chocolate Lover’s Delight: Use dark chocolate chips instead of mini chips for an intense cocoa flavor, creating an even richer cookie experience. For a chocolatey dough, you could also mix in cocoa powder!
No matter how you choose to customize this recipe, these Cannoli Cookies will be sure to transport you back to those cherished family gatherings. And if you’re looking for more delightful cookie inspirations, don’t miss out on the scrumptious Chocolate Oat Cookies or try the unique flavors of Pumpkin Smores Cookies!
How to Store and Freeze Cannoli Cookies
- Room Temperature: Store your Cannoli Cookies in an airtight container at room temperature for up to 3 days to maintain their delightful crispness.
- Fridge: If you’re in a warmer climate, keeping them in the fridge can help preserve freshness; just ensure they are sealed properly to prevent drying out.
- Freezer: For longer storage, freeze the cookies for up to 1 month. Layer parchment paper between them to avoid sticking and preserve texture.
- Reheating: To enjoy them warm, simply reheat in the oven at 350°F (175°C) for about 5 minutes, ensuring they regain their original crunch.
Expert Tips for Cannoli Cookies
- Ricotta Care: Ensure your ricotta cheese is well-drained to prevent sogginess; this keeps your Cannoli Cookies crisp.
- Dough Handling: Avoid overmixing when combining wet and dry ingredients; it ensures a tender texture.
- Rustic Shapes: Embrace imperfections; if the dough scraps appear, roll and cut them into more cookies for less waste.
- Baking Watch: Keep a close eye on cookies during the final minutes; the golden brown hue indicates they’re perfectly baked!
- Filling Flexibility: Customize the filling by mixing in your favorite ingredients, like dried fruits or different nuts, for unique Cannoli Cookies.
What to Serve with Classic Cannoli Cookies
Ready to elevate your dessert experience? Here are some delicious pairings that will complement the rich flavors of these delightful treats.
-
Rich Espresso: The boldness of a fresh espresso cuts through the sweetness, balancing the creamy filling beautifully. It’s a classic Italian combo that invites conversation.
-
Lemon Sorbet: The refreshing citrus notes cleanse your palate, providing a light counterpoint to the dense, sweet cookies. Perfect for a delightful contrast on warm days.
-
Chocolate Drizzle: Add a touch of indulgence with a silky chocolate drizzle over the cookies. This elevated presentation enhances flavor, making every bite an indulgent treat.
-
Pistachio Ice Cream: The nutty creaminess harmonizes with the cookie’s filling, creating a wonderfully cohesive dessert experience. It’s like enjoying cannoli in a whole new form.
-
Fruit Compote: A tart berry or stone fruit compote adds a juicy freshness that enhances the cookies’ sweetness, bringing a delightful pop of flavor to each bite.
-
Dessert Wine: A sweet dessert wine, such as Vin Santo, complements the cookies’ rich flavors while providing an authentic Italian experience. Sip and savor as you indulge!
-
Coffee Creamer Dip: Create a creamy dip by mixing your favorite coffee creamer with a touch of whipped cream. It’s a fun and interactive way to enjoy these cookies with a twist.
-
Almond Biscotti: For a crunch that mirrors the cookie’s crispy layer, serve with a side of almond biscotti. Dunking these treats creates a delightful textural experience.
-
Italian Cream Soda: The fizz and sweetness of a homemade Italian cream soda pair delightfully with the cookies, delivering a refreshing palate cleanser.
Experimenting with these pairings will turn your dessert time into a delightful event, ensuring that everyone leaves with satisfied sweet cravings!
Cannoli Cookies Recipe FAQs
How do I select the right ricotta cheese for my Cannoli Cookies?
Absolutely! When choosing ricotta cheese, look for a brand that is labeled “whole milk” for the creamiest texture. Be sure it’s well-drained to avoid sogginess in your cookies. You can check by putting it in a fine mesh strainer for about 30 minutes before using, allowing excess moisture to seep out, ensuring a crispier final product.
What’s the best way to store leftover Cannoli Cookies?
Yes! Store your Cannoli Cookies in an airtight container at room temperature for up to 3 days. If you live in a warm climate, refrigerate them to keep them fresh, but ensure they’re sealed properly to avoid drying out. Alternatively, freeze the cookies for up to 1 month by layering parchment paper between them to prevent sticking.
Can I freeze these Cannoli Cookies? What’s the process?
Very! To freeze your Cannoli Cookies, allow them to cool completely after baking. Next, layer them between sheets of parchment paper in an airtight freezer-safe container. This prevents sticking and allows for easy removal. They can be stored in the freezer for up to 1 month! When you’re ready to enjoy them, simply reheat in the oven at 350°F (175°C) for about 5 minutes for that wonderful, fresh-baked taste.
What should I do if my Cannoli Cookies spread while baking?
No worries! If your cookies are spreading too much, it’s likely due to either a warm dough or not enough flour. Ensure the dough has had ample time to chill at room temperature, and if it feels sticky, try adding a little more flour—up to 1 tablespoon at a time. Also, avoid overmixing; doing so can also lead to a spreadier cookie.
Are these Cannoli Cookies suitable for people with nut allergies?
If you need a nut-free option, absolutely! You can simply omit the chopped pistachios or substitute them with seeds like sunflower seeds or pumpkin seeds for a delightful crunch. Just make sure to use nut-free chocolate chips if desired as well. Enjoy these delightful treats worry-free!
Delicious Cannoli Cookies: A Twist on an Italian Classic
Ingredients
Equipment
Method
- Preheat your oven to 350°F (175°C) and gather your mixing bowls and measuring cups.
- Whisk together the all-purpose flour and granulated sugar in a large mixing bowl until fully combined.
- In a separate bowl, mix the ricotta cheese, large egg, vanilla extract, and lemon zest until smooth and creamy.
- Gradually mix the dry ingredients into the wet mixture, stirring gently until a soft dough forms.
- Cover the dough with plastic wrap and let it rest at room temperature for about 30 minutes.
- Dust a clean surface with flour and roll out the dough to about ¼ inch thick. Cut into rectangles measuring 2x3 inches.
- In a medium bowl, combine the remaining ricotta, chocolate chips, and chopped pistachios and mix well.
- Place a small spoonful of filling in the center of a rectangle of dough and fold to create a pouch, sealing the edges tightly.
- Arrange the filled cookies on a baking sheet lined with parchment paper and bake for 15-18 minutes until golden brown.
- Remove the cookies from the oven, cool briefly, and dust with powdered sugar before serving.
Leave a Reply