
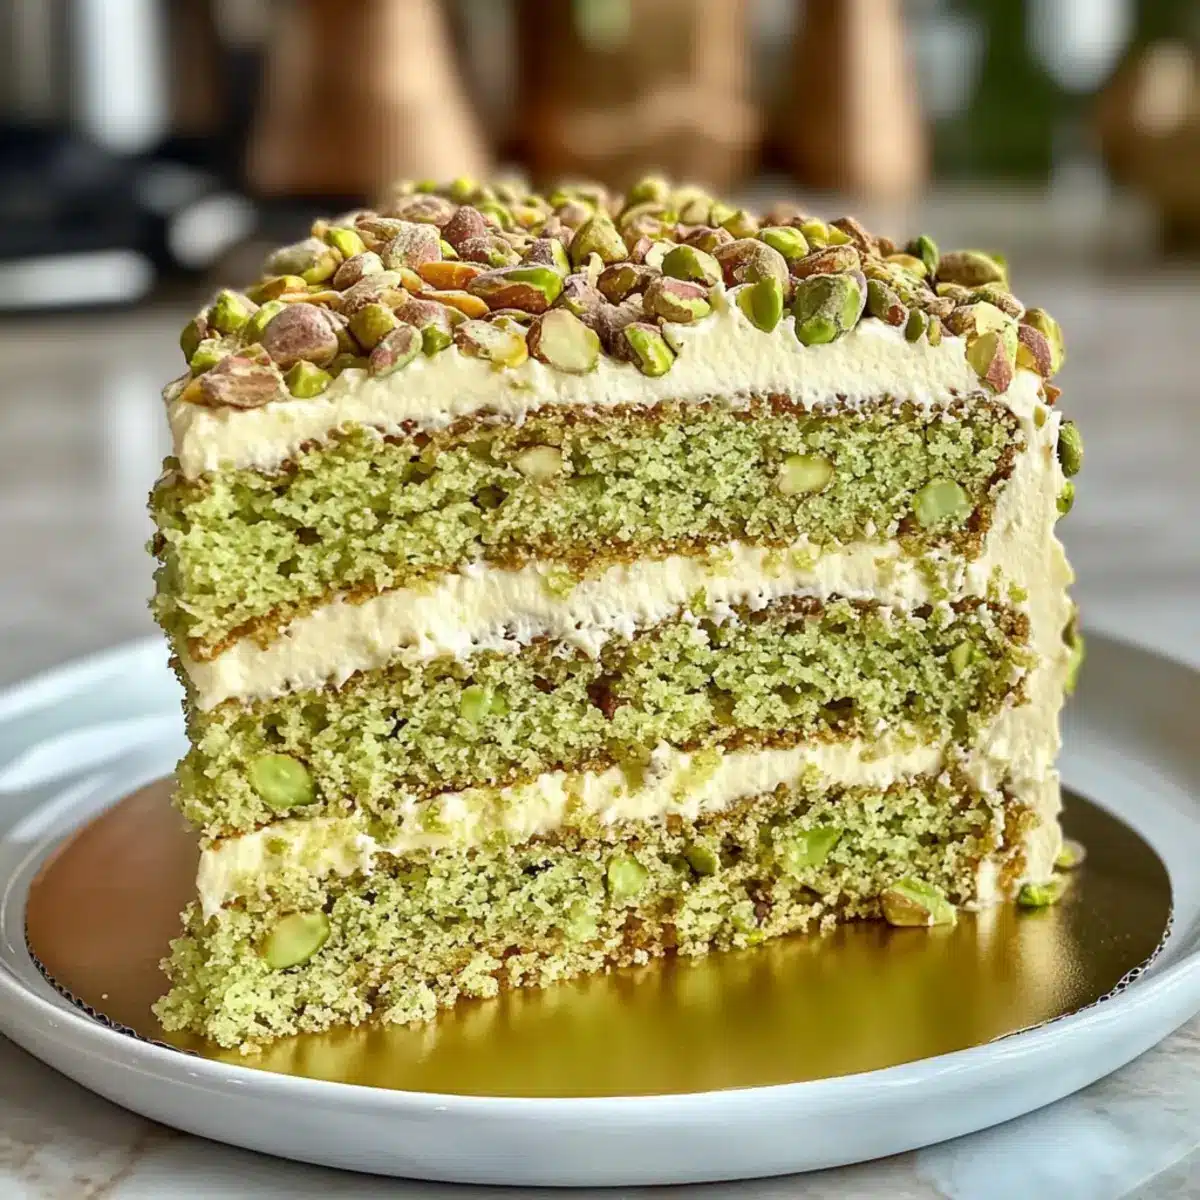
As I stood in my kitchen, the aroma of toasting pistachios filled the air, transporting me to a quaint café in Italy where desserts are celebrated like fine art. This Pistachio Mascarpone Layer Cake is a delightful blend of nutty sponge and airy mascarpone frosting that not only brings a touch of elegance to any occasion but is also surprisingly easy to whip up. Perfect for gatherings or an evening treat, this cake shines as a crowd-pleaser, sure to impress both friends and family. With just a handful of ingredients and simple steps, you can create this luxurious dessert that’s vegetarian-friendly too. Ready to elevate your baking game and indulge in a slice of pure bliss? Let’s dive into the recipe!
Why Try This Pistachio Cake?
Irresistible Flavor: Each bite of this Pistachio Mascarpone Layer Cake reveals a delightful fusion of nutty richness and creamy smoothness, creating a luxurious dessert experience.
Simple Steps: Don’t be intimidated! Just follow straightforward steps to create a stunning cake effortlessly.
Perfect for Any Occasion: Whether it’s a birthday, holiday, or a cozy gathering, this cake will impress your friends and family, making it a versatile addition to your dessert repertoire.
Vegetarian-Friendly: This cake caters to vegetarian diets without compromising on flavor, so everyone can enjoy a slice of this indulgent treat.
Make-Ahead Magic: Prepare the cake layers a day in advance, and simply assemble when ready for an effortlessly fresh dessert, just like you would with a French Butter Cake.
Elevate your dessert game with this showstopper, perfect alongside coffee or tea!
Pistachio Mascarpone Layer Cake Ingredients
For the Cake
- Unsalted Butter – Provides richness and moisture; ensure it’s softened for easy mixing.
- Granulated Sugar – Adds sweetness and structure to the cake; use the right amount for optimal flavor.
- Eggs – Essential for binding and leavening; room temperature eggs work best for better incorporation.
- Whole Milk – Adds moisture and richness; can be substituted with almond milk for a nutty flavor.
- Vegetable Oil – Enhances moisture to keep the cake tender; melted coconut oil is a great substitute.
- Vanilla Extract – Adds depth of flavor; pure extract is preferred for the best taste.
- Almond Extract – Optional for a subtle nutty flavor; feel free to omit if there’s an allergy.
- All-Purpose Flour – Provides the main structure of the cake; use a gluten-free blend for a dietary alternative.
- Baking Powder – Necessary for leavening the cake, helping it rise beautifully.
- Salt – Balances flavors; it’s an essential component in baked goods.
- Shelled Pistachios – Main flavoring of the cake; finely grind them for the perfect incorporation in the batter.
For the Frosting
- Mascarpone Cheese – Creates a luscious, creamy frosting; if unavailable, use cream cheese mixed with heavy cream.
- Heavy Cream – Needed for whipping; it helps achieve a light, airy texture in the frosting.
- Powdered Sugar – Sweetens the frosting and thickens it to achieve the desired consistency.
This dreamy Pistachio Mascarpone Layer Cake is ready to make a stunning appearance on your dessert table!
Step‑by‑Step Instructions for Pistachio Mascarpone Layer Cake
Step 1: Prepare Pistachios
Begin by pulsing shelled pistachios in a food processor until finely ground. This should take about 1-2 minutes. Once ground, combine them with all-purpose flour, baking powder, and salt in a mixing bowl. This mixture will be the dry base for your moist and nutty Pistachio Mascarpone Layer Cake, creating a harmonious flavor profile.
Step 2: Cream Butter and Sugar
In a large mixing bowl, beat softened unsalted butter and granulated sugar with an electric mixer on medium speed for about 3 minutes. You’ll know it’s ready when the mixture is light and fluffy, turning a pale yellow color. This step is crucial for achieving the rich flavor and smooth texture of your cake.
Step 3: Incorporate Wet Ingredients
Add the room temperature eggs one at a time to the creamed butter and sugar, mixing well after each addition. Gradually pour in whole milk, vegetable oil, and vanilla extract. Continue mixing on low speed until fully incorporated, ensuring a smooth batter that brings together the nutty and creamy elements of the Pistachio Mascarpone Layer Cake.
Step 4: Combine Mixtures
Gently fold the dry ingredient mixture into the wet ingredients using a spatula. Be careful not to overmix; stop as soon as there are no visible streaks of flour. This will help maintain the cake’s light texture, which is essential for a delightful Pistachio Mascarpone Layer Cake.
Step 5: Bake
Preheat your oven to 350°F (175°C). Divide the batter evenly among three greased 8-inch round cake pans. Bake for 22-25 minutes, or until a toothpick inserted in the center comes out clean. The edges should be lightly golden, indicating that the layers are ready to provide the perfect base for your creamy frosting.
Step 6: Cool Layers
Once baked, remove the cake layers from the oven and let them cool in the pans for about 10 minutes. Then, transfer them to a wire rack to cool completely. Allowing the layers to cool ensures that the mascarpone cream won’t melt when assembled, preserving the integrity of your Pistachio Mascarpone Layer Cake.
Step 7: Make Mascarpone Cream
In a medium bowl, whip heavy cream until soft peaks form, which should take about 3-5 minutes. Gradually add in mascarpone cheese, powdered sugar, and a splash of vanilla extract, continuing to mix until smooth and creamy. Achieving this light, airy texture is key for the delicious layering of your cake.
Step 8: Assemble Cake
Start layering your cooled cake: place one layer on a serving plate, spread with a generous amount of mascarpone cream, and top with another layer. Repeat this process with the second layer, frosting the top and sides of the cake generously with the remaining cream. This creates a beautiful, creamy contrast against the pistachio layers.
Step 9: Refrigerate
Chill the assembled Pistachio Mascarpone Layer Cake in the refrigerator for at least 2 hours before serving. This chilling time allows the flavors to meld and the frosting to set, ensuring that each slice retains its shape beautifully, making it even more enjoyable for your guests.
Make Ahead Options
These Pistachio Mascarpone Layer Cakes are perfect for busy home cooks looking to save time without sacrificing flavor! You can prepare the cake layers up to 24 hours in advance; simply bake, let them cool completely, and wrap each layer tightly in plastic wrap before refrigerating. The mascarpone cream can also be made ahead and stored in the refrigerator for up to 3 days; just give it a quick whisk before using to restore its airy texture. When you’re ready to serve, layer the cooled cake with the cream, and refrigerate for at least 2 hours to ensure the flavors meld beautifully. By prepping ahead, you’ll enjoy a stress-free dessert experience that’s just as delightful!
Variations & Substitutions of Pistachio Mascarpone Layer Cake
Feel free to spark your creativity as you enjoy this scrumptious Pistachio Mascarpone Layer Cake – the possibilities are pleasantly endless!
-
Citrus Zest: Add orange or lemon zest to the batter for a vibrant flavor boost that brightens each slice.
-
Nutty Swaps: Swap out pistachios for hazelnuts or walnuts to create entirely different flavor profiles in your cake.
-
Gluten-Free: Use a gluten-free flour blend to cater to those with dietary restrictions, ensuring everyone can enjoy this delightful cake.
-
Dairy-Free: Substitute mascarpone with a dairy-free cream cheese and use coconut milk instead of regular milk to accommodate lactose intolerant guests.
-
Chocolate Drizzle: Enhance the decadence! Drizzle melted dark chocolate over the frosted cake or incorporate into the layers for a sweet surprise.
-
Crunchy Topping: Top the finished cake with a sprinkle of chopped pistachios or a mix of your favorite nuts for an additional layer of texture.
-
Flavored Cream: Infuse the mascarpone cream with cardamom or cinnamon for a warm aromatic twist that complements the nutty flavor perfectly.
-
Layered Delight: Try this cake in the form of Coffee Cake Cinnamon or Chocolate Mug Cake for an inspired twist that ultimately transforms how you enjoy your dessert!
With these delightful variations, your Pistachio Mascarpone Layer Cake will remain a wonderfully versatile crowd-pleaser for any occasion!
What to Serve with Pistachio Mascarpone Layer Cake?
Elevate your dessert experience by pairing this delightful cake with complementary flavors and textures.
- Rich Espresso: The boldness of espresso enhances the cake’s creamy sweetness, making each bite a delightful contrast.
- Fresh Berries: Juicy strawberries or raspberries add a tart freshness that beautifully balances the richness of the mascarpone cream.
- Herbal Tea: A warm cup of chamomile or mint tea refreshes the palate between decadent slices.
- Creamy Vanilla Ice Cream: Scoop a velvety ice cream alongside for an extra layer of indulgence and a delightful melt-in-your-mouth experience.
- Crunchy Biscotti: Dipping almond biscotti will add a wonderful crunch, enhancing the nutty flavors of the cake.
- Sparkling Wine: A bubbly, fruity Prosecco complements the cake’s richness while adding a celebratory flair to your gathering.
- Citrusy Sorbet: Opt for a lemon or lime sorbet to cleanse the palate and provide a zesty kick alongside each sweet morsel.
- Chilled White Wine: A chilled Riesling brings notes of sweetness that sync perfectly with the cake’s nutty and creamy elements, creating a harmonious pairing.
- Chocolate Ganache: For the chocolate lovers, a drizzle of rich ganache can add depth and decadence to every slice of your Pistachio Mascarpone Layer Cake.
Expert Tips for Pistachio Mascarpone Layer Cake
-
Room Temperature Eggs: Ensure your eggs are at room temperature before using them; this helps create a smoother batter that incorporates air more efficiently.
-
Don’t Overmix: Be careful when folding in dry ingredients; overmixing can lead to a dense texture, ruining the lightness of your Pistachio Mascarpone Layer Cake.
-
Chill for Best Flavor: Refrigerating the assembled cake for at least 2 hours not only helps the frosting set but enhances the overall flavor as the ingredients meld together.
-
Precise Baking Time: Check cakes at the lower end of the baking time (22 minutes); overbaking can dry out the layers, affecting the moistness you desire.
-
Finely Ground Pistachios: Ensure the pistachios are ground finely enough to blend seamlessly into the batter, providing that lovely nutty flavor without chunky bits.
-
Whip Cream Wisely: When whipping heavy cream, stop when soft peaks form—continue whipping beyond can lead to a dense frosting.
How to Store and Freeze Pistachio Mascarpone Layer Cake
Fridge: Store leftover cake in an airtight container for up to 3 days. This keeps the Pistachio Mascarpone Layer Cake moist and fresh for your sweet cravings!
Freezer: For longer storage, wrap the cake tightly in plastic wrap and aluminum foil. It can be frozen for up to 3 months. Thaw in the fridge overnight before serving.
Reheating: If you prefer your cake slightly warmed, you can microwave a slice for about 10-15 seconds. Be careful not to overheat, or the frosting may melt.
Airtight Storage: Always ensure the cake is well-wrapped to prevent freezer burn and maintain its delicious flavor and texture when stored.

Pistachio Mascarpone Layer Cake Recipe FAQs
How do I select ripe pistachios?
Absolutely! When choosing pistachios, look for shells that are partially open, indicating that they are fresh and ready to enjoy. Avoid any nuts with dark spots or signs of being rancid, as these can affect the flavor of your cake. For the best results, go for high-quality shelled pistachios that are bright green and have a rich aroma.
What is the best way to store leftover Pistachio Mascarpone Layer Cake?
You can store any leftover cake in an airtight container in the fridge for up to 3 days. This helps preserve its moistness and flavor. Ensure it’s completely cooled before sealing it, to prevent condensation. If you have multiple layers, consider placing parchment paper between them to avoid sticking.
Can I freeze my Pistachio Mascarpone Layer Cake?
Certainly! To freeze the cake, wrap each layer tightly in plastic wrap, and then in aluminum foil to prevent freezer burn. You can freeze the layers for up to 3 months. When you’re ready to serve, thaw the cake in the fridge overnight. This keeps the texture light and fluffy while allowing flavors to develop as it warms up.
What if my cake layers are too dense or tough?
Very! If your cake layers turn out dense, it may be because of overmixing the batter when combining wet and dry ingredients. Mix just until the flour disappears. Another tip is to ensure your leavening agents are fresh; expired baking powder won’t provide the lift you need. Lastly, make sure your eggs are at room temperature, as this helps create a lighter crumb.
Is this Pistachio Mascarpone Layer Cake suitable for those with nut allergies?
The more the merrier! However, this cake is not suitable for those with nut allergies due to the pistachios. For a nut-free alternative, consider using a blend of seeds like sunflower seeds or creating a different flavor, such as a vanilla or chocolate mascarpone layer cake instead, which can still provide a delightful treat for everyone.
How do I make the frosting fluffier?
For a fluffier mascarpone frosting, ensure your heavy cream is cold before whipping; it should only take about 3-5 minutes to reach soft peaks. Gradually add the mascarpone cheese and powdered sugar once the cream is starting to thicken. This method allows for a light and airy frosting that pairs wonderfully with the cake layers!
Pistachio Mascarpone Layer Cake
Ingredients
Equipment
Method
- Begin by pulsing shelled pistachios in a food processor until finely ground.
- Combine the ground pistachios with all-purpose flour, baking powder, and salt in a mixing bowl.
- In a large mixing bowl, beat softened butter and sugar until light and fluffy.
- Add eggs one at a time, then mix in milk, oil, and vanilla extract.
- Gently fold in the dry ingredient mixture until no visible streaks remain.
- Divide the batter evenly among three greased 8-inch round cake pans.
- Bake at 350°F (175°C) for 22-25 minutes, or until a toothpick inserted comes out clean.
- Cool the layers in the pans for about 10 minutes before transferring to a wire rack.
- Whip heavy cream until soft peaks form.
- Gradually mix in mascarpone cheese and powdered sugar until smooth.
- Layer the cake starting with one layer, spread with mascarpone cream, and repeat.
- Frost the top and sides generously with the remaining cream.
- Chill in the refrigerator for at least 2 hours before serving.
Leave a Reply