
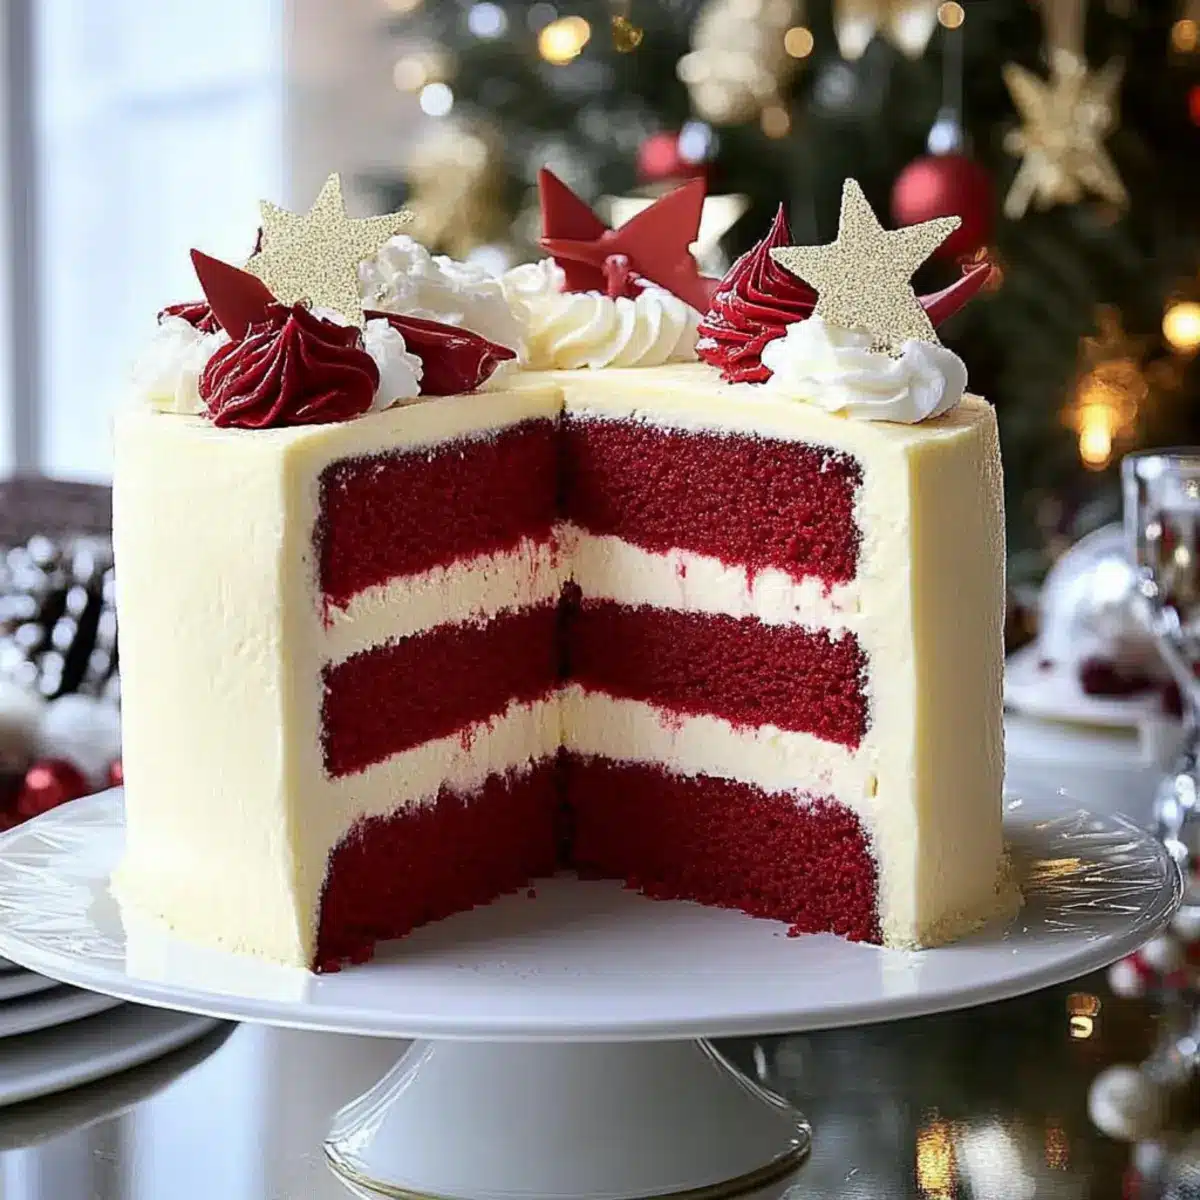
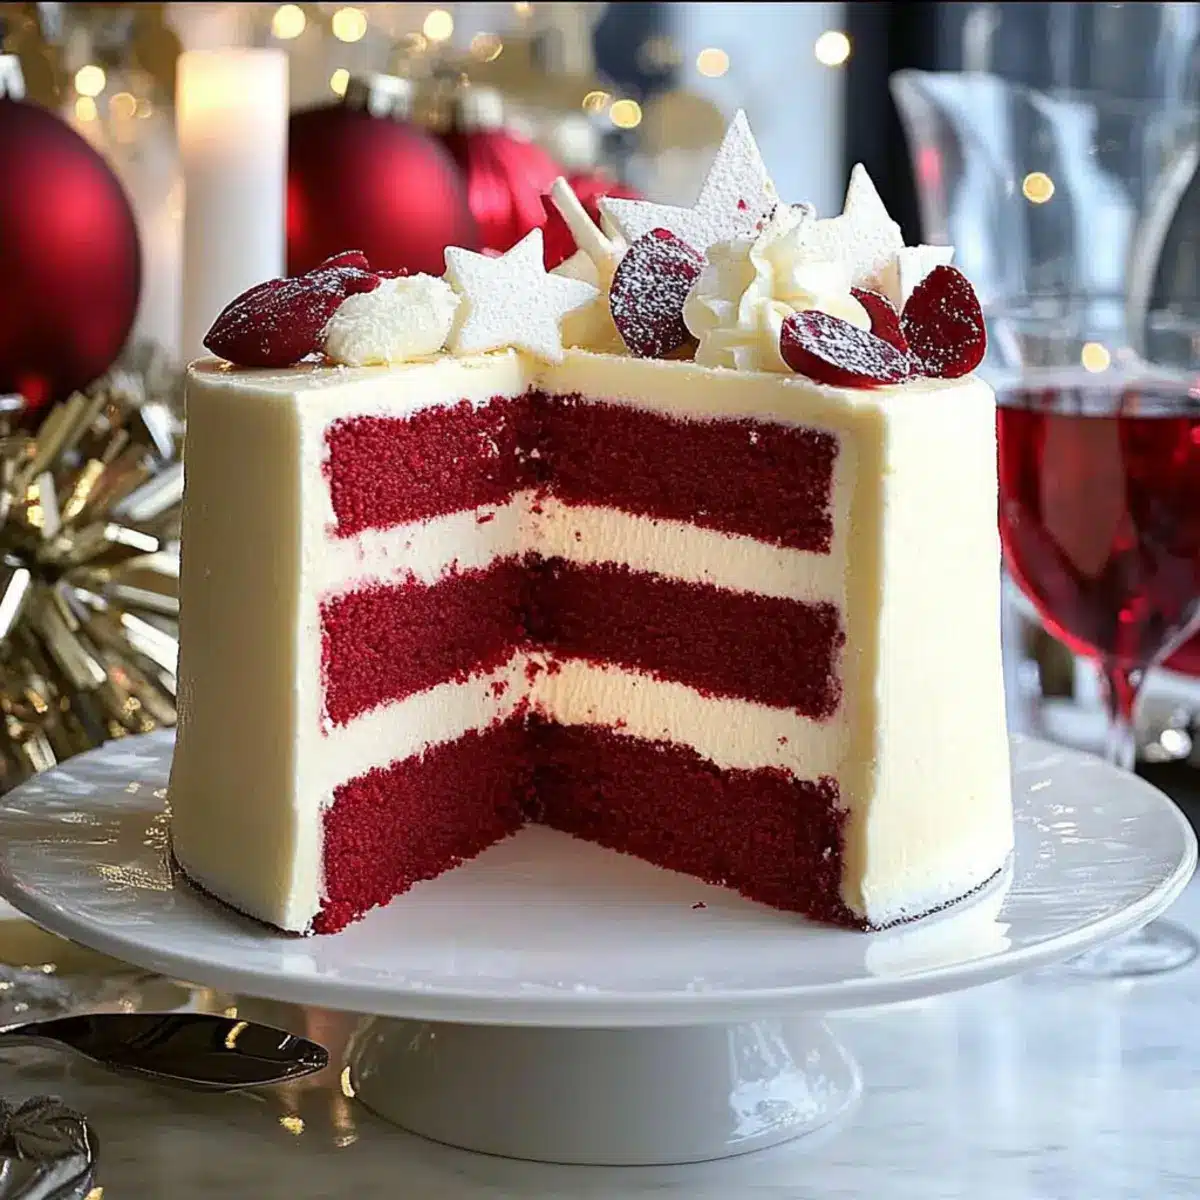
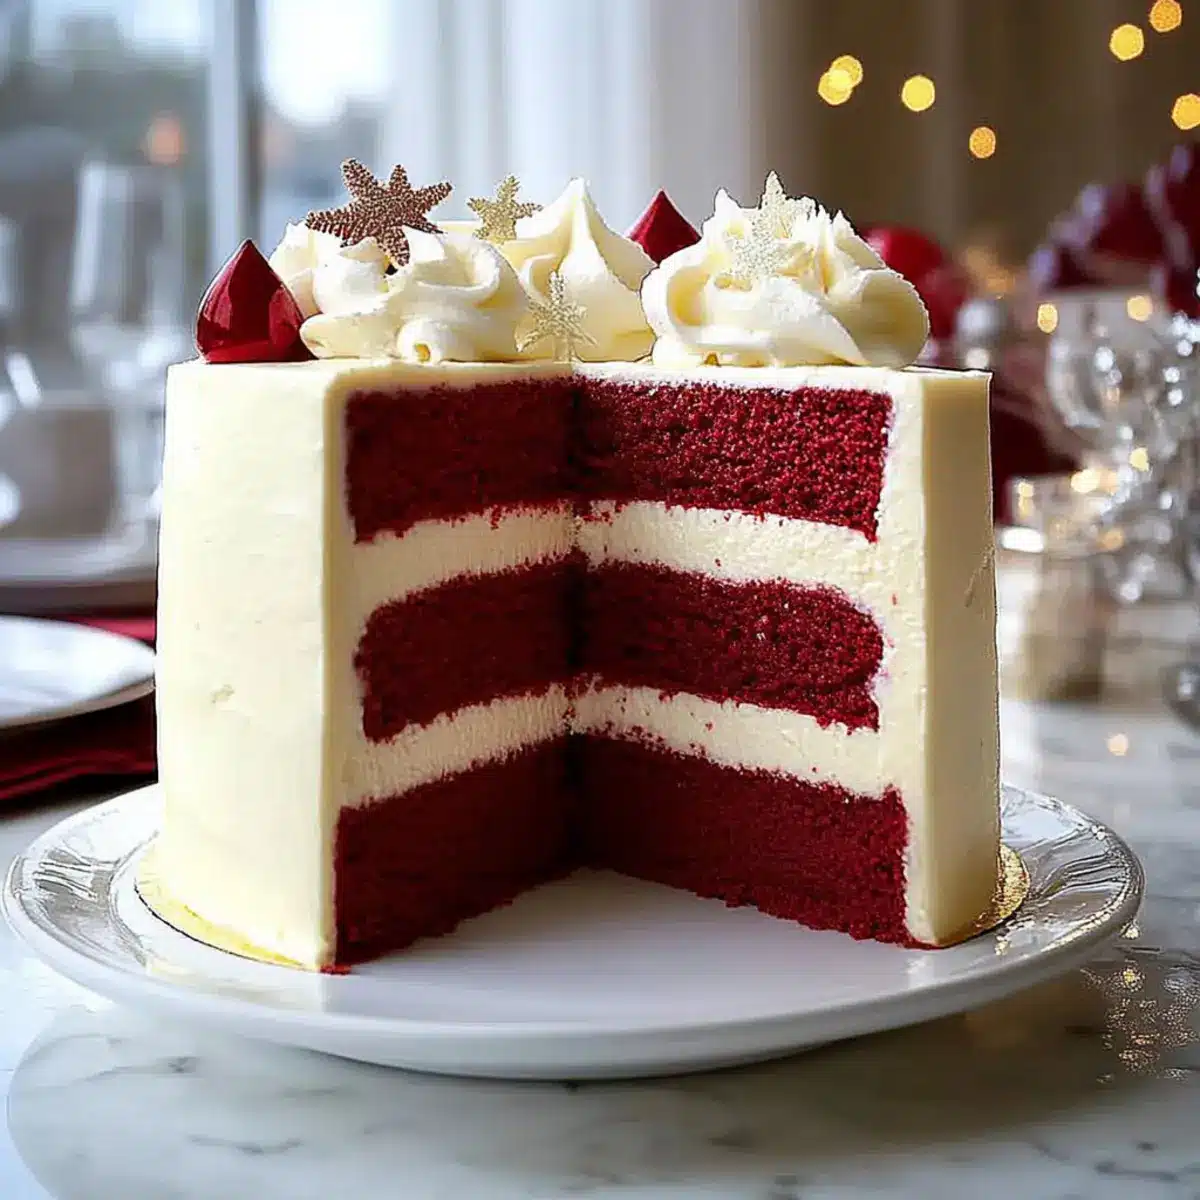
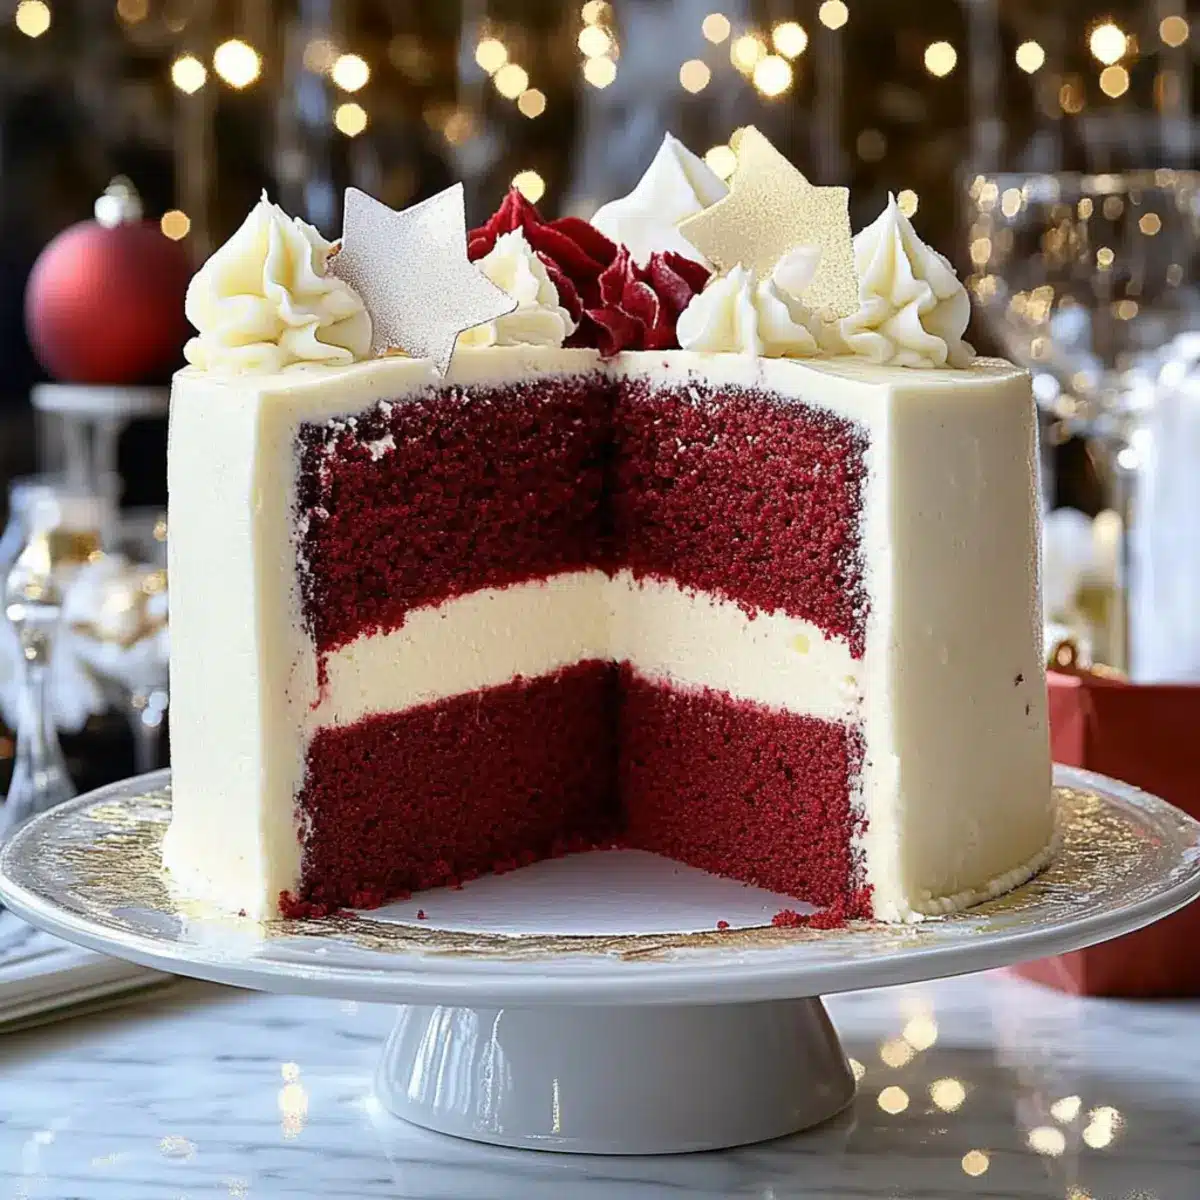
As I stepped into the kitchen, the hustle of holiday preparations filled the air, and my eyes landed on a recipe that promised to be the pièce de résistance of our festive feast: Christmas Red Velvet Cheesecake. This showstopper, with its vibrant red and creamy white layers, is more than just a dessert; it’s a celebration in itself! Not only does it make for an impressive centerpiece that will steal the show at any gathering, but it brings the delightful flavors of classic red velvet cake blended perfectly with rich cheesecake. Plus, the best part? This indulgent treat comes together quickly, so you can focus on what really matters during the holidays – making cherished memories with loved ones. Curious about how to create this festive delight for your own celebrations? Let’s dive in!
Why is this cheesecake a holiday favorite?
Eye-Catching Appeal: The vibrant red and white layers make this cheesecake a stunning centerpiece for any holiday spread.
Indulgent Flavors: Combining classic red velvet with rich cheesecake layers creates a dessert that is both luxurious and comforting.
Quick to Prepare: Despite its showstopping looks, this recipe is surprisingly easy and perfect for busy holiday bakers.
Versatile Decorations: You can tailor your presentation with festive garnishes like cranberries or mint leaves, enhancing its festive charm.
Make Ahead Friendly: Prepare this cheesecake up to two days in advance, allowing you to enjoy stress-free holiday gatherings.
This Christmas Red Velvet Cheesecake is truly the dessert everyone will be asking for, much like our delightful Millionaires Cheesecake Indulge or classic Louisiana Red Beans.
Christmas Red Velvet Cheesecake Ingredients
For the Cake Layers
• All-Purpose Flour – Provides structure; use gluten-free flour for a delightful alternative.
• Unsweetened Cocoa Powder – Adds deep chocolate flavor; opt for high-quality cocoa for the best results.
• Baking Powder & Baking Soda – Essential leaveners; do not substitute or omit as it affects the cake’s texture.
• Salt – Enhances flavor and balances the sweetness.
• Granulated Sugar (2x) – Sweetness for both cake and frosting; substitute some with brown sugar for a richer taste.
• Vegetable Oil – Keeps the cake moist; melted coconut oil or applesauce can be used instead for a lighter option.
• Buttermilk – Adds tanginess; make homemade buttermilk with milk mixed with vinegar or lemon juice.
• Large Eggs (3x) – Binds everything together; for a vegan version, consider using egg substitutes.
• Red Food Coloring – Creates that iconic red hue; gel food coloring is recommended for vibrant color without texture change.
• Vanilla Extract – Adds depth of flavor; no substitutes needed.
• White Vinegar – Reacts with baking soda for better leavening; lemon juice can work as a substitute.
For the Cheesecake Filling
• Cream Cheese (2x) – Main ingredient for the filling, ensuring a rich and creamy texture.
• Sour Cream – Adds tanginess; Greek yogurt makes for a lighter substitute.
For the Frosting
• Unsalted Butter – Used for creaminess in frosting; margarine can replace for a dairy-free option.
• Powdered Sugar – Sweetens and thickens your frosting; no substitutes necessary.
This Christmas Red Velvet Cheesecake is a delightful showstopper that showcases the perfect blend of textures and flavors, making your holiday gatherings unforgettable!
Step‑by‑Step Instructions for Christmas Red Velvet Cheesecake
Step 1: Preheat and Prepare
Preheat your oven to 350°F (175°C). Grease two 9-inch round cake pans and line the bottoms with parchment paper to ensure easy release. This step sets the stage for your Christmas Red Velvet Cheesecake by ensuring even baking and a perfect foundation for layering.
Step 2: Whisk Dry Ingredients
In a large mixing bowl, whisk together 2 cups of all-purpose flour, 1 tablespoon of unsweetened cocoa powder, 1 teaspoon of baking powder, 1 teaspoon of baking soda, and ½ teaspoon of salt. This step not only mixes the dry ingredients but also aerates the flour, ensuring a fluffy texture that will be essential for your red velvet layers.
Step 3: Combine Wet Ingredients
In a separate bowl, mix together 1¾ cups of granulated sugar, 1 cup of vegetable oil, 1 cup of buttermilk, 3 large eggs, 2 tablespoons of red food coloring, 2 teaspoons of vanilla extract, and 1 teaspoon of white vinegar until well combined. This blend creates the rich moisture and iconic red color of your cake layers, paving the way for the cheesecake topping.
Step 4: Merge Mixtures
Gradually fold the dry ingredients into the wet mixture using a spatula until just combined, being careful not to overmix. You want the batter to remain light and airy, setting the perfect base for your Christmas Red Velvet Cheesecake. The color should be vibrant and the texture smooth.
Step 5: Bake Cake Layers
Divide the batter evenly between the prepared pans and smooth the tops. Place the pans in the preheated oven and bake for 25–30 minutes, or until a toothpick inserted into the center comes out clean. Let the cakes cool in the pans for 10 minutes, then invert onto wire racks to cool completely.
Step 6: Make the Cheesecake Filling
While the cakes cool, prepare the cheesecake filling. Beat 16 oz of cream cheese and 1 cup of granulated sugar in a mixing bowl until smooth. Then, add 1 cup of sour cream and 3 large eggs, blending until the mixture is creamy and well incorporated. This step ensures a rich and velvety cheesecake filling that complements your red velvet layers.
Step 7: Layer and Bake Again
Once the cake layers are completely cooled, place one layer on a baking sheet. Pour the cheesecake filling on top, spreading it evenly. Lay the second cake layer gently atop the cheesecake filling, creating a stunning two-layer structure. Bake in the oven at 325°F (160°C) for 45–50 minutes until the cheesecake is set and the edges are lightly golden.
Step 8: Prepare the Frosting
In a mixing bowl, whip together 8 oz of cream cheese and ½ cup of unsalted butter until fluffy. Gradually add 4 cups of powdered sugar and 1 teaspoon of vanilla extract, mixing until you achieve a smooth, creamy frosting. This step enhances the richness and adds a delightful sweetness to your Christmas Red Velvet Cheesecake.
Step 9: Frost and Chill
Once the cheesecake is completely cooled, generously spread the cream cheese frosting over the top and sides of the layered cake. Chill the entire cheesecake in the refrigerator for at least 2 hours, allowing the flavors to meld and the frosting to set. This step ensures that your dessert is not only beautifully presented but also perfectly chilled for serving.
Step 10: Serve and Decorate
Once set, slice the Christmas Red Velvet Cheesecake and serve on festive plates. Consider decorating with seasonal garnishes such as fresh cranberries or mint leaves for an extra touch of holiday cheer. This final presentation elevates your dessert, making it the centerpiece of your festive gathering!
Expert Tips for Christmas Red Velvet Cheesecake
-
Room Temperature Ingredients: Ensure all ingredients like cream cheese and eggs are at room temperature. This helps create a smoother batter and cheesecake filling.
-
Gentle Mixing: Don’t overmix the batter when combining wet and dry ingredients. This can lead to a dense cake instead of the light, airy texture desired in a Christmas Red Velvet Cheesecake.
-
Chill Time Matters: Allow the cheesecake to chill completely before adding frosting. This step ensures the frosting spreads smoothly and keeps its shape, enhancing the overall presentation.
-
Check for Doneness: Use a toothpick to check the cake layers; they should come out clean. Baking just until set prevents a dry texture.
-
Decoration Ideas: Get creative with toppings! Fresh cranberries and mint leaves not only add color but also elevate the festive look of your cheesecake.
-
Make-ahead Advantage: Preparing the cake layers and cheesecake filling a day in advance saves time. Just frost before serving for a stress-free holiday treat!
What to Serve with Christmas Red Velvet Cheesecake
Indulging in a slice of Christmas Red Velvet Cheesecake is just the start of a festive culinary adventure! Let’s explore delightful pairings that will elevate your holiday feast.
-
Spiced Apple Cider: Warm, aromatic cider adds seasonal spice notes that perfectly contrast the cheesecake’s rich flavors. It invites cozy conversations by the fire.
-
Peppermint Hot Chocolate: The creamy, minty warmth of hot chocolate creates a delightful balance with the cheesecake’s tanginess while keeping the holiday spirit alive.
-
Gingerbread Cookies: The sweet, spicy crunchiness of homemade gingerbread cookies adds texture and complements the cake’s lush creaminess beautifully.
-
Sour Cream and Chive Mashed Potatoes: These creamy, savory potatoes offer a rich contrast to the dessert, serving as a hearty base for the overall meal.
-
Festive Salad: A fresh salad with mixed greens, pomegranates, and a light vinaigrette provides a crisp, refreshing gust that cuts through the cheesecake’s richness.
-
Red Wine: A light-bodied red wine such as Pinot Noir echoes the rich red hues of the cheesecake while its natural acidity refreshes the palate.
-
Chocolate Ganache Drizzle: For those who crave extra indulgence, a drizzle of ganache on your slice takes the flavor combination to a new, luxurious level.
-
Vanilla Ice Cream: This classic pairing adds creaminess and temperature contrast, enhancing every bite of the cheesecake while making it a comforting treat.
-
Caramel Sauce: Sweet, gooey caramel adds another layer of decadence to your cheesecake, beautifully harmonizing with both its flavors and textures.
-
Cranberry Orange Scones: These light, zesty scones will add a touch of brightness to your gathering, making each plate a perfect holiday celebration.
Christmas Red Velvet Cheesecake Variations
Feel free to customize your festive dessert for an even more memorable experience!
- Gluten-Free: Substitute all-purpose flour with a gluten-free flour blend for a delicious alternative that everyone can enjoy.
- Vegan Friendly: Use egg substitutes and coconut cream instead of cream cheese for a plant-based version that doesn’t skimp on flavor.
- Chocolate Lover’s Delight: Add a chocolate ganache topping made from dark chocolate and heavy cream for an extra luxurious finish.
- Spiced Sensation: Incorporate a pinch of cinnamon or nutmeg to the cake batter for a warm, holiday-friendly flavor that adds depth.
- Fruit Flavor Boost: Mix in some fresh raspberries or strawberries into the cheesecake layer for a fruity twist that complements the red velvet beautifully.
- Different Color Themes: Try other shades of gel food coloring for a unique festive look, like green for a Christmas twist.
- Nuts for Crunch: Crushed walnuts or pecans can be folded into the cheesecake filling for a delightful texture contrast.
- Zesty Cream Cheese: Add a teaspoon of orange or lemon zest to your frosting for a citrusy note that brightens the rich flavors.
These variations can elevate your Christmas Red Velvet Cheesecake experience. For more delicious ideas, check out our enchanting Strawberry Crunch Cheesecake or indulge in the classic Millionaires Cheesecake Indulge. Enjoy the delicious journey of creating your holiday masterpiece!
How to Store and Freeze Christmas Red Velvet Cheesecake
Fridge: Store any leftover Christmas Red Velvet Cheesecake in an airtight container or tightly wrapped in plastic wrap for up to 5 days. This keeps the cheesecake fresh and delicious.
Freezer: If you want to store the cheesecake for a longer period, wrap it tightly in plastic wrap and then in aluminum foil. It can be frozen for up to 2 months.
Thawing: To enjoy, simply transfer the cheesecake to the fridge a day before serving to allow it to thaw slowly. This helps preserve its creamy texture.
Reheating: There’s no need to reheat; serve slices chilled, and they’ll still be rich and indulgent!
Make Ahead Options
This Christmas Red Velvet Cheesecake is perfect for busy home cooks looking to streamline holiday meal preparations! You can bake the cake layers up to 24 hours in advance; once cooled, tightly wrap them in plastic wrap to maintain moisture. Additionally, you can prepare the cheesecake filling and store it in the refrigerator for up to 2 days—just remember to cover it well. When ready to assemble, layer the cheesecake filling between the cake layers, bake again, and then chill for at least 2 hours before serving. This way, you can enjoy a delightful, stress-free celebration with all the flavors of a homemade Christmas Red Velvet Cheesecake, just as delicious as if made fresh that day!
Christmas Red Velvet Cheesecake Recipe FAQs
How do I choose the right ripeness of ingredients for this cheesecake?
Absolutely! When selecting your ingredients, especially for the buttermilk, ensure it is fresh and not past its expiration date, as this can affect the taste. For eggs, choose large eggs that are at room temperature; this helps achieve a smoother batter. Also, opt for high-quality unsweetened cocoa powder, as the flavor can significantly impact the cheesecake’s richness.
What is the best way to store leftover Christmas Red Velvet Cheesecake?
Very! To keep your cheesecake fresh, store any leftovers in an airtight container or wrap it tightly with plastic wrap. It will stay delicious for up to 5 days in the refrigerator. Make sure it’s fully cooled before storing to prevent any condensation.
Can I freeze Christmas Red Velvet Cheesecake?
Absolutely! To freeze your cheesecake, wrap it tightly in plastic wrap and then cover it with aluminum foil. This will protect it from freezer burn. It can be frozen for up to 2 months. When you’re ready to enjoy it, simply transfer it to the fridge the day before serving to allow it to thaw slowly while keeping that creamy texture intact.
What should I do if my cheesecake cracks while baking?
If your cheesecake cracks, don’t worry! It’s a common occurrence. To prevent this next time, make sure to bake it at a lower temperature and avoid opening the oven door frequently. Another tip is to bake it in a water bath (bain-marie) to maintain consistent moisture and temperature, which helps with even baking.
Are there any dietary considerations I should be aware of regarding this cheesecake?
Absolutely! If you’re making this dessert for guests with dietary concerns, you can substitute ingredients like eggs with a vegan alternative (like applesauce or flaxseed meal mixed with water) for a dairy-free version. Additionally, for gluten-free options, using a gluten-free flour blend will work great in the cake layers. Always check food labels for allergies, ensuring that everyone can enjoy this festive treat.
How long can I prepare this cheesecake in advance before serving?
Very! This cheesecake can be made up to 2 days ahead of time. Just make sure to store it in the refrigerator covered tightly with plastic wrap. This not only saves you time on the day of your gathering but also allows the flavors to meld beautifully!
Christmas Red Velvet Cheesecake: Your Festive Showstopper!
Ingredients
Equipment
Method
- Preheat your oven to 350°F (175°C). Grease two 9-inch round cake pans and line the bottoms with parchment paper.
- In a large mixing bowl, whisk together the dry ingredients: all-purpose flour, cocoa powder, baking powder, baking soda, and salt.
- In a separate bowl, mix together the wet ingredients: granulated sugar, vegetable oil, buttermilk, eggs, red food coloring, vanilla extract, and white vinegar.
- Gradually fold the dry ingredients into the wet mixture until just combined.
- Divide the batter evenly between the prepared pans and bake for 25–30 minutes or until a toothpick comes out clean.
- While the cakes cool, prepare the cheesecake filling by beating cream cheese and sugar until smooth, then add sour cream and eggs.
- Once the cake layers are cool, layer one on a baking sheet, pour the cheesecake filling on top, and place the second layer on top.
- Bake at 325°F (160°C) for 45–50 minutes until the cheesecake is set and edges are lightly golden.
- Whip together cream cheese and butter for frosting, then gradually add powdered sugar and vanilla extract until smooth.
- Generously spread the frosting over the cooled cheesecake and chill for at least 2 hours before serving.
- Slice and serve, decorating with cranberries or mint leaves as desired.
Leave a Reply