
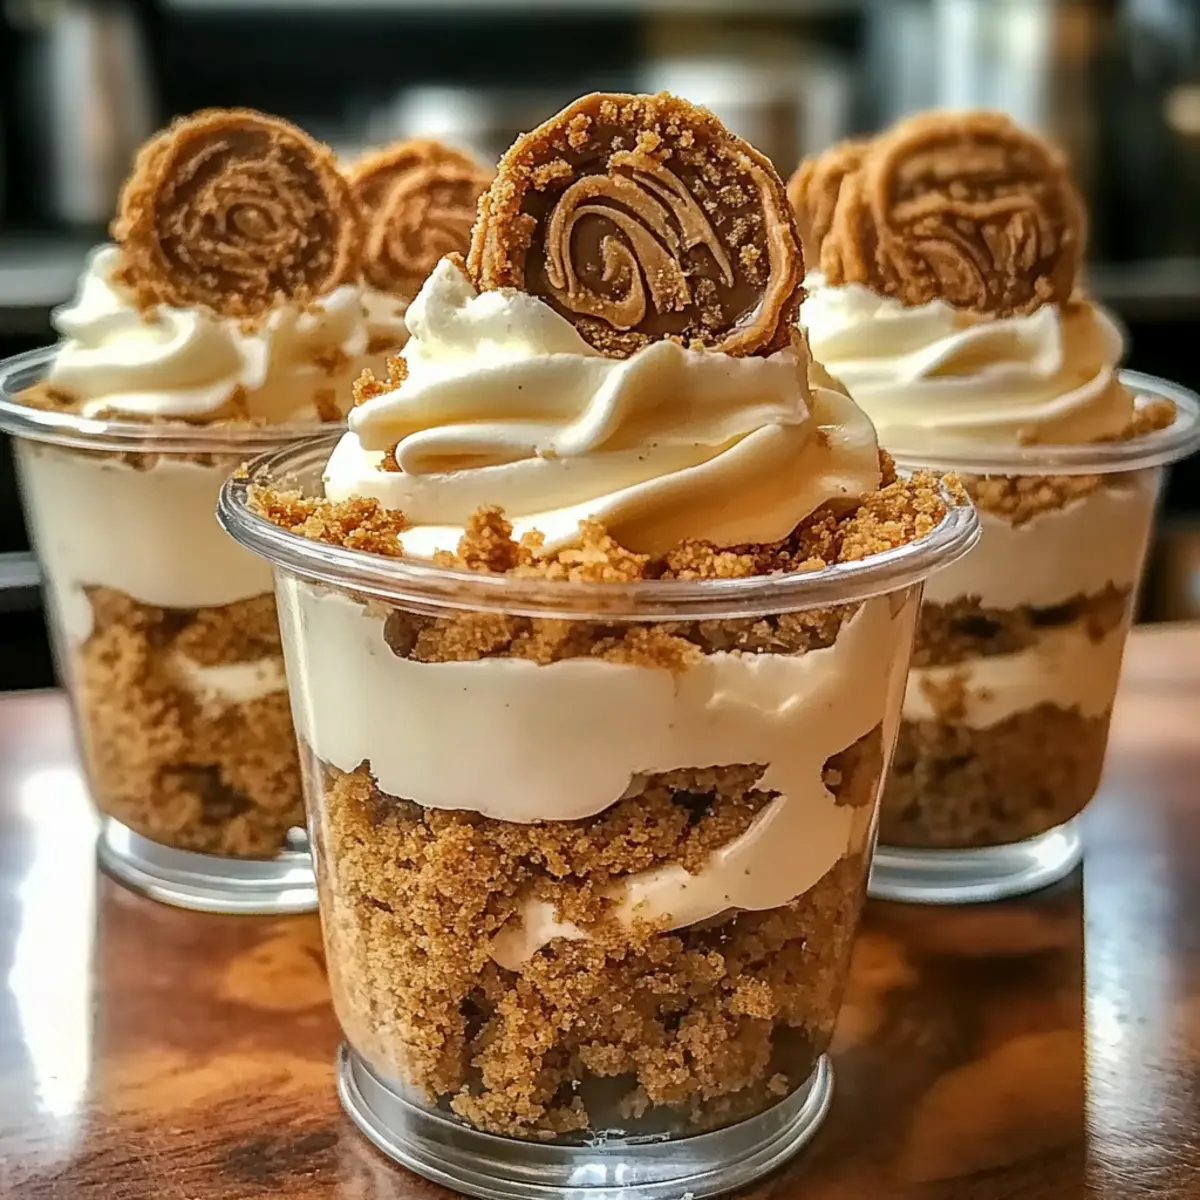
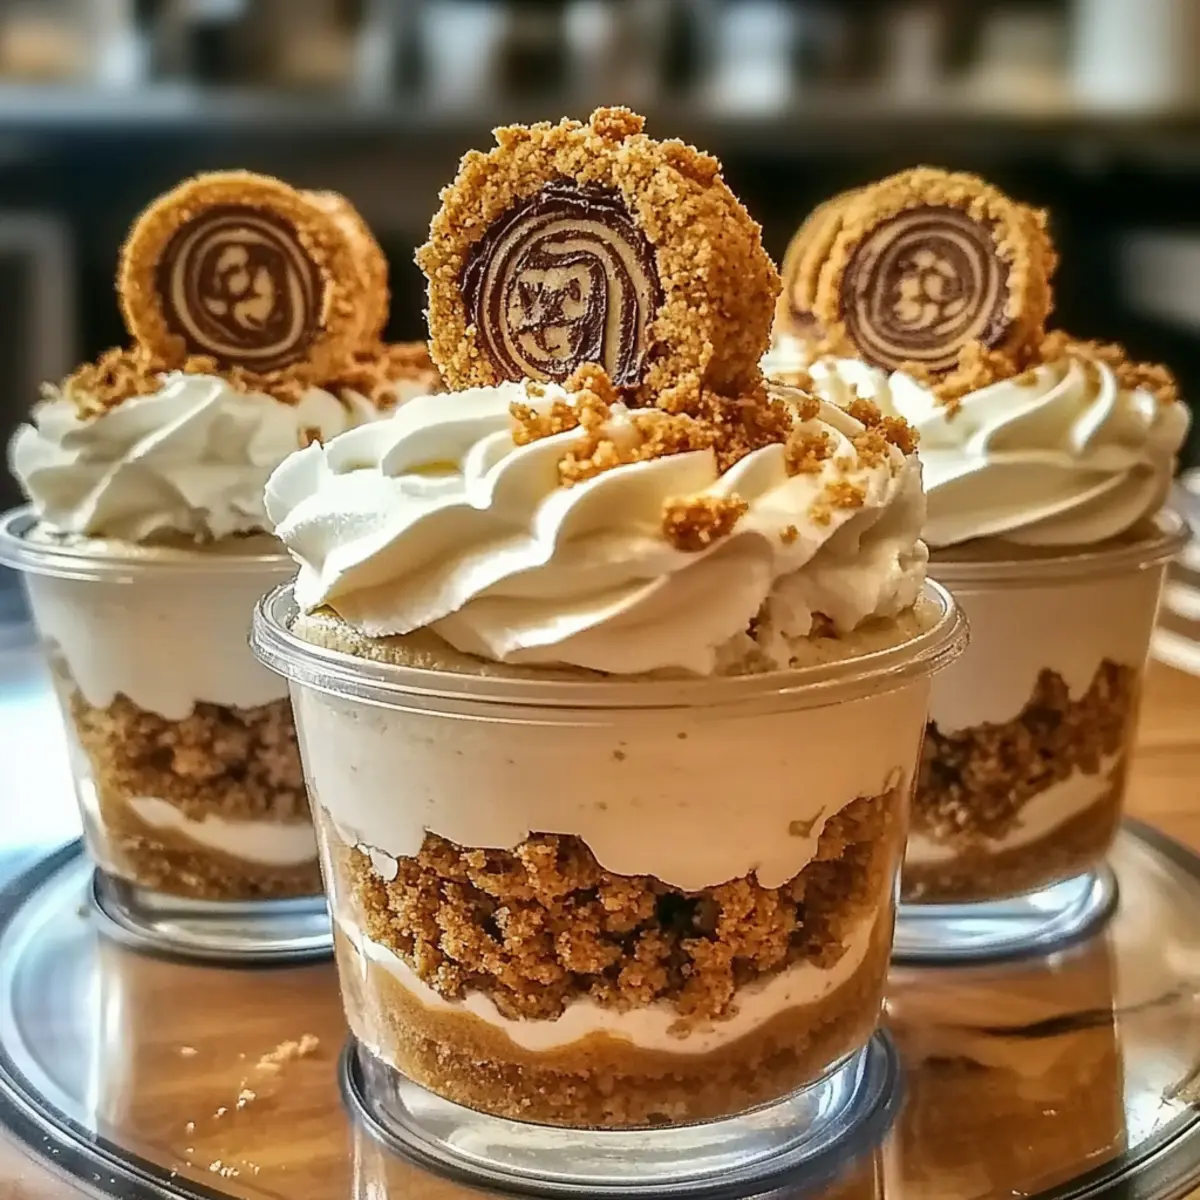
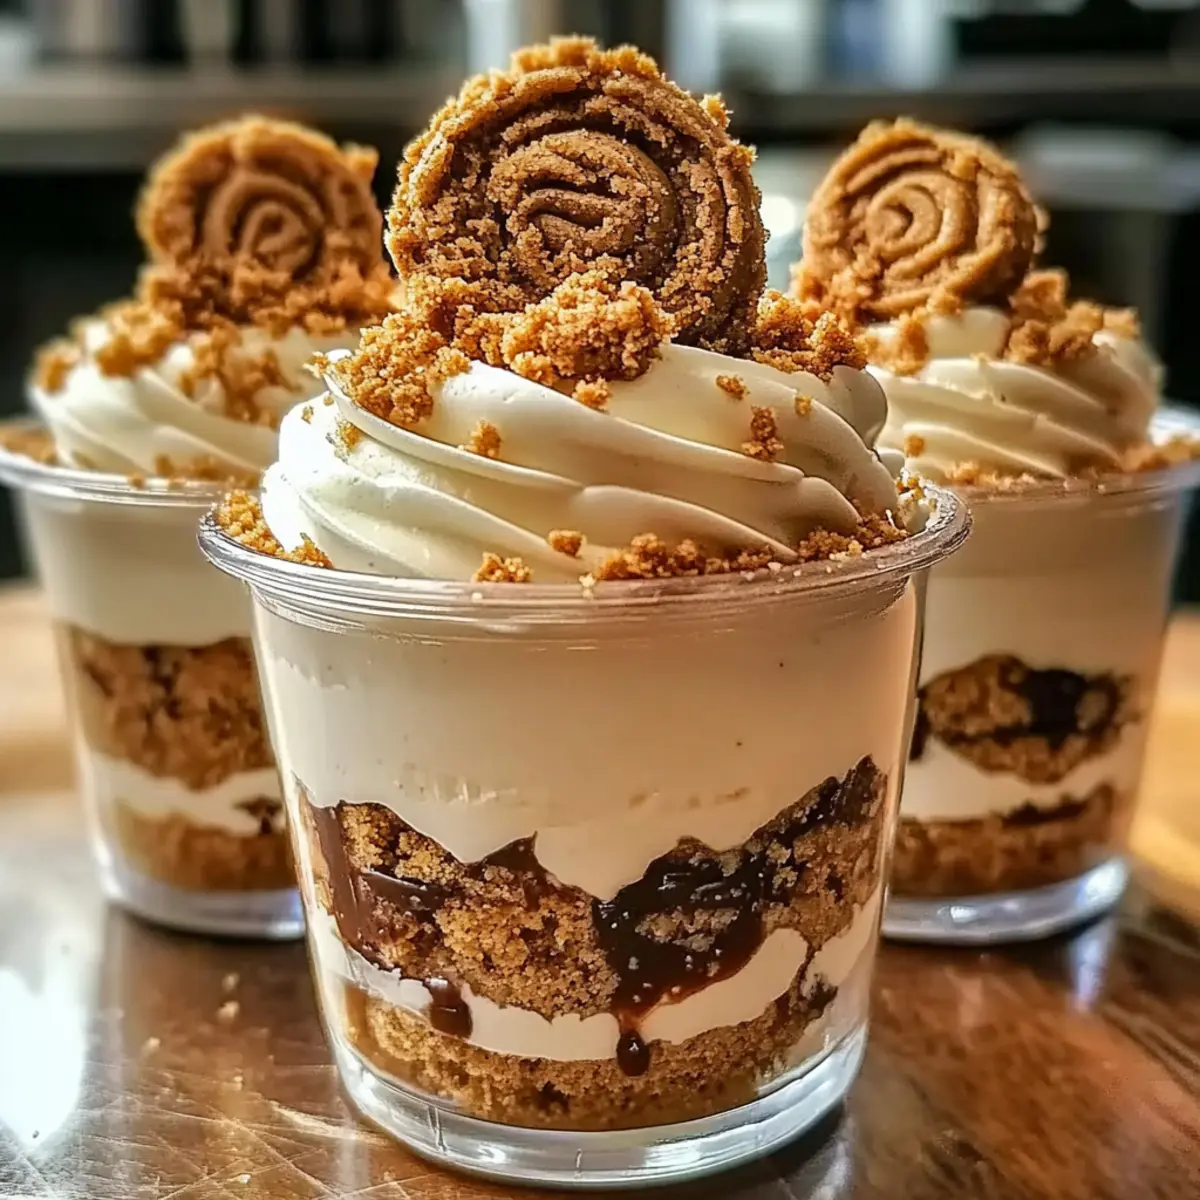
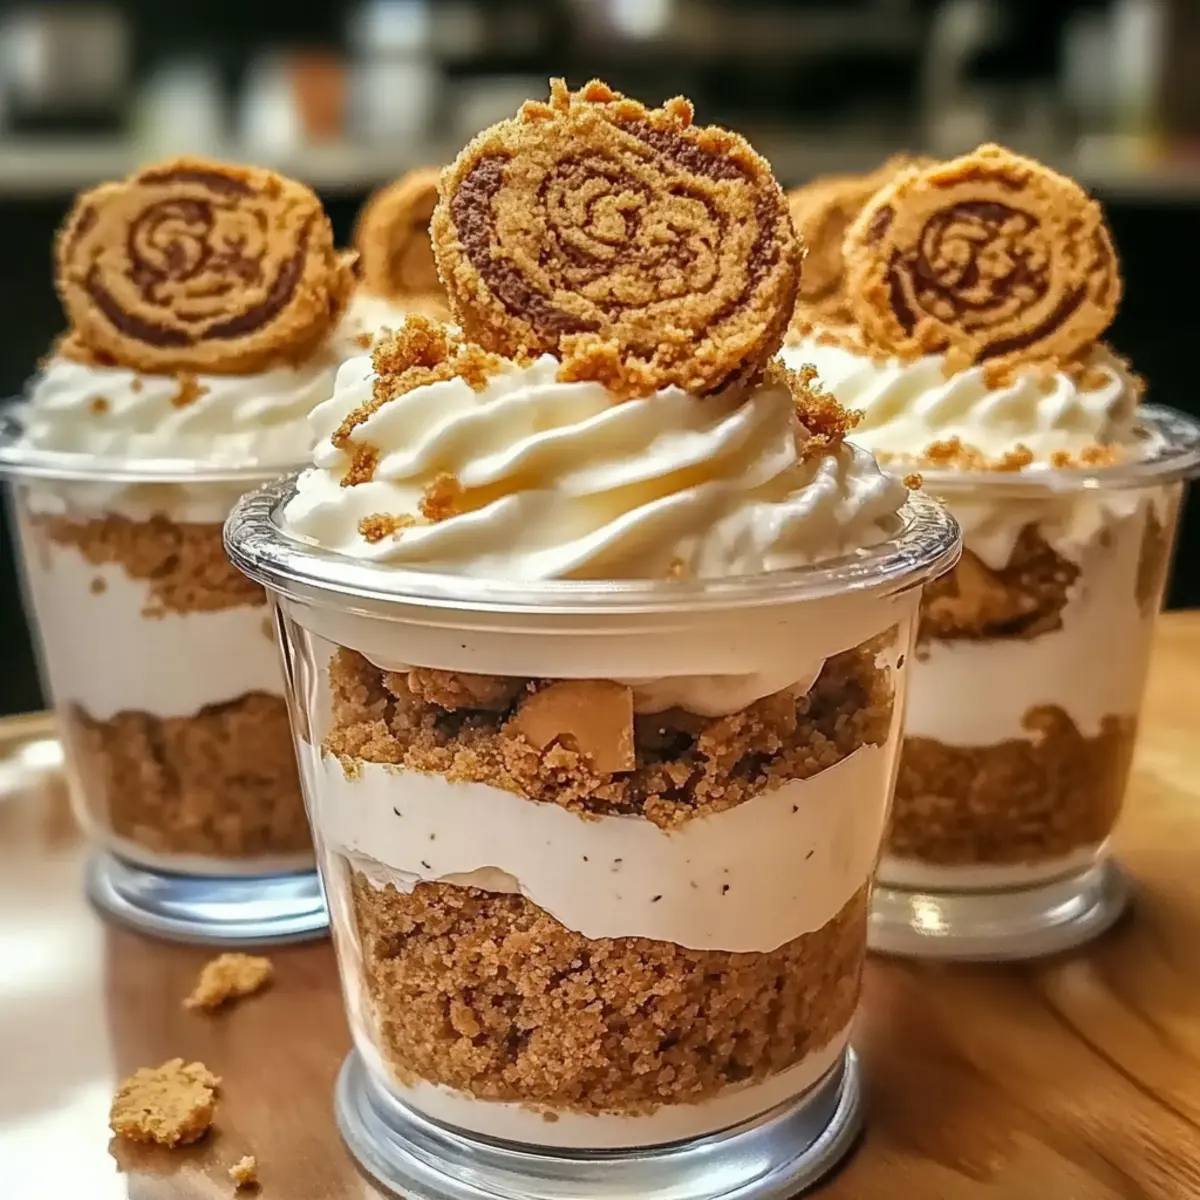
As I stood in my cozy kitchen, the tantalizing aroma of cookie butter wafted through the air, instantly taking me back to that blissful first bite of one of my favorite desserts. Enter the No-Bake Cookie Butter Cheesecake Cups—a simple yet irresistibly delightful creation that makes dessert feel like a special occasion, even on a regular Tuesday night. These little cups of joy come together effortlessly, boasting a crunchy cookie crumb base and a creamy, airy cheesecake filling that’s drizzled with extra cookie butter goodness. Not only are they an easy dessert that requires no baking, but they also offer a fantastic way to impress family and friends, turning any gathering into a celebration. Are you ready to indulge in this layered, dreamy treat? Let’s get started!
What makes these cheesecake cups special?
Flavor Explosion: The combination of cookie butter and cream cheese creates a delightful, rich flavor profile that will have everyone asking for seconds.
No-Bake Simplicity: With just a few easy steps, you’ll have a stunning dessert ready without ever turning on the oven—ideal for warm days or busy nights!
Layered Delight: Each cup features an irresistible layer of crunchy cookie crumb, creamy filling, and a heavenly drizzle of cookie butter, making every bite a taste sensation.
Crowd-Pleasing Treat: Perfect for gatherings, these individual cups are not only visually stunning but also thoroughly shareable. Pair them with fresh fruit or hot fudge for even more indulgence!
Make Ahead Magic: Prepare them in advance—the flavors only get better with time, and they can be stored easily for up to three days. You’ll love how hassle-free dessert can be!
Cookie Butter Cheesecake Cups Ingredients
-
For the Crust
• Biscoff or Speculoos Cookie Crumbs – Adds sweetness and structure to the crust; substitute with graham cracker or gingersnap crumbs if preferred.
• Melted Butter – Binds the cookie crumbs together for a stable crust; essential for crust formation, so no substitutes here. -
For the Cheesecake Filling
• Cream Cheese (8 oz) – Provides a rich, creamy base; make sure it’s softened for easy mixing.
• Powdered Sugar (¾ cup) – Sweetens the cream cheese mixture; granulated sugar can be used, but powdered achieves a smoother texture.
• Cookie Butter (½ cup + extra for drizzling) – The main flavor component that adds warmth and spice; cookie butter is recommended for the best taste.
• Vanilla Extract (1 tsp) – Enhances the overall flavor profile; opt for pure extract for optimal results.
• Heavy Whipping Cream (1 cup) – Creates a light, airy mousse texture when whipped; avoid low-fat alternatives for the best whipping results.
These luscious Cookie Butter Cheesecake Cups are a fantastic way to treat yourself and your loved ones without any baking fuss!
Step‑by‑Step Instructions for Cookie Butter Cheesecake Cups
Step 1: Prepare the Crust
Begin by combining 1 cup of Biscoff or speculoos cookie crumbs with ½ cup of melted butter in a medium bowl. Use a fork to mix until the crumbs are fully coated and resemble wet sand. Spoon this mixture evenly into the bottoms of your serving cups, pressing it down firmly to create a solid crust layer. Set the cups aside as you prepare the filling.
Step 2: Whip the Cream
In a separate large mixing bowl, pour in 1 cup of heavy whipping cream. Using an electric mixer, whip the cream on medium-high speed until soft peaks form, which should take about 3-4 minutes. This fluffy cream will add an airy texture to your Cookie Butter Cheesecake Cups, so be careful not to overwhip. Once ready, gently set it aside while you mix the other ingredients.
Step 3: Mix the Cheesecake Filling
In another large bowl, place 8 oz of softened cream cheese, ¾ cup of powdered sugar, ½ cup of cookie butter, and 1 tsp of vanilla extract. Beat the mixture with an electric mixer on medium speed until it reaches a smooth and creamy consistency, about 2-3 minutes. Make sure there are no lumps, creating a luscious filling for your cheesecake cups that blends beautifully with the cookie butter flavor.
Step 4: Combine the Mixtures
Gently fold the whipped cream into the cream cheese mixture using a silicone spatula. Start by adding one-third of the whipped cream to lighten the filling, then gradually incorporate the remaining whipped cream. Avoid overmixing to keep the filling fluffy. This creamy blend will form the decadent cheesecake layer in your Cookie Butter Cheesecake Cups.
Step 5: Layer the Filling
Spoon the cheesecake filling over the cookie crumb layers in each cup, filling them about halfway. Drizzle some melted cookie butter on top of the cheesecake layer for a flavorful surprise. The contrast of textures and the sweet spice of the cookie butter will enhance the indulgence of these cups, creating an unforgettable dessert experience.
Step 6: Complete the Layers
Repeat the layers by adding another spoonful of cookie crumb mixture, followed by more cheesecake filling, finishing it with a drizzle of melted cookie butter again. Aim to have a lovely layered presentation in each cup. This is where the visual appeal of the Cookie Butter Cheesecake Cups comes to life, making them irresistible.
Step 7: Chill the Cups
Once all the layers are complete, cover the cheesecake cups with plastic wrap and chill them in the refrigerator for at least 1 hour. This chilling time allows the flavors to meld beautifully and the filling to set, ensuring each cup captures the delightful essence of the cookie butter and cream cheese.
Step 8: Garnish and Serve
Before serving, feel free to garnish the tops with extra cookie crumbs or whole cookies for a crunchy finish. Remove the cups from the refrigerator and serve them chilled, showcasing your decadent Cookie Butter Cheesecake Cups. Your friends and family will be delighted with this easy and scrumptious no-bake dessert.
What to Serve with No-Bake Cookie Butter Cheesecake Cups
To create a memorable meal experience, consider these delightful pairings that enhance each bite of cookie butter bliss.
-
Fresh Berries: A mix of strawberries and blueberries offers a refreshing contrast that balances the richness of the cheesecake cups.
-
Spiced Apple Cider: This warm drink complements the cozy flavors of cookie butter, making every dessert moment feel extra special.
-
Chocolate Drizzle Brownies: For chocolate lovers, the fudgy texture of brownies alongside the cheesecake cups amplifies decadent indulgence.
-
Vanilla Ice Cream: A scoop of creamy vanilla ice cream melts perfectly over these dessert cups, adding an inviting chill.
Indulging in these pairings elevates your dessert experience, creating a spread that’s visually stunning and satisfyingly delicious. Each bite will be a perfect combination of textures, flavors, and warmth!
Make Ahead Options
These irresistible Cookie Butter Cheesecake Cups are perfect for meal prep enthusiasts looking to save time on busy days! You can prepare the cookie crumb crust and fill the cups with the cheesecake mixture up to 24 hours in advance; just keep them covered in the refrigerator to maintain their freshness. For even longer storage, feel free to freeze the assembled cups (without toppings) for up to 1 month. When you’re ready to serve, simply let them thaw in the refrigerator overnight and garnish with cookie crumbs before enjoying. With these make-ahead options, you’ll have a stunning dessert waiting for you, making entertaining easy and enjoyable!
Cookie Butter Cheesecake Cups Variations
Feel free to unleash your creativity and make these delightful cheesecake cups your own with these easy variations!
- Spicy Twist: Substitute gingersnap cookie crumbs for the crust adding a warm, spiced flavor that complements the sweetness of the filling beautifully.
- Nutty Blend: Mix cookie butter with a bit of crunchy peanut butter for a nutty, rich taste that adds texture.
- Family-Style Serving: Instead of individual cups, pour the mixture into a larger dish for a crowd-friendly dessert, perfect for potlucks!
- Flavor Infusion: Add a few pinches of cinnamon or nutmeg to the cheesecake filling for an additional layer of warmth and flavor.
- Chocolate Drizzle: Swap melted cookie butter for a rich chocolate sauce drizzled over the top for a delightful chocolatey twist.
- Whipped Topping: Top each cup with a dollop of whipped cream or homemade frosting for extra creaminess and decoration.
- Boozy Addition: For the adults, incorporate a splash of Irish cream liqueur into the cheesecake mixture for an indulgent hit.
These variations let you personalize the experience. Additionally, if you love layered desserts, you might enjoy making the incredibly delicious Strawberry Crunch Cheesecake or try some rich flavors with Millionaires Cheesecake Indulge. No matter how you decide to make these Cookie Butter Cheesecake Cups your own, you’re sure to create a dessert worth indulging in!
Storage Tips for Cookie Butter Cheesecake Cups
-
Fridge: Store cheesecake cups in an airtight container in the refrigerator for up to 3 days. This helps maintain their creamy texture and flavor.
-
Freezer: For longer storage, freeze the cups without toppings for up to 1 month. Thaw in the refrigerator overnight before serving.
-
Reheating: Since these are no-bake treats, they are best enjoyed chilled. Simply remove from the fridge and serve.
-
Garnishing After Freezing: If you decide to freeze the cheesecake cups, wait until you’re ready to serve to add any garnishes like cookie crumbs or whole cookies for the best presentation.
Expert Tips for Cookie Butter Cheesecake Cups
- Quality Ingredients: Choose high-quality cookie butter and cream cheese for the best flavor; it truly makes a difference in these delightful cheesecake cups.
- Whipped Cream Perfection: Make sure your heavy cream is very cold before whipping; this helps achieve maximum fluffiness without overwhipping.
- Layer Carefully: When layering, be gentle to avoid mixing the filling with the crumb base too much; this keeps your Cookie Butter Cheesecake Cups beautifully distinct.
- Chill Time Matters: Allow enough chilling time for the flavors to meld perfectly; chilling for 1-2 hours enhances the taste and texture significantly.
- Avoid Lumps: Ensure your cream cheese is properly softened before mixing; lumpy cream cheese can ruin the silky texture of your filling.
- Make-Ahead Convenience: These cups can be prepared up to 24 hours in advance, making them a fantastic choice for easy entertaining or last-minute gatherings.
Cookie Butter Cheesecake Cups Recipe FAQs
What type of cookie crumbs work best for the crust?
I love using Biscoff or speculoos cookie crumbs for their sweetness and crunch, but you can also substitute with graham cracker or gingersnap crumbs for a different flavor profile. Just ensure they’re finely crushed for a perfect base!
How should I store the cheesecake cups, and how long will they last?
Store your Cookie Butter Cheesecake Cups in an airtight container in the refrigerator for up to 3 days. This keeps them fresh and maintains their creamy texture. If you want to keep them longer, you can freeze them—just be sure to do so without any toppings.
Can I freeze these cheesecake cups, and if so, how?
Absolutely! To freeze your Cookie Butter Cheesecake Cups, prepare them as directed but skip the toppings. Place them in a freezer-safe container and store them for up to 1 month. When you’re ready to enjoy them, simply transfer the cups to the fridge to thaw overnight. Once thawed, add your desired garnishes for serving!
What should I do if my cream cheese mixture is too lumpy?
If you find your cream cheese mixture is lumpy, it’s important to ensure your cream cheese is completely softened before mixing. If lumps persist, don’t fret! You can use a hand mixer to beat it more vigorously until smooth. Alternatively, a mini food processor can help achieve a perfectly velvety filling.
Are there any dietary considerations?
Great question! These Cookie Butter Cheesecake Cups contain dairy and gluten, so they aren’t suitable for those with lactose intolerance or gluten allergies. If you’re looking for alternatives, try using gluten-free cookie crumbs and dairy-free cream cheese. However, the flavor will change slightly, so I recommend testing first!
Can I prepare these cheesecake cups in advance?
Yes! You can make Cookie Butter Cheesecake Cups up to 24 hours in advance. This actually enhances the flavors as they have time to meld together beautifully. Just be sure to chill them in the refrigerator until you’re ready to serve, and add any garnishes right before serving to keep them looking fresh!
Irresistible Cookie Butter Cheesecake Cups to Delight You
Ingredients
Equipment
Method
- Combine 1 cup of cookie crumbs with ½ cup of melted butter in a bowl. Mix until crumbs resemble wet sand and press into cups to form the crust.
- In a mixing bowl, whip 1 cup of heavy cream on medium-high speed until soft peaks form, about 3-4 minutes.
- In another bowl, beat 8 oz of cream cheese, ¾ cup of powdered sugar, ½ cup of cookie butter, and 1 tsp of vanilla extract until smooth, about 2-3 minutes.
- Gently fold the whipped cream into the cream cheese mixture, incorporating gradually to keep it fluffy.
- Spoon the cheesecake filling into the cups, drizzling with melted cookie butter between layers.
- Repeat layering with cookie crumbs and cheesecake, finishing with a drizzle of cookie butter.
- Cover the cups with plastic wrap and chill in the refrigerator for at least 1 hour.
- Garnish with extra cookie crumbs or whole cookies before serving.
Leave a Reply