
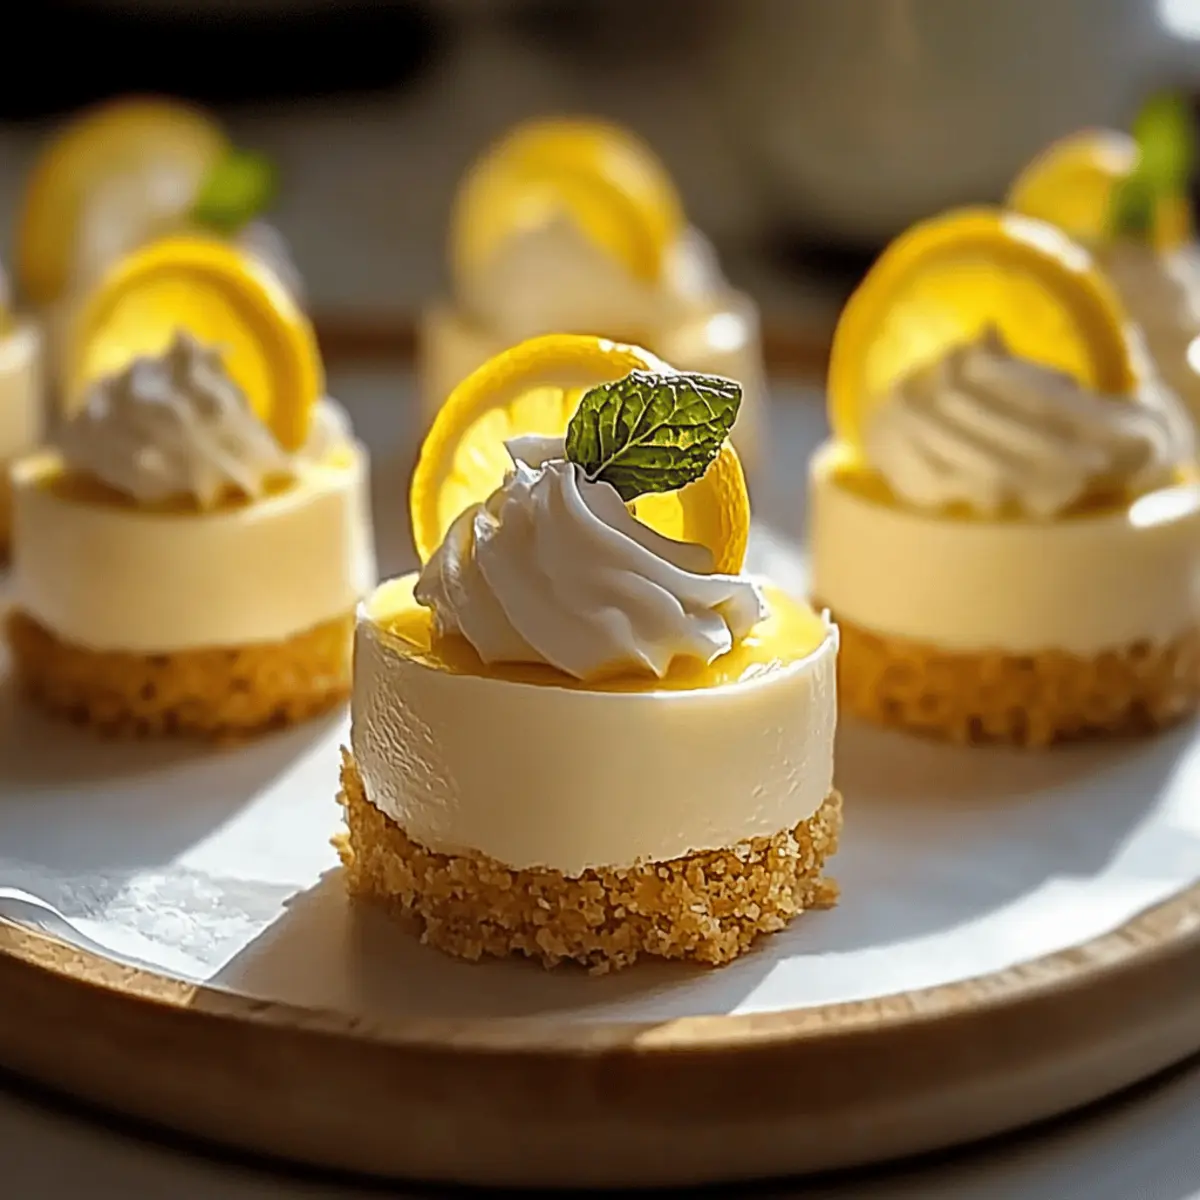
As the oven hums softly, I can’t help but think about how something as simple as cream cheese and lemon can bring a smile to anyone’s face. These Mini Lemon Cheesecakes are an absolute game changer—a delightful way to end any meal with their creamy, tangy flavor. They’re wonderfully light, making them the perfect dessert for everything from a cozy family dinner to an elegant gathering. Plus, who doesn’t love a sweet treat that can be made ahead of time? With customizable options available, you can easily tailor these cheesecakes to your taste. So, are you ready to whip up a batch of these little delights that will have everyone asking for seconds?
Why Choose Mini Lemon Cheesecakes?
Delightful flavors: Each cheesecake is bursting with bright, zesty lemon, perfectly balanced by a creamy texture that melts in your mouth.
Customization galore: Easily swap in your favorite toppings or experiment with different citrus fruits for a unique twist on this classic.
Perfect for gatherings: Their individual portions make them an ideal treat for sharing, ensuring everyone gets their sweet fix without overserving.
Quick and easy: With a straightforward preparation process, you can whip these up in no time and store them for later—perfect for any last-minute dessert cravings!
Why not pair these with a refreshing Whipped Pink Lemonade for a bright and cheerful finish to your meal? These Mini Lemon Cheesecakes aren’t just a dessert; they’re a joyful addition to any occasion!
Mini Lemon Cheesecake Ingredients
For the Crust
• Graham Cracker Crumbs – Provides a buttery flavor and structure; swap with crushed digestive biscuits for a similar texture.
• Melted Butter – Binds crust ingredients while adding richness; coconut oil is a great dairy-free alternative.
For the Filling
• Cream Cheese – The backbone of the cheesecake filling, ensuring creaminess; make sure it’s softened to prevent lumps.
• Granulated Sugar – Sweetens the filling, balancing the tanginess of the lemon; coconut sugar works well for a healthier option.
• Eggs – Provide necessary structure and stability; room temperature eggs mix in more smoothly.
• Sour Cream – Adds creaminess and a slight tanginess to the filling; Greek yogurt can be an excellent substitute.
• Lemon Juice – Infuses the cheesecake with its signature tang; freshly squeezed juice is best for flavor.
• Lemon Zest – Intensifies the lemon flavor profile with aromatic oils; consider using zest from other citrus fruits for variety.
• Vanilla Extract – Adds a depth of flavor that perfectly complements the sweet and tangy filling.
• Salt – Balances the sweetness against the tartness, enriching the overall flavor.
Whether you’re making these Mini Lemon Cheesecakes for a special occasion or just to satisfy a sweet tooth, this ingredient list has everything you need to whip up a batch of joy!
Step‑by‑Step Instructions for Mini Lemon Cheesecakes
Step 1: Preheat the Oven
Start by preheating your oven to 325°F (163°C). This temperature is ideal for baking the crusts to a perfect golden brown while ensuring the filling sets beautifully. Line a 12-cup muffin tin with cupcake liners or silicone cups, which will help with easy removal once your Mini Lemon Cheesecakes are ready.
Step 2: Make the Crust
In a medium bowl, combine graham cracker crumbs with granulated sugar and melted butter. Stir until the mixture resembles wet sand and holds together. Firmly press this crumb mixture into the bottom of each muffin tin cup, ensuring an even layer. This forms the base for your creamy cheesecakes.
Step 3: Bake the Crust
Place the muffin tin in the preheated oven and bake for about 8 minutes. You’ll know they’re done when the edges are slightly golden and the crust feels firm to the touch. Remove the tin from the oven and let it cool slightly while you prepare the filling for your Mini Lemon Cheesecakes.
Step 4: Prepare the Filling
In a large mixing bowl, beat softened cream cheese with granulated sugar until creamy and smooth. Gradually incorporate eggs, one at a time, ensuring each is fully mixed in before adding the next. Now add the sour cream, lemon juice, lemon zest, vanilla extract, and salt. Mix on low speed until the filling is silky.
Step 5: Bake the Cheesecakes
Spoon the creamy filling over the pre-baked crusts, filling each cup almost to the top. Return the muffin tin to the oven and bake for 18-20 minutes. The centers should be set but will have a slight jiggle when gently shaken. Overbaking can lead to cracks, so keep a close eye on them.
Step 6: Cool
Once baked, remove your Mini Lemon Cheesecakes from the oven and let them cool in the pan for about 10 minutes. After that, gently lift them out and place them on a wire rack to cool completely. To achieve the best texture, chill the cheesecakes in the refrigerator for at least 2 hours before serving, allowing the flavors to blend beautifully.
Make Ahead Options
These Mini Lemon Cheesecakes are perfect for busy cooks looking to save time without sacrificing flavor! You can prepare the crust up to 24 hours ahead by mixing the graham cracker crumbs, sugar, and melted butter, pressing it into the muffin tin, and then storing it in the fridge. The filling can be made up to 3 days in advance; just combine the cream cheese, sugar, eggs, and other ingredients as instructed and refrigerate it in an airtight container. When you’re ready to serve, simply spoon the filling into the pre-baked crusts and bake as directed. This way, you’ll enjoy delicious cheesecakes with minimal effort right when you need them!
How to Store and Freeze Mini Lemon Cheesecakes
Fridge: Store your Mini Lemon Cheesecakes in an airtight container for up to 5 days. This keeps them fresh and prevents them from absorbing other odors in the refrigerator.
Freezer: For longer storage, freeze the cheesecakes for up to 3 months. Place them in a single layer in a freezer-safe container or wrap each one individually to prevent freezer burn.
Thawing: When ready to enjoy, thaw the cheesecakes overnight in the fridge. This gradual process helps maintain their creamy texture and flavor.
Reheating: While these Mini Lemon Cheesecakes are best served chilled, if you prefer a slightly softened treat, you can leave them at room temperature for about 15-20 minutes before serving.
What to Serve with Mini Lemon Cheesecakes?
When it comes to celebrating delightful flavors and textures, pairing the perfect sides with your dessert elevates the whole experience.
- Whipped Cream: A dollop of fluffy whipped cream adds a light sweetness that beautifully complements the tanginess of the mini cheesecakes.
- Fresh Berries: Juicy strawberries, blueberries, or raspberries not only brighten the plate but provide a burst of freshness that pairs perfectly with the creamy filling.
- Sparkling Lemonade: This effervescent drink adds a zesty kick, refreshing your palate after each rich bite, enhancing the lemony goodness in the cheesecakes.
- Mint Leaves: A few sprigs of fresh mint offer a vibrant color contrast and a hint of herbal freshness that cuts through the richness of the dessert.
- Lemon Slices: Thinly sliced lemons as a garnish not only provide visual charm but also allow guests to squeeze a bit of extra lemon juice for more zestiness.
- Chocolate Drizzle: A light drizzle of melted chocolate creates a sweet contrast, balancing the tartness while adding a luxurious touch of indulgence.
- Coffee: A warm cup of coffee acts as a delightful accompaniment, its rich flavors beautifully offsetting the light and creamy cheesecakes.
- Coconut Sorbet: This light and refreshing dessert is perfect for a palate cleanser and prepares the taste buds for the creamy lemon delight.
These ideas will not only complement your Mini Lemon Cheesecakes but also create a visually stunning and delicious spread that will have everyone asking for seconds!
Mini Lemon Cheesecakes Variations & Substitutions
Feel free to mix things up and make these delightful cheesecakes your own—let your creativity be the key ingredient!
-
Berry Boost: Top your cheesecakes with a handful of fresh berries like strawberries or raspberries for a burst of color and flavor. The tartness of berries beautifully complements the lemon’s zing.
-
Citrus Swap: Experiment with other citrus fruits, such as lime or orange, to create different flavor profiles. Each option brings its own unique twist to these delightful treats.
-
Chocolate Bliss: Add richness by incorporating cocoa powder or melted dark chocolate into the filling. You’ll create a delectable chocolate-lemon combination that will surprise and delight your taste buds!
-
Nutty Crust: Substitute graham cracker crumbs with crushed almonds or hazelnuts for a nutty flavor in the crust. This twist adds dimension and a pleasing crunch to your mini cheesecakes.
-
Dairy-Free Delight: Swap out cream cheese for a dairy-free alternative, like cashew or coconut cream, to make these cheesecakes suitable for a vegan diet. They maintain a creamy texture while being gentle on the tummy!
-
Caramel Drizzle: After baking, add a drizzle of caramel sauce before serving for an indulgent touch. The sweet, buttery flavor pairs wonderfully with the tangy lemon.
-
Savory Twist: For a unique challenge, try adding a touch of sea salt or rosemary to the filling for a savory-inflected flavor. It’s a sophisticated surprise that works beautifully for a gourmet dessert.
Why not pair them with a refreshing drink like Raspberry Peach Lemonade to elevate your dessert experience? These Mini Lemon Cheesecakes can easily become a versatile canvas for your culinary creativity!
Expert Tips for Mini Lemon Cheesecakes
Cream Cheese Care: Always ensure your cream cheese is softened to room temperature. This prevents lumps and helps achieve a smooth filling.
Avoid Overbaking: Watch closely during the last few minutes. The centers should be set with a slight jiggle—overbaking can lead to cracks.
Chill for Flavor: After baking, allow your Mini Lemon Cheesecakes to cool and then chill for at least 2 hours. This enhances the creamy texture and flavors.
Temperature Matters: Prevent cracks by allowing cheesecakes to cool gradually in the pan. Avoid placing hot cheesecakes into a cold fridge.
Storage Savvy: Store leftovers in an airtight container in the fridge for up to 5 days. They also freeze well—just thaw overnight in the fridge.
Mini Lemon Cheesecakes Recipe FAQs
How do I choose ripe lemons for my Mini Lemon Cheesecakes?
Absolutely! Look for lemons that are bright yellow and feel heavy for their size. The skin should be smooth, and if you gently press on it, it should yield slightly. Avoid any that have dark spots or are overly soft, as they may be past their prime.
What’s the best way to store Mini Lemon Cheesecakes?
Store your Mini Lemon Cheesecakes in an airtight container in the fridge for up to 5 days. This keeps them fresh and helps them maintain their creamy texture. I recommend placing parchment paper between layers if stacking to prevent sticking.
Can I freeze Mini Lemon Cheesecakes?
Yes, you can! To freeze, first allow the cheesecakes to cool completely. Place them in a single layer in a freezer-safe container or wrap each cheesecake individually in plastic wrap followed by foil to prevent freezer burn. They’ll be good for up to 3 months! When you’re ready to enjoy them, thaw overnight in the fridge for the best texture.
What should I do if my cheesecake filling is lumpy?
No worries at all! If your filling is lumpy, it’s likely because the cream cheese wasn’t softened enough or wasn’t beaten long enough. To fix this, return it to a mixing bowl and beat on medium speed until creamy and smooth. You can even consider running it through a fine sieve if lumps persist, just to ensure a silky texture for your Mini Lemon Cheesecakes.
Can people with allergies eat Mini Lemon Cheesecakes?
These cheesecakes contain dairy (cream cheese and sour cream) and eggs, so they are not suitable for someone with dairy or egg allergies. However, you can customize the recipe; for a dairy-free version, use vegan cream cheese and coconut yogurt. Always double-check labels to ensure ingredients are allergy-friendly.
Mini Lemon Cheesecakes to Brighten Every Sweet Moment
Ingredients
Equipment
Method
- Preheat your oven to 325°F (163°C) and line a 12-cup muffin tin with cupcake liners or silicone cups.
- In a medium bowl, combine graham cracker crumbs with granulated sugar and melted butter. Press into the bottom of each muffin cup.
- Bake the crusts in the preheated oven for about 8 minutes until the edges are slightly golden. Let cool.
- In a large bowl, beat cream cheese with sugar until smooth. Incorporate eggs one at a time. Add sour cream, lemon juice, lemon zest, vanilla extract, and salt, mixing until silky.
- Spoon the filling over the pre-baked crusts and bake for 18-20 minutes until centers are set with a slight jiggle.
- Let mini cheesecakes cool in the pan for 10 minutes, then transfer to a wire rack and chill in the refrigerator for at least 2 hours before serving.
Leave a Reply