
As the sweet aroma of baking wafts through my kitchen, I can’t help but daydream about my latest creation: the Peanut Butter Cup Dump Cake. Picture this delightful union of gooey chocolate and creamy peanut butter, effortlessly layered to deliver a dessert experience that’s as indulgent as it is easy. Thanks to its quick prep time and no-mixer simplicity, this crowd-pleaser is perfect for any weeknight craving or casual gathering. Just mix, pour, and bake! Whether you’re serving it warm with a scoop of vanilla ice cream or simply enjoying it straight from the pan, every bite offers a delightful crunch and rich texture that’s hard to resist. So, are you ready to dive into this deliciously easy recipe?
Why is this cake a must-try?
Easy Preparation: No mixers needed! Just a few simple layers to create a luscious dessert.
Irresistibly Indulgent: Each bite combines chocolate, peanut butter, and caramel bliss that leaves you wanting more.
Versatile Options: Feel free to switch up ingredients, like trying different cake mixes or candies for a unique twist.
Crowd Favorite: Whether for a family dinner or a potluck, this dessert never fails to impress and satisfies sweet cravings.
Quick to Bake: In around 40 minutes, you’ll have a warm, delightful dessert that’s perfect for any occasion. Enjoy it solo, or pair it with a scoop of vanilla ice cream for an unforgettable experience!
Peanut Butter Cup Dump Cake Ingredients
For the Cake Base
- Chocolate Fudge Cake Mix – This rich cake mix provides a decadent chocolate flavor; consider using dark chocolate for added depth.
- Whole Milk – Adds creaminess to the pudding—the switch to a dairy-free alternative keeps it inclusive for all diets.
- Unsalted Butter, Melted – Offers moisture and richness; always go for unsalted to control the sweetness.
For the Pudding Layer
- Instant Chocolate Pudding Mix – Boosts the fudgy texture while providing extra moisture to the overall cake.
For the Topping
- Semi-Sweet Chocolate Chips – Enhance that chocolatey goodness; opt for dark chocolate chips for a richer twist.
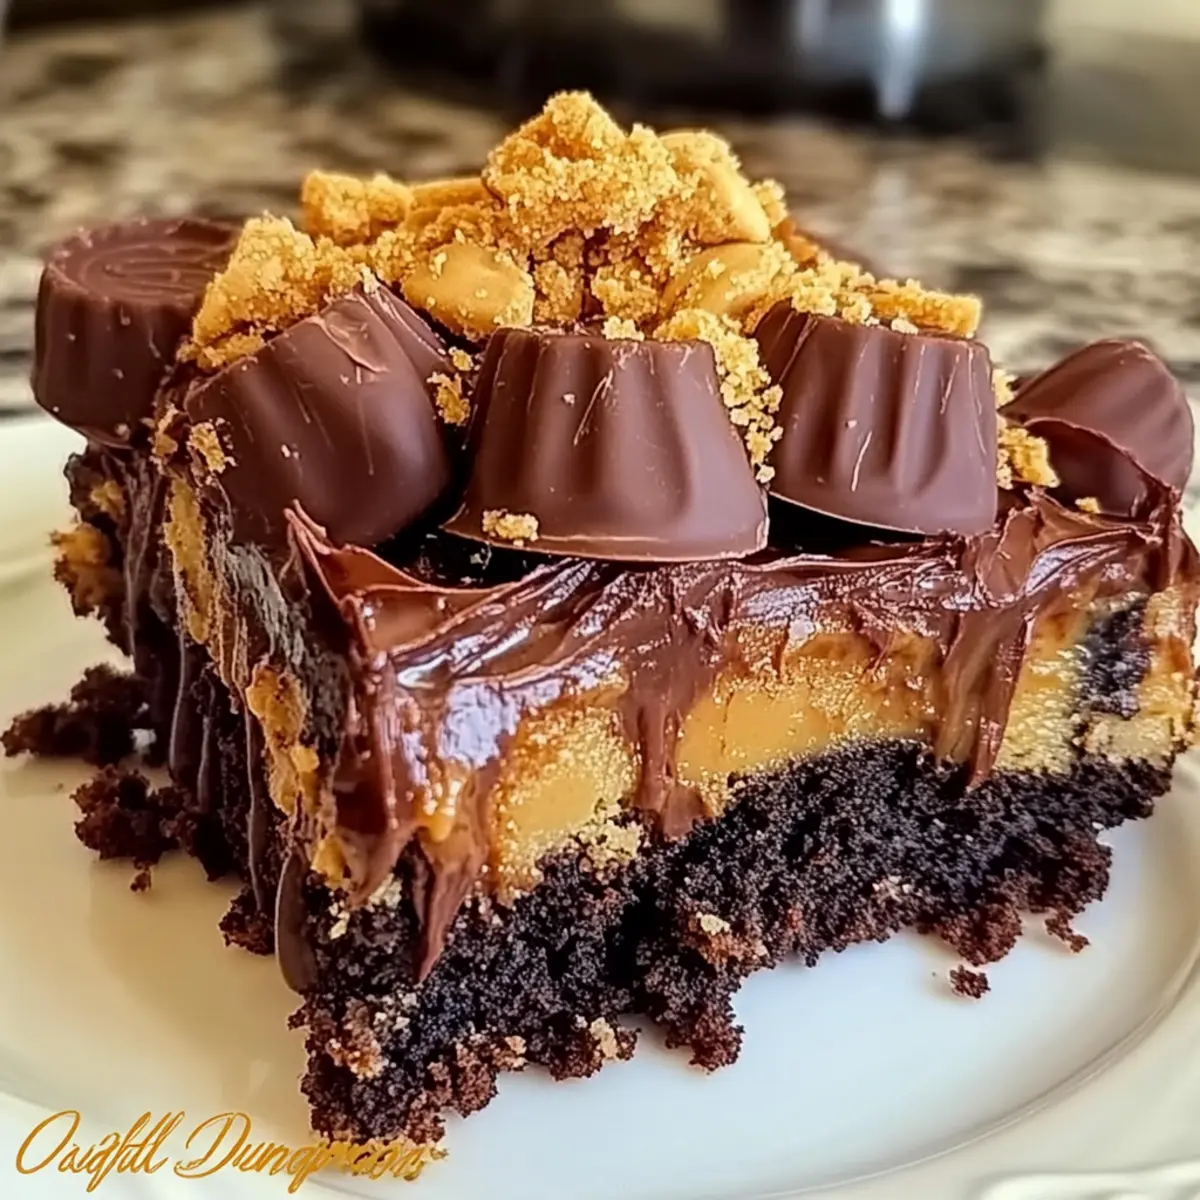
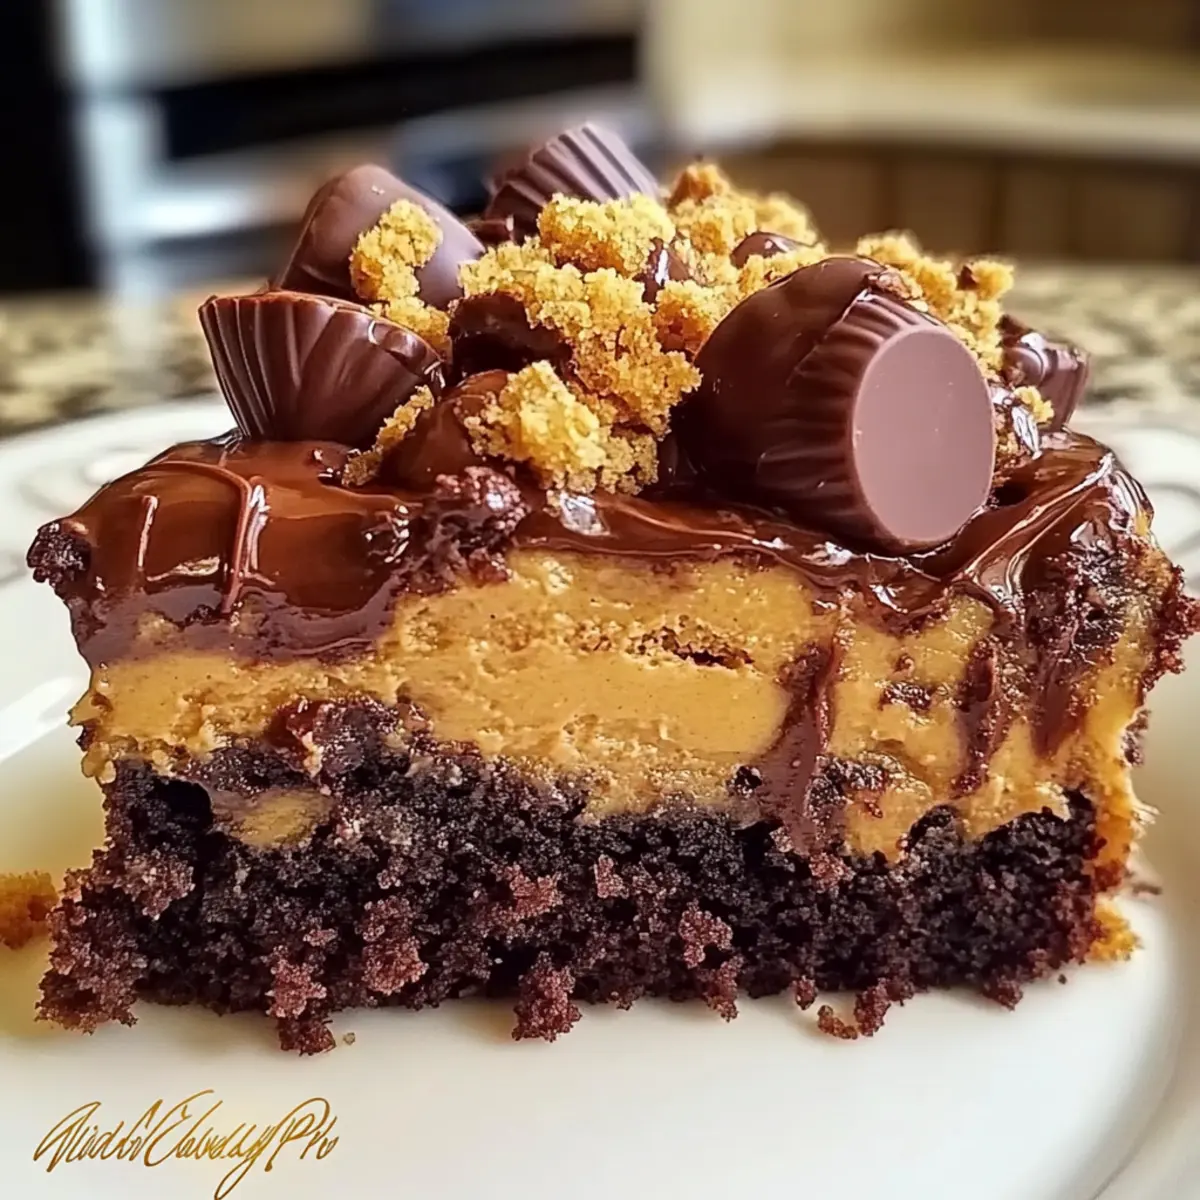
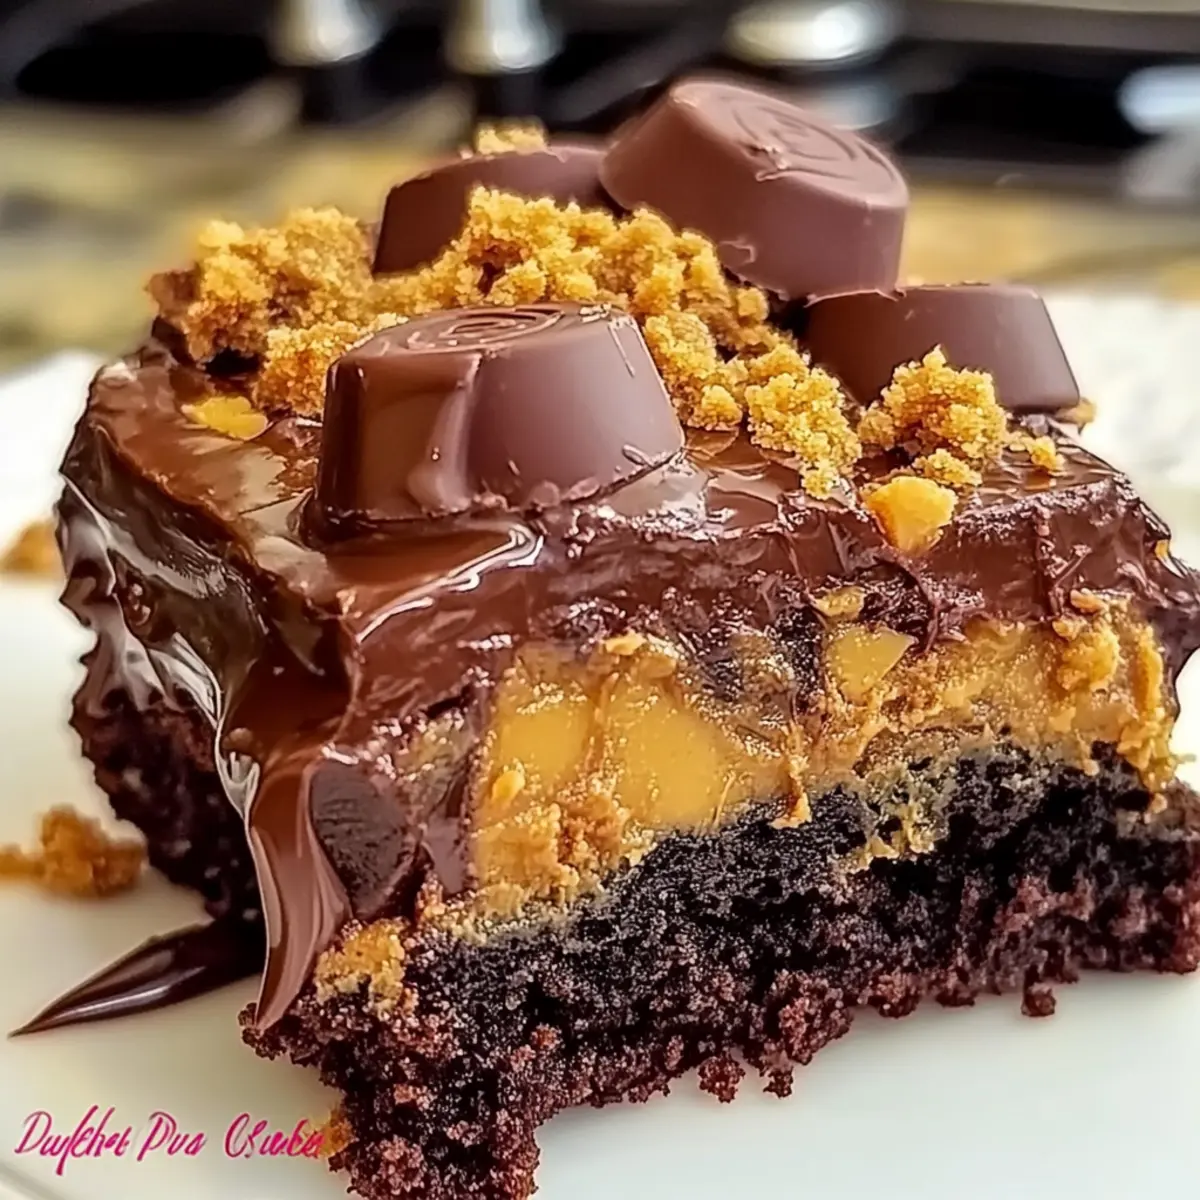
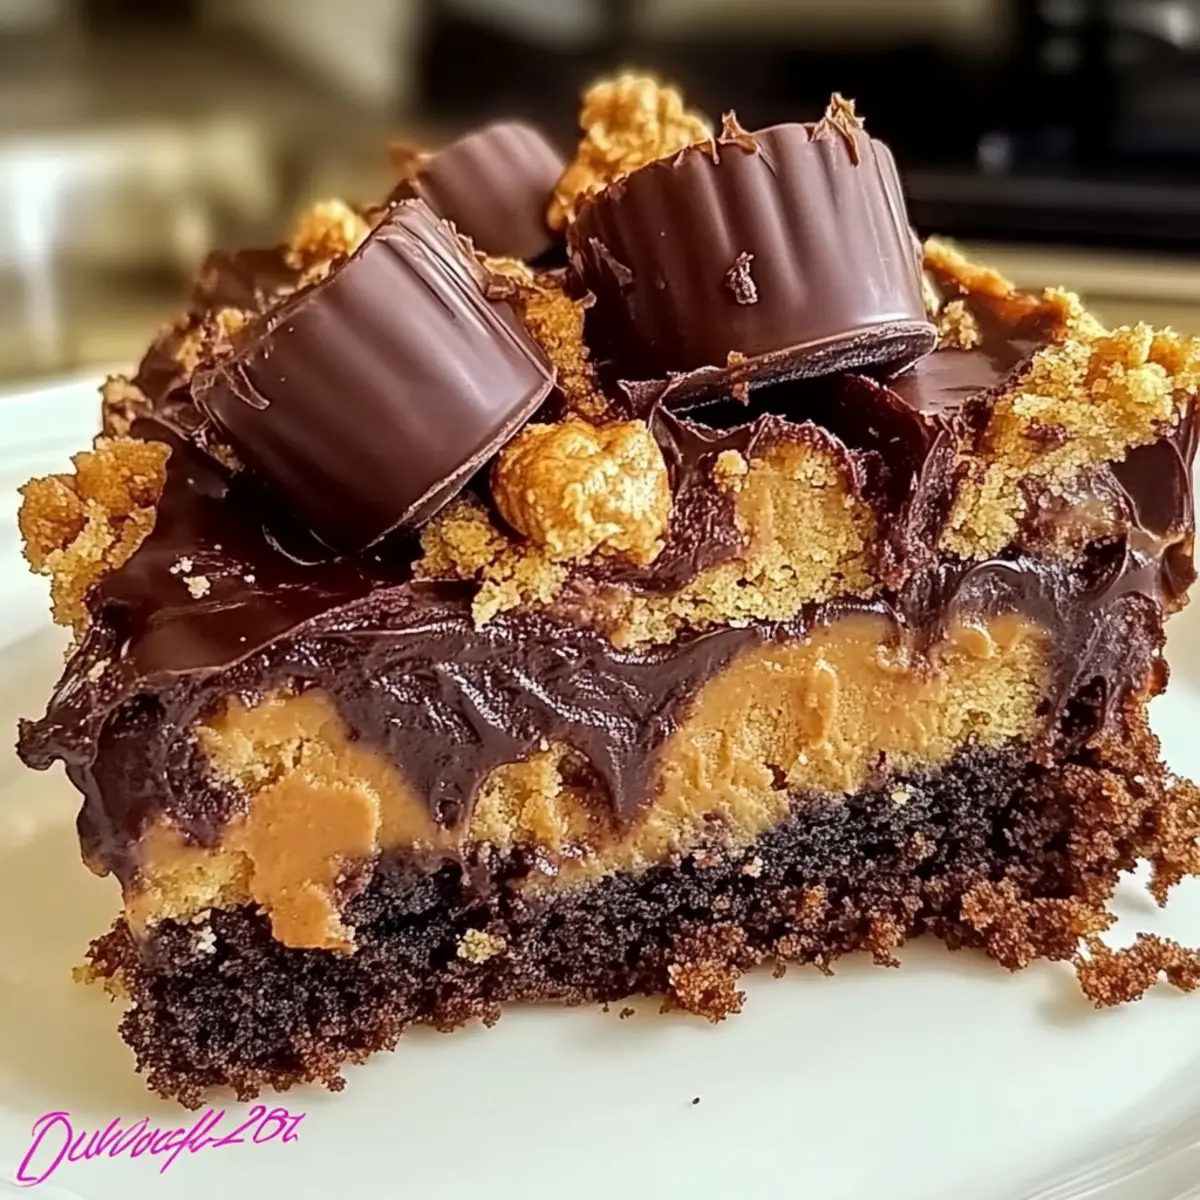
- Mini Peanut Butter Cups – The star ingredient! These little gems add creamy, nutty flavor; feel free to swap them with Snickers or Rolos for fun variations.
- Caramel Sauce – A gooey topping that enhances sweetness; drizzle generously for that extra indulgent touch.
- Crushed Graham Crackers or Biscoff Cookies – These add a delightful crunch that balances the soft texture of the cake.
- Sweetened Condensed Milk (Optional) – Increases gooeyness and moisture if you crave a richer dessert.
For Preparation
- Nonstick Cooking Spray or Parchment Paper – Essential for preventing sticking and ensuring easy removal of your Peanut Butter Cup Dump Cake.
There you have it! With these simple ingredients, you’ll be well on your way to creating a dessert that will steal the show. So gather your supplies, and let’s make some magic in the kitchen!
Step‑by‑Step Instructions for Peanut Butter Cup Dump Cake
Step 1: Prep Your Baking Dish
Preheat your oven to 350°F (175°C) and take a moment to grease a 9×13-inch baking dish with nonstick cooking spray or line it with parchment paper. This prep step is crucial for ensuring your Peanut Butter Cup Dump Cake releases smoothly after baking. Set the dish aside as you prepare the delicious layers.
Step 2: Layer the Cake Mix
Evenly sprinkle the chocolate fudge cake mix over the bottom of your greased baking dish, creating a smooth layer. Avoid mixing it at this point; the beauty of a dump cake lies in its easy assembly. Make sure the mix covers the base entirely, forming the foundation for your rich and indulgent dessert.
Step 3: Mix the Pudding
In a separate mixing bowl, whisk together the instant chocolate pudding mix with the cold whole milk until the mixture is smooth and well-combined. This luxurious pudding layer is key to infusing moisture and fudginess into the Peanut Butter Cup Dump Cake. Carefully pour this smooth pudding mixture over the cake mix layer, ensuring it covers the entire surface.
Step 4: Drizzle with Butter
Gently drizzle the melted unsalted butter over the pudding layer, allowing it to cascade beautifully across the surface. This adds a rich layer of flavor and moisture to your dump cake. Don’t worry about spreading it evenly; the magic of the cake will work itself out during baking to create a delightful texture.
Step 5: Add Chocolate and Peanut Butter
Now, scatter semi-sweet chocolate chips and halved mini peanut butter cups generously over the top of the pudding layer. The semisweet chocolate chips will melt to create oozing pockets of chocolate, while the peanut butter cups will add delectable creamy bites throughout your Peanut Butter Cup Dump Cake.
Step 6: Drizzle the Caramel
Generously pour caramel sauce over the surface of your layered creation, ensuring that every part is touched by that sweet, gooey goodness. If you’re using sweetened condensed milk, now is the time to drizzle some on as well, enhancing the cake’s moistness and indulgence.
Step 7: Top with Crunch
Finish off by sprinkling the crushed graham crackers or Biscoff cookies evenly over the entire surface. This will add a delightful crunch that contrasts perfectly with the soft, gooey layers beneath. Make sure the crunch is evenly distributed for a consistent texture.
Step 8: Bake to Perfection
Place your prepared baking dish in the preheated oven and bake for 35–40 minutes. Keep an eye on it; you’ll know it’s done when the edges are bubbling and the center is just set. If it starts to brown too quickly, lightly tent it with aluminum foil to prevent burning while allowing it to finish baking.
Step 9: Cool Before Serving
Once out of the oven, let your Peanut Butter Cup Dump Cake cool for about 10–15 minutes. This resting period allows the flavors to meld and makes it easier to serve. Once cooled slightly, you can drizzle additional caramel on top before digging in and enjoying the warm, gooey dessert!
Peanut Butter Cup Dump Cake Variations
Feel free to get creative with this delightful recipe and make it truly your own!
- Chocolate Cake Mix: Swap chocolate fudge cake mix for dark chocolate or devil’s food cake mix for an intensified chocolate experience.
- Dairy-Free: Use almond milk or coconut milk instead of whole milk and dairy-free butter to create a delicious dairy-free version.
- Different Candies: Replace mini peanut butter cups with Snickers, Rolos, or even crushed Oreos for a fun twist in flavor and texture. Each alternative adds a unique personality to your dessert!
- Add Nuts: Toss in some chopped roasted peanuts or walnuts for an extra crunchy bite that complements the creamy filling beautifully.
- Flavor Boost: Add a sprinkle of sea salt on top before baking to enhance the sweetness, or try adding a teaspoon of espresso powder to the cake mix for a coffee-infused flavor.
- Extra Gooeyness: For an ultra-decadent dessert, drizzle more caramel sauce over the cake just before serving, or fold in a handful of chocolate chips into the pudding layer.
- Fruit Additions: Mix in some fresh banana slices or raspberries between the layers for a fruity explosion that pairs wonderfully with chocolate and peanut butter.
- Biscuit Crust Option: For an interesting textural twist, replace crushed graham crackers with crushed biscuits or shortbread cookies to create a unique base topping.
Let your imagination run wild and enjoy this Peanut Butter Cup Dump Cake in endless delightful forms! For more easy dessert ideas, consider checking out delicious recipes like French Butter Cake or Thai Peanut Chicken for a lovely culinary journey!
How to Store and Freeze Peanut Butter Cup Dump Cake
- Room Temperature: Allow the cake to cool completely before covering it loosely with foil or parchment. It can be kept at room temperature for up to 2 days.
- Fridge: Store in an airtight container for up to 4 days. Make sure it’s fully cooled before sealing to avoid condensation, which can affect texture.
- Freezer: Wrap tightly in plastic wrap and aluminum foil to prevent freezer burn. It can be frozen for up to 3 months. Thaw in the fridge before reheating.
- Reheating: Warm individual slices in the microwave for about 10-15 seconds or until just heated through; serve with another drizzle of caramel for that fresh-from-the-oven feel!
What to Serve with Peanut Butter Cup Dump Cake
Imagine a warm, gooey dessert that elevates any occasion, begging to be paired with something deliciously satisfying.
- Vanilla Ice Cream: A classic match, the creaminess of ice cream perfectly balances the rich flavors and gooey texture of the dump cake.
- Whipped Cream: With a light, airy touch, whipped cream enhances the overall indulgence, providing a lovely contrast to the cake’s richness.
- Chocolate Sauce: Drizzle on extra decadence—rich chocolate sauce perfectly harmonizes with the dump cake’s chocolatey goodness.
- Fresh Berries: Bright, tart strawberries or raspberries offer a refreshing burst, cutting through the sweetness and creating a delightful flavor profile.
- Coffee: A warm cup of coffee or espresso provides a rich, bold beverage that pairs wonderfully with the sweet, creamy dessert.
- Chopped Nuts: Sprinkle crunchy roasted peanuts or pecans on top for added texture and a nutty flavor that complements the peanut butter.
For a complete dessert experience, consider serving the cake warm straight from the oven, topped with a generous scoop of ice cream and a drizzle of chocolate sauce for a blissful treat!
Make Ahead Options
These Peanut Butter Cup Dump Cakes are excellent for busy home cooks looking to save time! You can prepare the layers (cake mix, pudding mixture, and even peanut butter cups) up to 24 hours in advance; simply assemble and refrigerate them until you’re ready to bake. To maintain that delightful gooey texture, cover the assembled dish securely with plastic wrap. When it’s time to bake, take the cake out of the fridge and let it sit at room temperature for about 30 minutes before placing it in the preheated oven. This way, you’ll ensure your Peanut Butter Cup Dump Cake is just as delicious and indulgent as if you made it fresh!
Expert Tips for the Best Peanut Butter Cup Dump Cake
- Layer Wisely: Don’t mix the layers; gently create distinct layers to maintain the dump cake’s signature texture.
- Avoid Overbaking: Keep an eye on your cake; it’s done when the edges are bubbly and the center is just set to ensure gooeyness.
- Cool for Better Serving: Let the cake cool for 10–15 minutes to help it set properly, making it easier to slice and serve.
- Add a Flavor Boost: For an extra dimension, sprinkle a touch of sea salt or chopped roasted peanuts on top before baking.
- Serve Warm: Enjoy the Peanut Butter Cup Dump Cake warm for an indulgent experience, especially when paired with vanilla ice cream!
Peanut Butter Cup Dump Cake Recipe FAQs
What type of cake mix works best for this recipe?
Absolutely! The Chocolate Fudge Cake Mix is the star here, creating a rich and decadent base. However, feel free to substitute it with dark chocolate or devil’s food cake mix for an even deeper chocolate flavor. The more chocolate, the merrier, right?
How should I store leftover Peanut Butter Cup Dump Cake?
After enjoying this gooey delight, let the cake cool completely. You can store it in an airtight container in the fridge for up to 4 days. Alternatively, if you’d like to save some for later, wrap it tightly in plastic wrap and cover it with aluminum foil—this way, it’ll last in the freezer for up to 3 months!
Can I freeze Peanut Butter Cup Dump Cake?
Yes, you can! To freeze, first ensure the cake is completely cooled. Wrap it tightly in plastic wrap and aluminum foil to prevent freezer burn. When you’re ready to enjoy it, thaw it in the refrigerator overnight, then reheat in the microwave for about 10-15 seconds for that fresh-out-of-the-oven taste.
What if my cake mix layer isn’t rising properly?
No need to worry! Sometimes, the layers might need a little extra coaxing. Make sure you’re not overmixing; the beauty of a dump cake lies in those layered textures. If your cake seems too dense, ensure you’re following the liquid ratios—check that you’re using the correct amount of milk and melted butter! Patience is key, and your cake will shine at the end.
Can I make a dairy-free version of this cake?
Very much so! To create a delightful dairy-free Peanut Butter Cup Dump Cake, simply substitute the whole milk with your favorite dairy-free alternative, such as almond or oat milk. Use dairy-free chocolate chips and ensure any other ingredients like caramel sauce are also dairy-free. You’ll still end up with a rich, gooey cake that everyone can enjoy!
Are there any allergy considerations for this recipe?
Definitely! Since this dessert includes peanut butter cups, be cautious of nut allergies. For an allergen-friendly version, you can swap the mini peanut butter cups with nut-free chocolate candies or even use cookie pieces like Oreos. Always check the labels for unexpected allergens, and ensure your alternatives are safe for your guests.
Peanut Butter Cup Dump Cake: Easy, Gooey Bliss in Minutes
Ingredients
Equipment
Method
- Preheat your oven to 350°F (175°C) and grease a 9×13-inch baking dish with nonstick cooking spray or line it with parchment paper.
- Evenly sprinkle the chocolate fudge cake mix over the bottom of your greased baking dish.
- In a mixing bowl, whisk together the instant chocolate pudding mix with the cold whole milk until smooth.
- Gently drizzle the melted unsalted butter over the pudding layer.
- Scatter semi-sweet chocolate chips and halved mini peanut butter cups over the pudding layer.
- Pour caramel sauce generously over the surface.
- Sprinkle the crushed graham crackers or Biscoff cookies evenly over the entire surface.
- Place your prepared baking dish in the oven and bake for 35–40 minutes until the edges are bubbling and the center is just set.
- Let your Peanut Butter Cup Dump Cake cool for about 10–15 minutes before serving.
Leave a Reply