
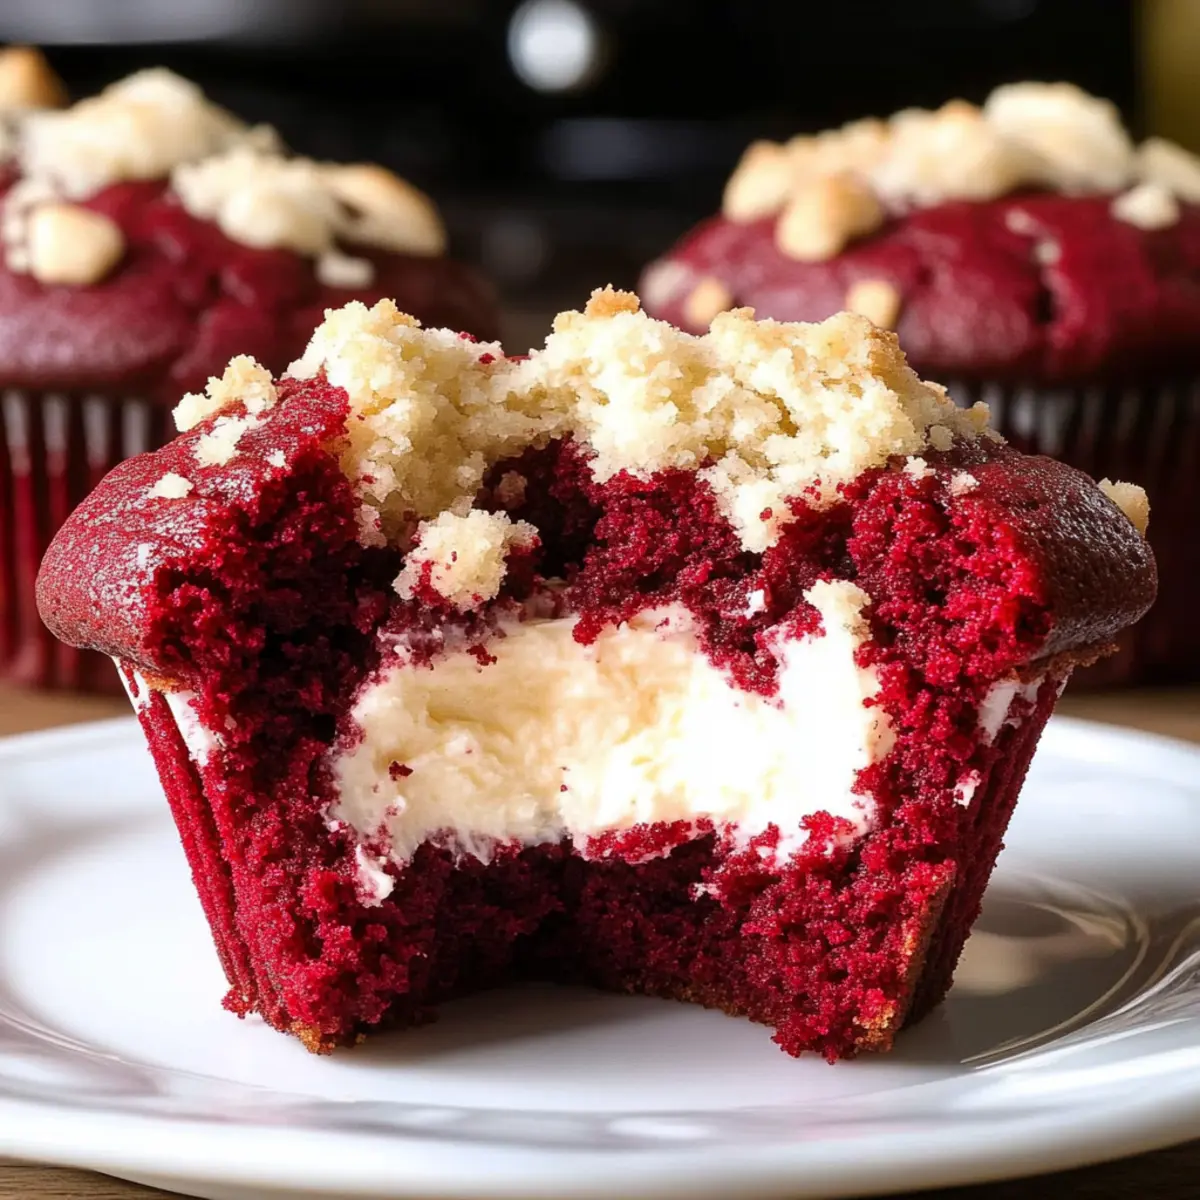
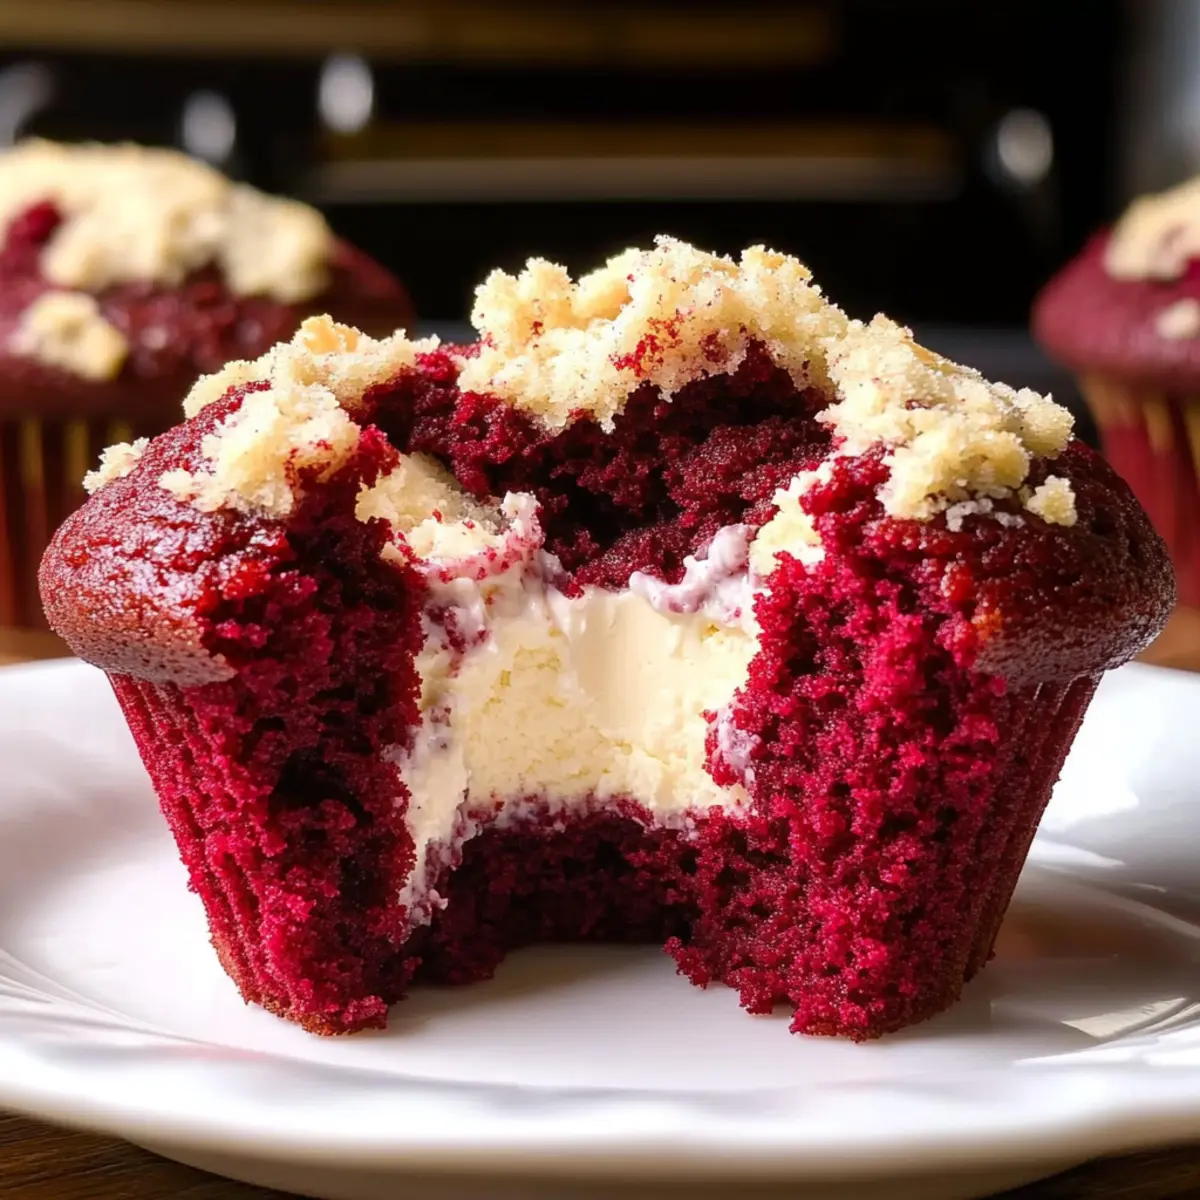
The moment I pulled these buttery red velvet muffins from the oven, the warm aroma enveloped my kitchen like a cozy hug. These delightful pastries, filled with a creamy heart reminiscent of a cheese danish, not only promise a stunning visual but also deliver on taste. Perfect as a homemade breakfast treat, these Red Velvet Muffins with Cream Cheese Filling are the answer to your cravings for comfort food without the fuss. Their crunch-topped exterior gives way to a soft, moist interior that will have everyone reaching for seconds. Plus, they’re quick to whip up, making them an ideal choice for busy mornings or impromptu gatherings. Intrigued by how easily you can elevate your baking game? Let’s dive into the dreamy world of these red velvet delights!
Why Choose Red Velvet Muffins?
Irresistible Combination: These muffins bring together the rich taste of red velvet with a surprising cream cheese filling, creating a unique pastry that’s bound to impress.
Quick and Easy: With simple steps and common ingredients, whipping up these treats doesn’t require professional baking skills—perfect for home chefs of all levels.
Versatile Delight: Enjoy them fresh from the oven, or save them for breakfast on the go or a delightful afternoon snack pairing perfectly with your favorite coffee.
Crowd-Pleasing Treat: Serve these at gatherings, and watch them disappear faster than traditional pastries—everyone loves the familiar taste of red velvet in muffin form!
Melt-in-Your-Mouth Moisture: Thanks to whipped cream folded into the batter, each bite is soft and airy, reminiscent of your favorite bakery-style treats.
Elevate your breakfast routine with these decadent muffins or try other delightful recipes like Baked Chicken Cheese or Coffee Cake Muffins for more homemade goodness!
Red Velvet Muffin Ingredients
-
For the Muffin Batter
• Cake Flour – Provides a soft texture light enough for muffins; substitute with all-purpose flour mixed with cornstarch in a 1:1 ratio for similar results.
• Cocoa Powder – Adds a subtle chocolate flavor to complement the red velvet; use Dutch-process cocoa for a richer taste.
• Baking Powder & Baking Soda – Help the muffins rise; ensure they are fresh for optimal leavening.
• Salt – Enhances overall flavor.
• Brown Sugar – Contributes moisture and a deep sweetness; can substitute with white sugar but may require additional moisture.
• Unsalted Butter – Essential for moisture and richness; ensure it’s softened for easy mixing.
• Vegetable Oil – Helps maintain the muffins’ moisture; can be replaced with melted coconut oil.
• Egg Whites – Provide structure without the fat of the yolks; can’t be substituted with whole eggs for the same texture.
• Vanilla Extract & Red Velvet Emulsion – Adds flavor; gel food coloring can substitute the emulsion if unavailable.
• Buttermilk – Contributes acidity for tenderness; regular milk with vinegar can be a substitute.
• Heavy Cream – Whipped and folded into the batter enhances softness; not substitutable with milk due to lack of air when whipped. -
For the Cream Cheese Filling
• Cream Cheese – Makes up the filling; ensure it’s softened for easy mixing.
• Powdered Sugar – Sweetens the cream cheese filling; granulated sugar can work but will not achieve the same smooth texture. -
For the Crumb Topping
• Flour – Provides structure to the crumb; choose a good-quality all-purpose flour for best results.
• Butter – Adds richness and crunch; it should be cold and cubed for the right topping texture.
• Sugar – Sweetens the topping, creating a delightful contrast with the muffins; any granulated sugar will do.
These Red Velvet Muffins with Cream Cheese Filling are not just a treat—they’re an experience waiting to happen!
Step‑by‑Step Instructions for Red Velvet Muffins with Cream Cheese Filling
Step 1: Prepare Cream Cheese Filling
In a mixing bowl, beat together softened cream cheese, one egg yolk, and powdered sugar until you achieve a smooth, creamy consistency. Once well combined, scoop the mixture into small dollops and place them on a parchment-lined tray. Freeze these dollops for about 30 minutes, ensuring they hold their shape when nestled into the muffins later.
Step 2: Make Crumb Topping
In a medium-sized bowl, combine flour, cold cubed butter, and sugar to create the crumb topping. Use your fingers or a pastry cutter to mix until the butter is fully coated with flour and the mixture resembles coarse crumbs. Set this mixture aside, as it will add a delightful crunch to your red velvet muffins.
Step 3: Prepare Muffin Batter
In a large mixing bowl, cream together the softened unsalted butter, vegetable oil, and brown sugar until light and fluffy, about 2–3 minutes. Gradually add the egg whites, mixing until fully incorporated and smooth. This rich batter will be the foundational layer for your Red Velvet Muffins with Cream Cheese Filling.
Step 4: Mix Dry Ingredients
In a separate bowl, whisk together the cake flour, baking powder, cocoa powder, baking soda, and salt until well combined. This dry mixture is essential for creating the perfect rise and texture in your muffins. Be sure to incorporate these dry ingredients gently to maintain their leavening properties.
Step 5: Combine Ingredients
Gradually add the dry ingredients to the wet mixture while alternating with buttermilk, beginning and ending with the dry ingredients. Stir gently just until the batter is combined; avoid overmixing to keep the muffins tender. The rich red batter will have a beautiful hue that sets the stage for your decadent Red Velvet Muffins.
Step 6: Fold in Whipped Cream
In a separate bowl, whip the heavy cream until you achieve soft peaks. Gently fold the whipped cream into the muffin batter, ensuring no white streaks remain. This step adds an airy lightness to the muffins, enhancing their overall moistness and contributing to the delightful mouthfeel.
Step 7: Fill Muffin Cups
Preheat your oven to 425°F (220°C). Grease a muffin pan or line it with paper liners. Fill each muffin cup halfway with the muffin batter, carefully placing a frozen dollop of cream cheese filling in the center. Top off with the remaining batter, filling each cup nearly to the top to ensure tall, bakery-style muffins.
Step 8: Add Crumb Topping
Sprinkle a generous amount of the prepared crumb topping over each muffin, pressing it down slightly to create larger, crunchy crumbs. This topping will add a delicious contrast to the soft muffin texture and complement the creamy filling beautifully.
Step 9: Bake
Place the muffin pan in the preheated oven and bake at 425°F for 6 minutes to create a quick rise. Then, reduce the temperature to 350°F (175°C) and continue baking for 18–22 minutes, or until a toothpick inserted into the center comes out with a few moist crumbs.
Step 10: Cool
Once baked, remove the muffins from the oven and allow them to cool in the tin for about 10 minutes. This step helps set the muffins and prevents breakage when moving them. After cooling, carefully transfer the Red Velvet Muffins with Cream Cheese Filling to a wire rack to cool completely before serving.
Expert Tips for Red Velvet Muffins
-
Proper Ingredient Prep: Make sure all ingredients, especially butter and cream cheese, are at room temperature for easier mixing and better texture in your Red Velvet Muffins.
-
Element of Surprise: Consider adding mini chocolate chips or crushed nuts to the batter for an unexpected twist and extra flavor contrast to the creamy filling.
-
Temperature Control: Always preheat your oven properly to ensure the muffins rise correctly; a higher initial bake temperature helps create that glorious dome on top.
-
Avoid Overmixing: Gently combine the dry and wet ingredients to prevent tough muffins—overmixing can lead to a loss of that tender crumb you want in your Red Velvet Muffins with Cream Cheese Filling.
-
Cooling Time: Let muffins cool in the tin for a few minutes before removing to help them set and maintain their shape, avoiding any potential breakage as they come out.
What to Serve with Buttery Red Velvet Muffins with Cream Cheese Filling?
These delightful muffins are a perfect companion at breakfast, deliciously complementing your morning routine and warm conversations with family and friends.
-
Fresh Fruit Salad: A vibrant mix of seasonal fruits adds a refreshing contrast, enhancing the muffin’s richness while providing a healthful touch.
-
Spiced Chai Tea: The warm, aromatic spices of chai tea match beautifully with the sweet notes of red velvet, perfect for cozy gatherings.
-
Vanilla Yogurt: The creamy, tangy yogurt balances the sweetness of the muffins, creating a satisfying breakfast that feels indulgent yet wholesome.
-
Coffee or Espresso: Rich coffee or a smooth espresso provides a delightful pairing, enhancing the chocolatey flavors and keeping you energized throughout the day.
-
Maple Syrup Drizzle: A light drizzle of maple syrup brings an added layer of sweetness that complements the richness of the cream cheese filling.
-
Chocolate Milkshake: For a decadent treat, a cold chocolate milkshake can serve as a fun indulgence, emphasizing the muffin’s cocoa undertones.
These options promise to elevate your experience with these Red Velvet Muffins, ensuring every bite is as enchanting as the last!
Make Ahead Options
These decadent Red Velvet Muffins with Cream Cheese Filling are perfect for busy home cooks looking to save time during the week! You can prepare the cream cheese filling up to 24 hours in advance by mixing the cream cheese, egg yolk, and powdered sugar, then scooping into dollops and freezing. Additionally, the muffin batter can be made up to 3 days ahead and stored in the refrigerator—just be sure to blend again before filling the muffin cups to maintain a smooth consistency. To finish, simply add the frozen cream cheese dollops, top with crumb topping, and bake as directed. With these make-ahead tips, you’ll have fresh, bakery-style muffins ready with minimal effort!
How to Store and Freeze Red Velvet Muffins with Cream Cheese Filling
-
Room Temperature: Store the muffins in an airtight container for up to 3 days to keep them fresh and moist. Enjoy them warm for a comforting treat!
-
Fridge: If you prefer them chilled, place the muffins in a covered container in the fridge for up to 5 days. Just remember to let them sit at room temperature for a few minutes before enjoying!
-
Freezer: For longer storage, wrap each muffin tightly in plastic wrap and place them in a freezer bag. They can last for up to 3 months in the freezer without losing flavor or texture.
-
Reheating: To enjoy these delectable Red Velvet Muffins with Cream Cheese Filling, simply thaw overnight in the fridge and reheat in a microwave for 15-20 seconds or in a warm oven for about 5-10 minutes.
Red Velvet Muffins with Cream Cheese Filling Variations
Feel free to mix things up with these delightful variations that will elevate your red velvet muffins to new heights!
- Gluten-Free: Substitute cake flour with a gluten-free all-purpose blend for a gluten-free version that everyone can enjoy.
- Nutty Addition: Toss in some chopped pecans or walnuts for added crunch, enhancing both texture and flavor wonderfully.
- Fruit Infusion: Add a handful of raspberries or chopped strawberries for a fruity twist that complements the cream cheese filling beautifully.
- Spicy Kick: Incorporate a pinch of cayenne pepper or cinnamon to the batter for a warm, unexpected heat that sparks interest.
- Chocolate Lovers: Replace half of the cocoa powder with Dutch-process cocoa for a deeper chocolate flavor that pairs beautifully with the cream cheese.
- Dairy-Free Delight: Substitute the buttermilk with a plant-based milk and add a splash of apple cider vinegar for a dairy-free version that still delivers on taste.
- Mocha Magic: Skip the vanilla and add a tablespoon of espresso powder for coffee lovers seeking a morning caffeine boost in their sweet muffins.
- Caramel Drizzle: Drizzle homemade or store-bought caramel sauce over the muffins after baking for a sweet, indulgent finish reminiscent of dessert.
These creative spins can change your experience with these Red Velvet Muffins with Cream Cheese Filling, offering delightful new flavors and textures that can suit any craving! For more variations, check out my delicious Baked Chicken Cheese or indulge in Cottage Cheese Blueberry treats.
Red Velvet Muffins with Cream Cheese Filling Recipe FAQs
How do I select ripe ingredients for my Red Velvet Muffins?
Absolutely! Make sure your cream cheese is softened to room temperature for easy mixing into the filling. Look for cake flour that feels light and fine, avoiding any clumps. When choosing cocoa powder, opt for Dutch-process for a deeper flavor. Fresh eggs are also key; a test for freshness is submerging them in water—if they sink, they’re fresh!
What’s the best way to store my Red Velvet Muffins with Cream Cheese Filling?
These muffins can be stored at room temperature in an airtight container for up to 3 days to keep them fresh and moist. Alternatively, place them in the fridge, and they’ll last up to 5 days. Just let them come to room temperature for a few minutes before enjoying them chilled!
Can I freeze my Red Velvet Muffins and how?
Definitely! To freeze, wrap each muffin tightly in plastic wrap to prevent freezer burn, then place them in a freezer bag. They can be stored for up to 3 months. When you’re ready to indulge, thaw them in the fridge overnight and then reheat for a warm, soft treat!
What if my muffins aren’t rising properly?
Very! Check to see if your baking powder and baking soda are fresh—old leavening agents can result in flat muffins. Another common issue is overmixing the batter; remember to mix just until combined. If you filled the muffin cups too high, the muffins might spill over instead of rising, so aim for filling them nearly to the top.
Are these muffins safe for pets or people with allergies?
For pets, take caution! Chocolate in the cocoa powder can be toxic to dogs, so it’s best to keep these muffins away from them. As for allergies, anyone with a dairy allergy should avoid the cream cheese and buttermilk or consider suitable plant-based substitutes to enjoy a similar experience.
Decadent Red Velvet Muffins with Cream Cheese Filling Bliss
Ingredients
Equipment
Method
- In a mixing bowl, beat together softened cream cheese, one egg yolk, and powdered sugar until smooth. Scoop mixture into dollops and freeze for about 30 minutes.
- In a medium bowl, combine flour, cold cubed butter, and sugar for crumb topping. Mix until it resembles coarse crumbs.
- In a large bowl, cream together softened butter, oil, and brown sugar until light and fluffy. Add egg whites gradually until smooth.
- In a separate bowl, whisk together cake flour, baking powder, cocoa powder, baking soda, and salt.
- Gradually add dry ingredients to wet mixture, alternating with buttermilk. Stir gently until combined.
- In another bowl, whip heavy cream until soft peaks. Fold into muffin batter gently to maintain lightness.
- Preheat oven to 425°F. Grease muffin pan. Fill each cup halfway with batter, place a frozen dollop of cream cheese in center, then top with remaining batter.
- Sprinkle crumb topping over each muffin and press down slightly.
- Bake at 425°F for 6 minutes, then reduce temperature to 350°F and bake for 18-22 minutes until a toothpick comes out with moist crumbs.
- Allow muffins to cool in the tin for about 10 minutes then transfer to a wire rack to cool completely.
Leave a Reply