
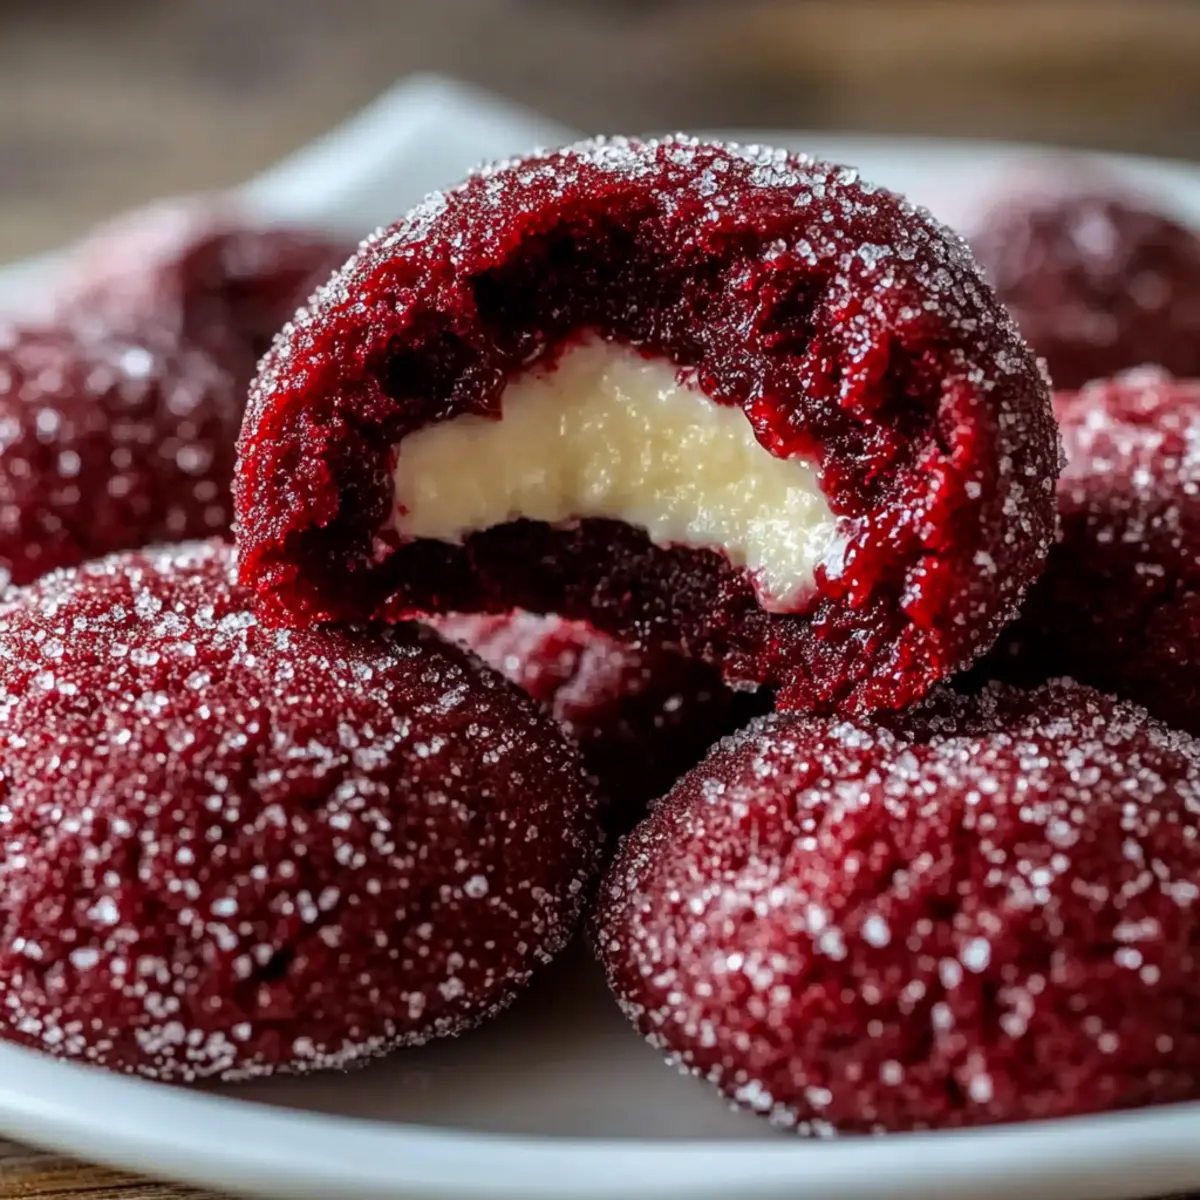
As I pulled a tray of these vibrant Red Velvet Thumbprint Cookies from the oven, a wave of sweet nostalgia washed over me. The blend of rich cocoa and smooth cream cheese filling turned my kitchen into a lively dessert haven. These cookies are not only an eye-catching showstopper for any gathering but also incredibly quick to whip up—a perfect solution for those with a busy schedule who still want to impress. The soft, chewy texture paired with a tangy filling creates such a delightful balance, making these treats irresistible to everyone who takes a bite. If you’re ready to elevate your baking game and bring a splash of color to your dessert table, let’s dive into this recipe for Soft & Chewy Red Velvet Thumbprint Cookies! What will you pair them with for your next celebration?
Why Are These Cookies So Special?
Irresistible texture: Each bite offers a delightful chewiness, perfectly complemented by a rich, creamy filling.
Vibrant color: The stunning red hue makes these cookies a visual delight for any gathering.
Quick preparation: Ready in just a few simple steps, making them perfect for last-minute baking!
Versatile options: Customize your cookies with seasonal color themes or different cream cheese flavors. Whether you’re hosting a party or enjoying a cozy night in, these cookies will steal the show. For more deliciously easy options, check out my Cinnamon Roll Cookies or the indulgent Pumpkin Smores Cookies!
Red Velvet Thumbprint Cookies Ingredients
For the Cookie Dough
• All-Purpose Flour – Provides structure to the cookies; be sure to measure accurately for a tender texture.
• Unsweetened Cocoa Powder – Adds that classic red velvet flavor, creating a rich and tasty base.
• Baking Soda – Acts as a leavening agent; it’s activated by the buttermilk, ensuring a lovely light cookie.
• Salt – Balances the sweetness and elevates overall flavor.
• Unsalted Butter, Softened – Essential for creaming with sugar, leading to a lighter cookie.
• Granulated Sugar – Sweetens the cookies and helps achieve slightly crisp edges.
• Large Eggs, at Room Temperature – Adds moisture and richness; helps with better mixing and emulsification.
• Vanilla Extract – Enhances the flavor profile, making cookies irresistible.
• Red Food Coloring – For that vibrant hue; opt for gel for the best results without altering the taste.
• Buttermilk – Adds moisture and a tangy flavor; can be replaced with milk mixed with lemon juice or vinegar.
• Granulated Sugar (for rolling) – Creates a sparkling exterior that adds a delicious crunch.
For the Cream Cheese Filling
• Cream Cheese, Softened – The star of the filling; should be lump-free for a smooth and creamy texture.
• Unsalted Butter, Softened (for filling) – Adds richness and ensures a silky filling.
• Powdered Sugar, Sifted – Sweetens and thickens the filling; sifting avoids any pesky lumps.
• Vanilla Extract (for filling) – Complements the tangy cream cheese beautifully, enhancing the overall flavor.
Dive into making these delightful Red Velvet Thumbprint Cookies, and bring joy to your kitchen with every bite!
Step‑by‑Step Instructions for Red Velvet Thumbprint Cookies
Step 1: Prepare Dry Ingredients
In a mixing bowl, whisk together 2 cups of all-purpose flour, ¼ cup of unsweetened cocoa powder, 1 teaspoon of baking soda, and a pinch of salt. This blends the dry components and ensures an even distribution of flavors. Set this bowl aside as you prepare the wet ingredients, which will bring the vibrant, rich Red Velvet Thumbprint Cookies to life.
Step 2: Cream Butter and Sugar
In a large bowl, using an electric mixer, beat together 1 cup of softened unsalted butter and 1 cup of granulated sugar on medium speed for about 2-3 minutes until the mixture becomes fluffy and pale. This process incorporates air into the butter, which is crucial for achieving the soft and chewy texture that makes these cookies so delightful.
Step 3: Incorporate Eggs and Flavors
Add 2 large eggs, one at a time, mixing well after each addition to ensure they are fully incorporated. Next, blend in 1 teaspoon of vanilla extract and 1 tablespoon of red food coloring, continuing to mix until the color is uniform. This step enhances the flavor while transforming the mixture into a beautiful red base, key for the Red Velvet Thumbprint Cookies.
Step 4: Combine Mixtures
Gradually add the dry ingredient mixture to the creamed mixture, alternating with 1 cup of buttermilk. Start and end with the dry ingredients, mixing gently on low speed until just combined. Avoid overmixing to keep the cookies tender. The dough will be smooth and a vibrant red, ready for chilling.
Step 5: Chill Dough
Cover the bowl with plastic wrap and refrigerate the dough for at least 30 minutes. Chilling is vital as it allows the flavors to meld and helps the dough firm up, ensuring that your Red Velvet Thumbprint Cookies maintain their shape during baking.
Step 6: Preheat Oven
While the dough chills, preheat your oven to 375°F (190°C). Line two baking sheets with parchment paper, ready to accommodate your beautifully rolled cookie dough. Proper oven temperature is crucial for baking cookies evenly and achieving that perfect chewy texture.
Step 7: Shape Cookies
Once chilled, scoop the dough and roll it into 1-inch balls, then coat them in granulated sugar. Place the balls on the prepared baking sheets, leaving about 2 inches of space between each. Use your thumb to create a gentle indent in the center of each ball, perfect for holding the luscious cream cheese filling.
Step 8: Bake
Bake the cookies in your preheated oven for 8-10 minutes, just until the edges are set, and the centers appear slightly soft. Keep an eye on them; they continue to bake on the tray after being removed. The Red Velvet Thumbprint Cookies should have a vibrant hue in a slightly puffy form, ready for cooling.
Step 9: Make Filling
In a medium bowl, beat together 8 oz of softened cream cheese, ¼ cup of softened unsalted butter, 2 cups of sifted powdered sugar, and 1 teaspoon of vanilla extract until creamy and smooth. The filling should be rich and lump-free, ready to complement the vibrant cookies perfectly.
Step 10: Fill Cookies
Allow the baked cookies to cool completely on the baking sheets before moving them to a cooling rack. Once cool, gently fill each indentation with the cream cheese mixture, smoothing it out for a lovely presentation. These Red Velvet Thumbprint Cookies are now beautifully assembled and ready to impress your friends and family!
How to Store and Freeze Red Velvet Thumbprint Cookies
Refrigerator: Store filled cookies in an airtight container for up to 3-4 days. This helps maintain their soft texture and creamy filling.
Room Temperature: Unfilled cookies can last at room temperature for up to 5 days. Keep them in a cool, dry place in an airtight container to preserve freshness.
Freezer: For longer storage, freeze unfilled cookies for up to 3 months. Wrap them tightly in plastic wrap and place in a freezer-safe bag. Thaw at room temperature before filling.
Reheating: If you like your cookies warm, briefly microwave filled cookies for 10-15 seconds. This softens them and enhances the cream cheese filling just before serving.
Make Ahead Options
These Red Velvet Thumbprint Cookies are a fantastic choice for meal prep, making your baking endeavors smoother and more manageable! You can prepare the cookie dough up to 24 hours in advance by fully chilling it in the refrigerator. Just scoop, roll in sugar, and make the indents before baking. Additionally, the cream cheese filling can be made up to 3 days ahead; store it in an airtight container in the refrigerator to keep it fresh and creamy. When you’re ready to serve, simply fill the cooled cookies with the prepared cream cheese mixture. This approach allows you to enjoy delicious cookies without the last-minute rush—perfect for busy weeknights or festive gatherings!
What to Serve with Soft & Chewy Red Velvet Thumbprint Cookies?
These delightful treats are perfect for creating a memorable dessert experience with vibrant flavors and contrasting textures.
- Vanilla Ice Cream: A scoop of creamy vanilla ice cream balances the sweetness of the cookies, creating a delightful contrast that’s hard to resist.
- Fresh Berries: Serve with a medley of strawberries, blueberries, and raspberries for a refreshing pop of color and natural sweetness against the rich cookies.
- Hot Chocolate: A warm cup of hot chocolate ties the whole dessert experience together, with its rich and comforting flavor every chocolate lover will adore.
- Creamy Cheesecake: For an indulgent pairing, serve alongside slices of cheesecake; the creamy texture mirrors the filling and adds an elegant touch.
- Coffee: Brewed coffee brings out the cocoa notes in the cookies while offering a bitter contrast that makes each bite more satisfying.
- Lemon Sorbet: The citrusy brightness of lemon sorbet is a refreshing counterpoint to the sweet cream cheese filling, cleansing the palate beautifully.
- Nut Toppings: Enhance the textural experience by sprinkling chopped walnuts or pecans on top; their crunch complements the softness of the cookies.
- Sparkling Wine: A glass of bubbly adds a touch of celebration; the light effervescence pairs well with the rich dessert and enhances flavors.
- Chocolate Dipped Pretzels: The saltiness of pretzels dipped in chocolate offers a unique twist, providing a delightful contrast to the sweet cookies.
- Almond Milk: A glass of chilled almond milk creates a light pairing, enhancing the cookie’s sweetness while leaving a minimalist aftertaste.
Expert Tips for Red Velvet Thumbprint Cookies
- Chill the Dough: Always refrigerate the cookie dough for at least 30 minutes. This helps maintain shape during baking and leads to a soft, chewy texture.
- Don’t Overmix: When combining the dry and wet ingredients, mix just until incorporated. Overmixing can result in tough cookies instead of light, airy Red Velvet Thumbprint Cookies.
- Monitor Baking Time: Keep a close eye on your cookies; they should be slightly underbaked in the center. They’ll firm up as they cool, providing that perfect gooey texture.
- Properly Soften Ingredients: Ensure all dairy ingredients are at room temperature for better mixing. This guarantees a smooth and creamy filling, essential for those delightful Red Velvet Thumbprint Cookies.
- Sift Powdered Sugar: Always sift the powdered sugar for the filling to avoid lumps. A smooth filling elevates the overall presentation and taste.
Red Velvet Thumbprint Cookies Variations
Feel free to let your creativity shine by customizing these delicious cookies to suit your taste!
-
Gluten-Free: Substitute all-purpose flour with a gluten-free baking blend to make these cookies accessible for everyone.
-
Seasonal Colors: Use alternative food colorings like green for St. Patrick’s day or orange for Halloween to make these cookies festive and fun.
-
Orange Zest Twist: Enhance the cream cheese filling with a teaspoon of orange zest for a delightful citrusy flavor that complements the sweetness.
-
Nutty Surprise: Add chopped walnuts or pecans to the dough for a delightful crunch that contrasts beautifully with the softness of the cookie.
-
Dark Chocolate: Mix in dark chocolate chips into the dough for an extra rich chocolatey flavor that everyone will adore.
-
Cream Cheese Varieties: Try flavored cream cheese, like strawberry or chocolate, in the filling for an exciting twist on the classic recipe.
-
Spicy Kick: Add a pinch of cayenne or cinnamon to the dough for a subtle warmth that adds depth to these sweet treats.
-
Chewy Coconut: Fold in some shredded coconut to the dough for an added texture and tropical flair that pairs beautifully with the red velvet.
Whichever variation you choose, these Red Velvet Thumbprint Cookies will surely be a hit. For even more treat inspiration, explore my captivating Cinnamon Roll Cookies or the delightful Pumpkin Smores Cookies. Try them today and experience the joy of baking!
Red Velvet Thumbprint Cookies Recipe FAQs
What kind of cocoa powder should I use for Red Velvet Thumbprint Cookies?
I recommend using unsweetened cocoa powder, as it provides the classic chocolate flavor that complements the red hue beautifully. Make sure to sift the cocoa along with the dry ingredients to eliminate any lumps before mixing.
How do I store Red Velvet Thumbprint Cookies, and how long do they last?
Filled cookies should be stored in an airtight container in the refrigerator for up to 3-4 days to keep their soft texture and creamy filling intact. Unfilled cookies can be kept at room temperature for up to 5 days if stored properly in a cool, dry place in an airtight container.
Can I freeze Red Velvet Thumbprint Cookies? If so, how?
Absolutely! To freeze unfilled cookies, wrap them tightly in plastic wrap and place them in a freezer-safe bag. They can be frozen for up to 3 months. When you’re ready to enjoy them, simply thaw at room temperature before filling with the cream cheese mixture.
What if my cookies spread too much while baking?
If your cookies are spreading excessively, it might be due to overly warm dough or insufficient chilling time. Always ensure that your dough is well-chilled (at least 30 minutes) before baking. If you encounter this issue, consider refrigerating the dough for an additional 15-20 minutes before baking for optimal results.
Are there any allergy considerations with this recipe?
Yes! This recipe includes common allergens like eggs, dairy (butter and cream cheese), and gluten (all-purpose flour). If you’re baking for someone with allergies, be sure to substitute accordingly. You can use dairy-free butter and cream cheese alternatives, and a gluten-free flour blend if needed. Always double-check labels for traces of allergens!
Deliciously Soft Red Velvet Thumbprint Cookies You’ll Adore
Ingredients
Equipment
Method
- In a mixing bowl, whisk together all-purpose flour, cocoa powder, baking soda, and salt.
- In a large bowl, beat together softened butter and granulated sugar until fluffy.
- Add eggs one at a time, mixing well, then blend in vanilla extract and red food coloring.
- Gradually add the dry ingredients alternating with buttermilk until just combined.
- Cover and refrigerate the dough for at least 30 minutes.
- Preheat the oven to 375°F (190°C) and line baking sheets with parchment paper.
- Scoop dough into 1-inch balls, roll in granulated sugar, and create an indent in each.
- Bake for 8-10 minutes until edges are set and centers are soft.
- Beat together cream cheese, butter, powdered sugar, and vanilla until creamy.
- Cool cookies completely, then fill each indent with the cream cheese filling.
Leave a Reply