
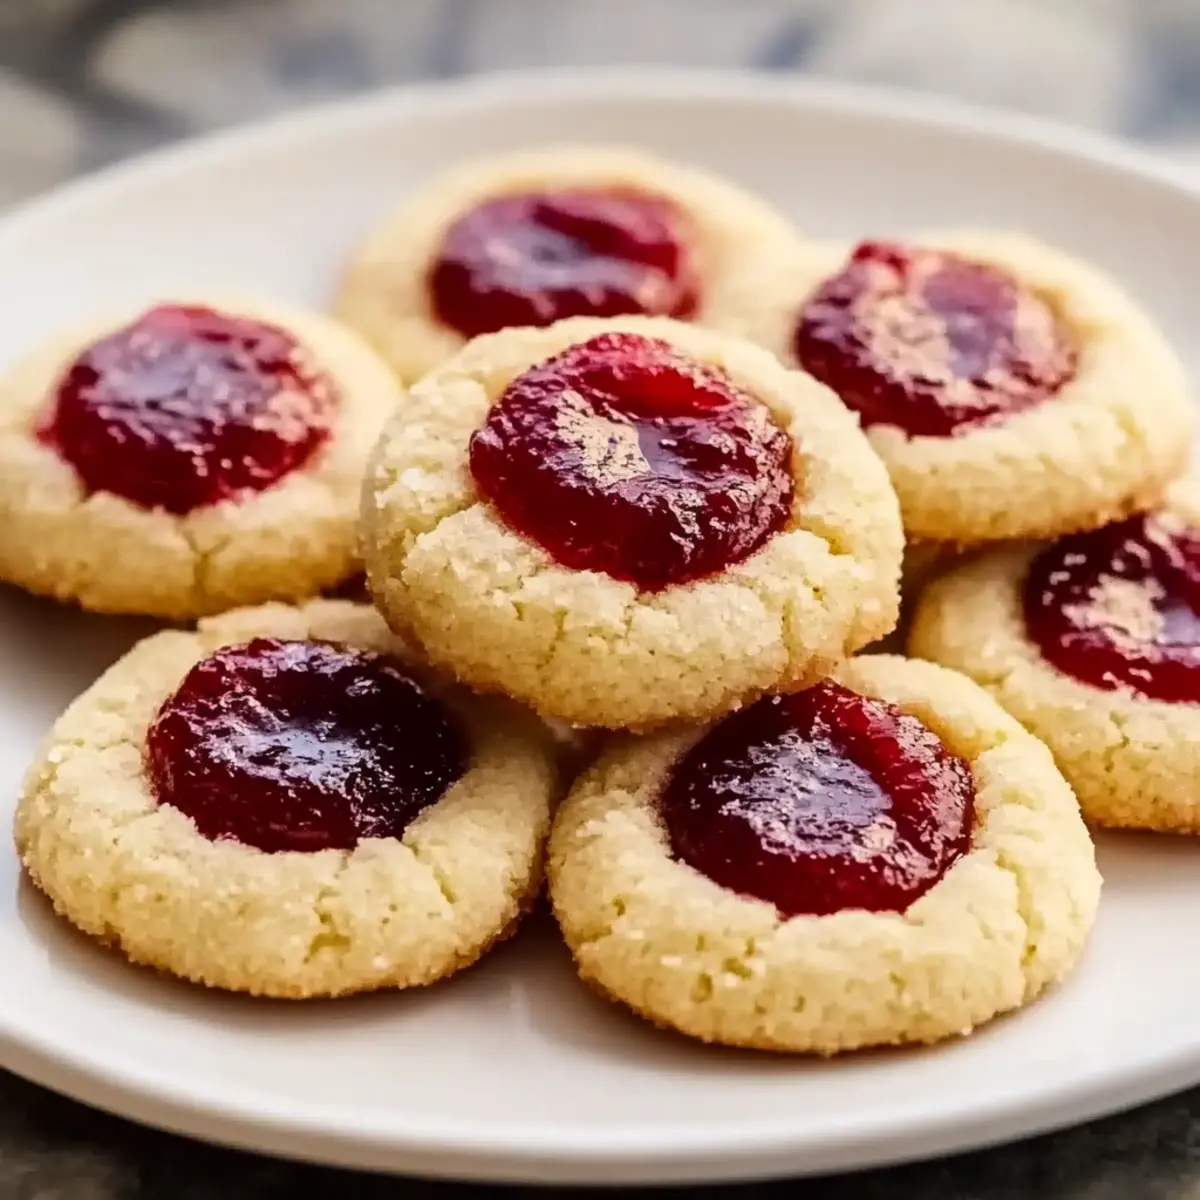
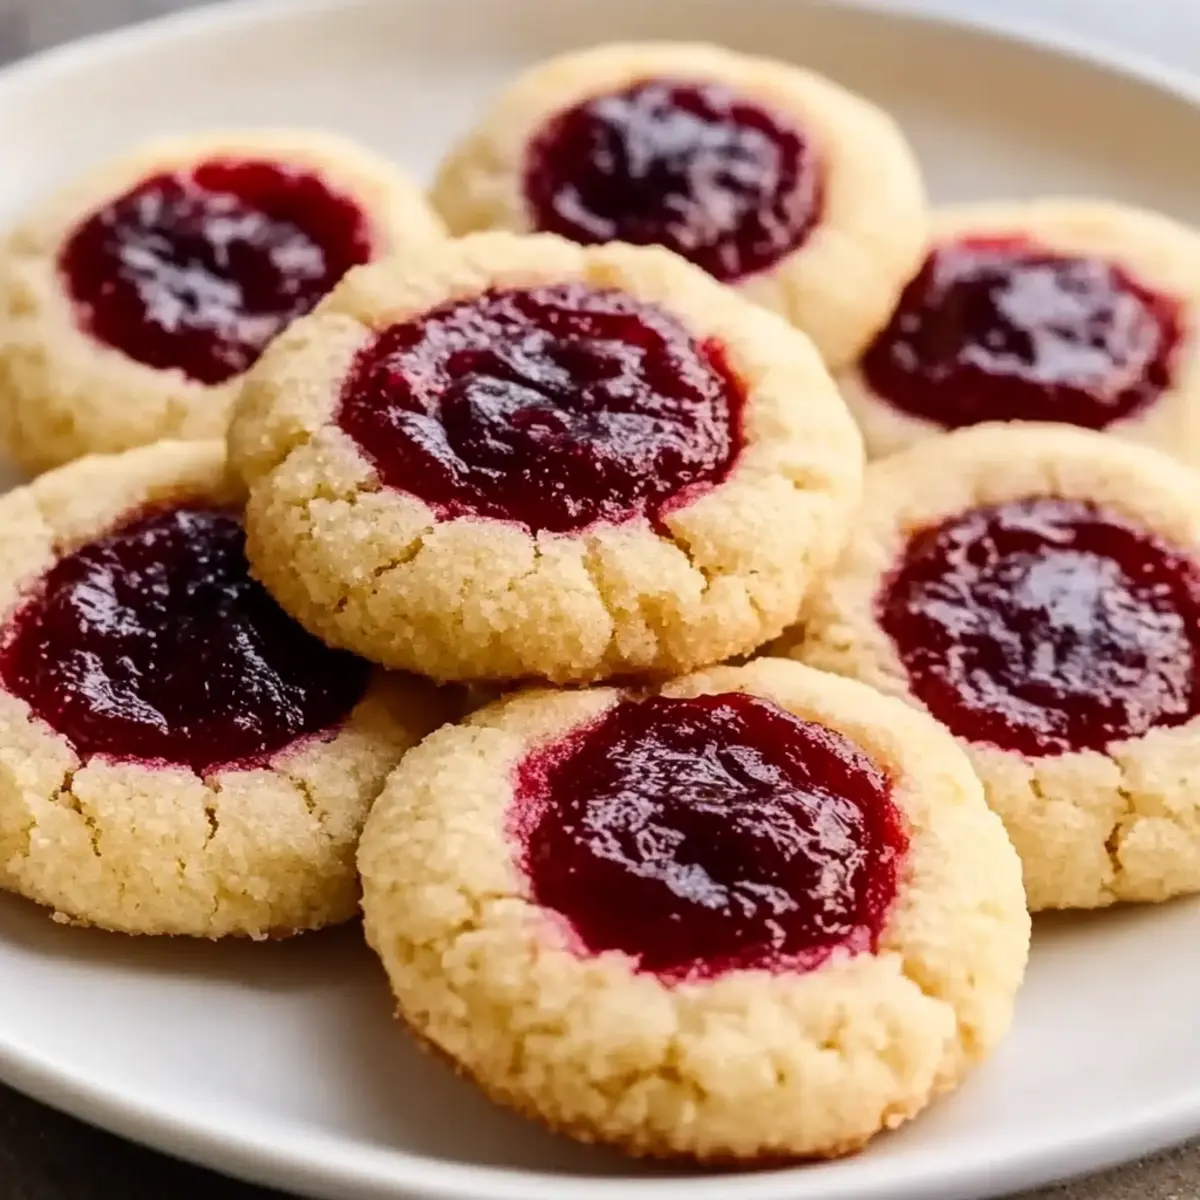
As I pulled my latest batch of buttery Thumbprint Cookies from the oven, the aroma of vanilla and fruity jam filled the air, taking me back to countless afternoons spent baking with loved ones. This Thumbprint Cookies Recipe is a delightful combination of crisp edges and a soft, melt-in-your-mouth center, making it perfect for any occasion—from festive gatherings to cozy tea time. Not only are these cookies quick and easy to whip up, but they also allow for a world of creativity with flavors; swap in your favorite jams or even Nutella to customize each bite. Why settle for store-bought cookies when you can create these charming delights at home? Curious about how to get that picture-perfect thumbprint every time? Let’s dive in!

Why Are Thumbprint Cookies So Irresistible?
Buttery Bliss: The rich buttery flavor melts in your mouth, making each bite a delight.
Customization Galore: Choose from various jams or even delicious Nutella to suit every taste.
Easy to Make: This approachable recipe is perfect for all baking skill levels; no fuss, just fun!
Perfect for Sharing: Great for tea time or holiday gatherings, these cookies will impress friends and family.
Nostalgic Touch: Thumbprint cookies have a delightful charm that recalls memories of baking with loved ones.
For more delicious treats, try my Cinnamon Roll Cookies or our popular Pumpkin Smores Cookies for a seasonal twist!
Thumbprint Cookies Recipe Ingredients
For the Cookies
• Unsalted Butter – Provides richness and tenderness; use vegan butter for a dairy-free option.
• Granulated Sugar – Adds sweetness and enhances texture for delightful bites.
• Light Brown Sugar – Offers caramel notes that deepen the flavor of these thumbprint cookies.
• All-Purpose Flour – The main structure of the cookies; ensure proper measurement for the best results.
• Cornstarch – Acts as a tenderizer; substitute with arrowroot powder or tapioca starch if needed.
• Egg Yolk – Enriches the dough, keeping it tender without making it cakey.
• Vanilla Extract – Enhances sweetness and adds depth to the overall flavor.
• Salt – Balances sweetness and enhances the overall taste of the cookies.
For the Jam Center
• Jam – Provides the fruity burst in the center; opt for high-quality varieties for optimal flavor.
Make your baking experience memorable with these delightful thumbprint cookies!
Step‑by‑Step Instructions for Classic Butter Thumbprint Cookies with Fruity Jam Center
Step 1: Cream the Butters and Sugars
Begin by placing 1 cup of softened unsalted butter into a mixing bowl. Using a hand mixer or stand mixer, beat the butter until it becomes creamy, about 2-3 minutes. Gradually add ½ cup granulated sugar and ½ cup light brown sugar, continuing to mix until the mixture is fluffy and light in color, signaling it’s aerated and ready for the next step.
Step 2: Add Egg Yolk and Vanilla
Once your butter and sugars are well combined, crack in one large egg yolk and pour in 1 teaspoon of vanilla extract. Mix on low speed until thoroughly integrated, ensuring a smooth and glossy consistency. This will enrich your dough and add depth to your Classic Butter Thumbprint Cookies.
Step 3: Combine Dry Ingredients
In a separate bowl, whisk together 2 cups of all-purpose flour, 2 tablespoons of cornstarch, and ½ teaspoon of salt. Once well-mixed, slowly incorporate the dry ingredients into the wet mixture. Use a spatula or the mixer on low speed, mixing until a dough starts to form. The dough should be slightly sticky but firm—perfect for shaping.
Step 4: Shape the Dough Balls
With your hands, scoop out tablespoon-sized portions of the dough and roll them into smooth balls, ensuring there are no cracks on the surface. If desired, roll each ball in granulated sugar for an added sweet crunch. Place the dough balls onto a parchment-lined baking sheet, spacing them about 2 inches apart for even baking.
Step 5: Indent the Cookies
Using your thumb, gently press down the center of each dough ball to create a small indentation—this is where your jam will go. Be careful not to press too hard; you want a nice well without going through the dough. After forming the thumbprint, chill the baking sheet in the freezer for about 30 minutes to help the cookies maintain their shape while baking.
Step 6: Preheat and Fill
While the dough chills, preheat your oven to 375°F (190°C). After 30 minutes, take your cookies out of the freezer and slightly warm your choice of jam to prevent it from being too thick. Carefully fill each indentation with your preferred jam, being cautious not to overfill to avoid spillage during baking.
Step 7: Bake the Cookies
Place the baking sheet in your preheated oven and bake the Classic Butter Thumbprint Cookies for approximately 11-13 minutes. You’ll know they’re ready when the edges are slightly golden but the centers remain soft and paler. Avoid overbaking to maintain that delightful melt-in-your-mouth texture.
Step 8: Cool and Serve
After the baking time is up, remove the cookies from the oven and let them cool on the baking sheet for about 5 minutes. This allows them to set properly. Once slightly cooled, transfer them to a wire rack to cool completely. Now, these delicious thumbprint cookies are ready to be shared and savored!
Thumbprint Cookies Recipe Variations
Feel free to let your creativity shine with these delightful twists on the classic thumbprint cookie!
- Nutty Crunch: Roll the dough balls in crushed nuts for an added delightful crunch and flavor. This variation not only enhances texture but also complements the sweetness of the jam perfectly.
- Citrus Zest: Mix in lemon or orange zest to the dough for a fresh and tangy kick. This brightens the flavors and adds an unexpected, delicious contrast to the sweet jam center.
- Chocolate Swirl: Instead of jam, fill the centers with melted chocolate or Nutella for a rich and decadent treat. This will satisfy any chocolate lover’s craving and create a fusion of flavors that is simply irresistible.
- Spiced Up: Add a pinch of cinnamon or nutmeg into the dough for a warm, spicy flavor profile that’s perfect for cozy gatherings or holiday celebrations. The spices will envelop your kitchen in warmth and nostalgia.
- Fruit Medley: Experiment with a variety of jams—think raspberry, apricot, or blueberry—for different bursts of flavor in every bite. Mixing multiple flavors makes each cookie a little surprise that delightfully mixes sweet and tangy!
- Dairy-Free Delight: Substitute unsalted butter with vegan butter or coconut oil for a dairy-free variant while keeping that rich texture. You’ll never guess they’re dairy-free!
- Gluten-Free Option: Use a gluten-free flour blend in place of all-purpose flour to make this recipe suitable for those with gluten sensitivities. The cookies still turn out deliciously soft and jammy!
- Savory Twist: For a unique take, try a savory jam or jelly, like jalapeño jelly, and incorporate some crumbled cheese in the dough for an adventurous flavor experience. Serve these at gatherings for a conversation starter!
Don’t forget to pair your cookies with a lovely cup of tea or coffee for an afternoon treat, perhaps while enjoying a comforting dish like Seafood Gratin or making delicious snacks like a Chopped Chicken Bacon Ranch Sandwich. Happy baking!
Storage Tips for Thumbprint Cookies
Room Temperature: Store cooled Thumbprint Cookies in an airtight container at room temperature for up to 4 days to maintain freshness and flavor.
Fridge: If you prefer longer storage, you can refrigerate the cookies in an airtight container for up to 1 week; just remember they may lose some of their melt-in-your-mouth texture.
Freezer: For extended preservation, freeze the dough balls or baked cookies in a single layer on a baking sheet. Once frozen, transfer to a freezer bag for up to 3 months. Bake frozen dough directly from the freezer, adding a couple of extra minutes to the baking time.
Reheating: To enjoy your cookies warm, reheat in the oven at 350°F for about 5 minutes, ensuring they regain a lovely softness without losing their delightful structure.
What to Serve with Classic Butter Thumbprint Cookies
Enjoy these charming cookies with delightful pairings that create a well-rounded experience for your taste buds!
- Coffee Companion: A warm cup of coffee enhances the buttery richness, making every nibble even more satisfying.
- Fruity Fruit Platter: Serve with sliced strawberries or blueberries to add fresh flavors and a pop of color to your dessert table.
- Herbal Tea: Pair with chamomile or mint tea for a cozy afternoon treat that feels like a warm hug.
- Chocolate Milk: The sweet, creamy taste of chocolate milk complements the fruity jam, creating a nostalgic after-school snack.
- Ice Cream Scoop: A scoop of vanilla ice cream served alongside transforms these cookies into a delightful sundae!
- Cheese Board Addition: Incorporate a small selection of cheeses for a savory contrast that highlights the sweetness of the cookies.
- Whipped Cream: Top each cookie with a dollop of whipped cream for an indulgent twist that adds a luscious layer.
- Sparkling Cider: Serve with a chilled glass of sparkling cider for a festive touch that’s perfect for gatherings.
- Lemonade Splash: A refreshing glass of lemonade brightens the palate, balancing the sweet and buttery flavors beautifully.
- Milkshake Bliss: Blend up a fruit-flavored milkshake to bring a fun twist that pairs perfectly with the jam-filled cookies, making for an extraordinary treat!
Expert Tips for Thumbprint Cookies
-
Tight Dough Balls: Rolling the dough tightly prevents cracks, ensuring a beautiful thumbprint and avoiding misshapen cookies during baking.
-
Chill the Dough: Don’t skip chilling the formed dough—this crucial step helps maintain the cookie shape and prevents unwanted spreading in the oven.
-
Perfect Jam Fill: Fill the thumbprints with just the right amount of jam; overfilling can cause spills and messy cookies. Aim for a level fill to keep them looking neat.
-
Avoid Store-Bought Dough: For the best texture and flavor in your Thumbprint Cookies, always opt for your own homemade dough instead of pre-made options, which may not yield the same results.
-
Experiment with Flavors: Feel free to try various jams or even chocolate spreads like Nutella for creative variations that everyone will love!
Make Ahead Options
These Thumbprint Cookies are perfect for meal prep enthusiasts! You can prepare the dough up to 24 hours in advance. Simply mix all the ingredients, shape the dough balls, and place them on a parchment-lined baking sheet. Cover the sheet with plastic wrap and refrigerate. Additionally, the cookies can be fully baked and stored in an airtight container at room temperature for up to 4 days or frozen for longer storage. When you’re ready to indulge, if frozen, bake them directly from the freezer for about 2-3 extra minutes until they’re golden and beautiful, ensuring they’re just as delicious as when they first came out of the oven. Enjoy the ease of homemade goodness!

Classic Butter Thumbprint Cookies with Fruity Jam Center Recipe FAQs
How do I choose the best jam for my Thumbprint Cookies?
Absolutely! Opt for high-quality, all-natural jams that have a rich, fruity flavor to enhance your cookies. Look for jams that have minimal additives and a thick consistency to prevent them from overflowing during baking. Popular options include raspberry, strawberry, or apricot, and if you’re feeling adventurous, a chocolate spread like Nutella can add a delightful twist!
What’s the best way to store Thumbprint Cookies?
To keep your cookies fresh, store them in an airtight container at room temperature for up to 4 days. If you’d like to enjoy them longer, you can refrigerate them for up to a week, but be aware they may lose their signature melt-in-your-mouth texture. Just make sure they’re sealed well to prevent drying out!
Can I freeze the dough or baked Thumbprint Cookies?
Certainly! To freeze the dough, roll it into balls and place them on a baking sheet in the freezer until solid. Once frozen, transfer the balls to a freezer-safe bag for up to 3 months. When you’re ready to bake, place the frozen dough on your baking sheet and add a couple of extra minutes to the baking time. If you prefer freezing the baked cookies, lay them flat in a single layer until fully frozen, then move them to a bag for up to 3 months.
Why did my cookies spread during baking?
Very likely, it’s due to the dough not being chilled long enough! Chilling the cookie dough for at least 30 minutes before baking is crucial to help them maintain their shape. If you notice your cookies spreading, ensure your oven temperature is accurate and the dough balls are rolled tightly without cracks.
Are these Thumbprint Cookies suitable for dietary restrictions?
Yes, they can be! For a dairy-free option, you can substitute the unsalted butter with vegan butter. If someone has egg allergies, you can experiment by using a flaxseed meal egg replacement (1 tablespoon of flaxseed meal + 2.5 tablespoons of water, mixed and left to sit for 5 minutes). Always check the jam for any allergens too!
Melt-in-Your-Mouth Thumbprint Cookies Recipe for Sweet Moments
Ingredients
Equipment
Method
- Begin by placing 1 cup of softened unsalted butter into a mixing bowl. Beat until creamy, about 2-3 minutes.
- Gradually add ½ cup granulated sugar and ½ cup light brown sugar, mixing until fluffy and light in color.
- Crack in one large egg yolk and pour in 1 teaspoon of vanilla extract, mixing until smooth.
- In a separate bowl, whisk together 2 cups of all-purpose flour, 2 tablespoons of cornstarch, and ½ teaspoon of salt.
- Slowly incorporate the dry ingredients into the wet mixture until a slightly sticky dough forms.
- Scoop out tablespoon-sized portions of the dough and roll into smooth balls. Optionally roll in granulated sugar.
- Press a thumb into the center of each dough ball to create an indentation, then chill dough balls in the freezer for 30 minutes.
- Preheat your oven to 375°F (190°C). Warm your choice of jam and fill each indentation carefully.
- Bake cookies for about 11-13 minutes until edges are golden but centers remain soft.
- Let cookies cool on the baking sheet for 5 minutes, then transfer to a wire rack to cool completely.
Leave a Reply