
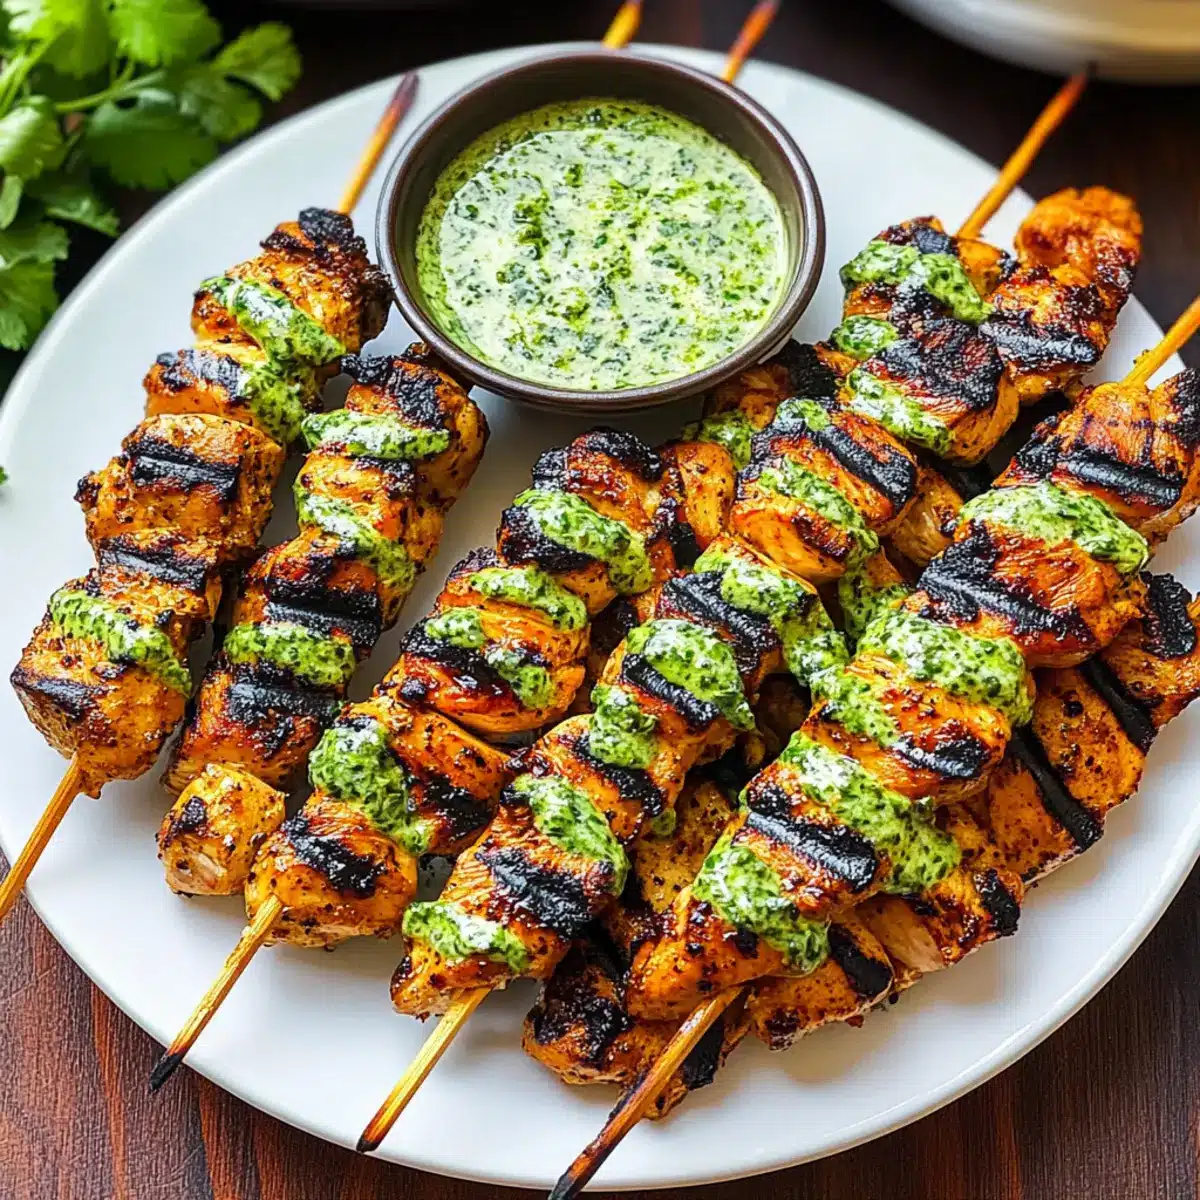
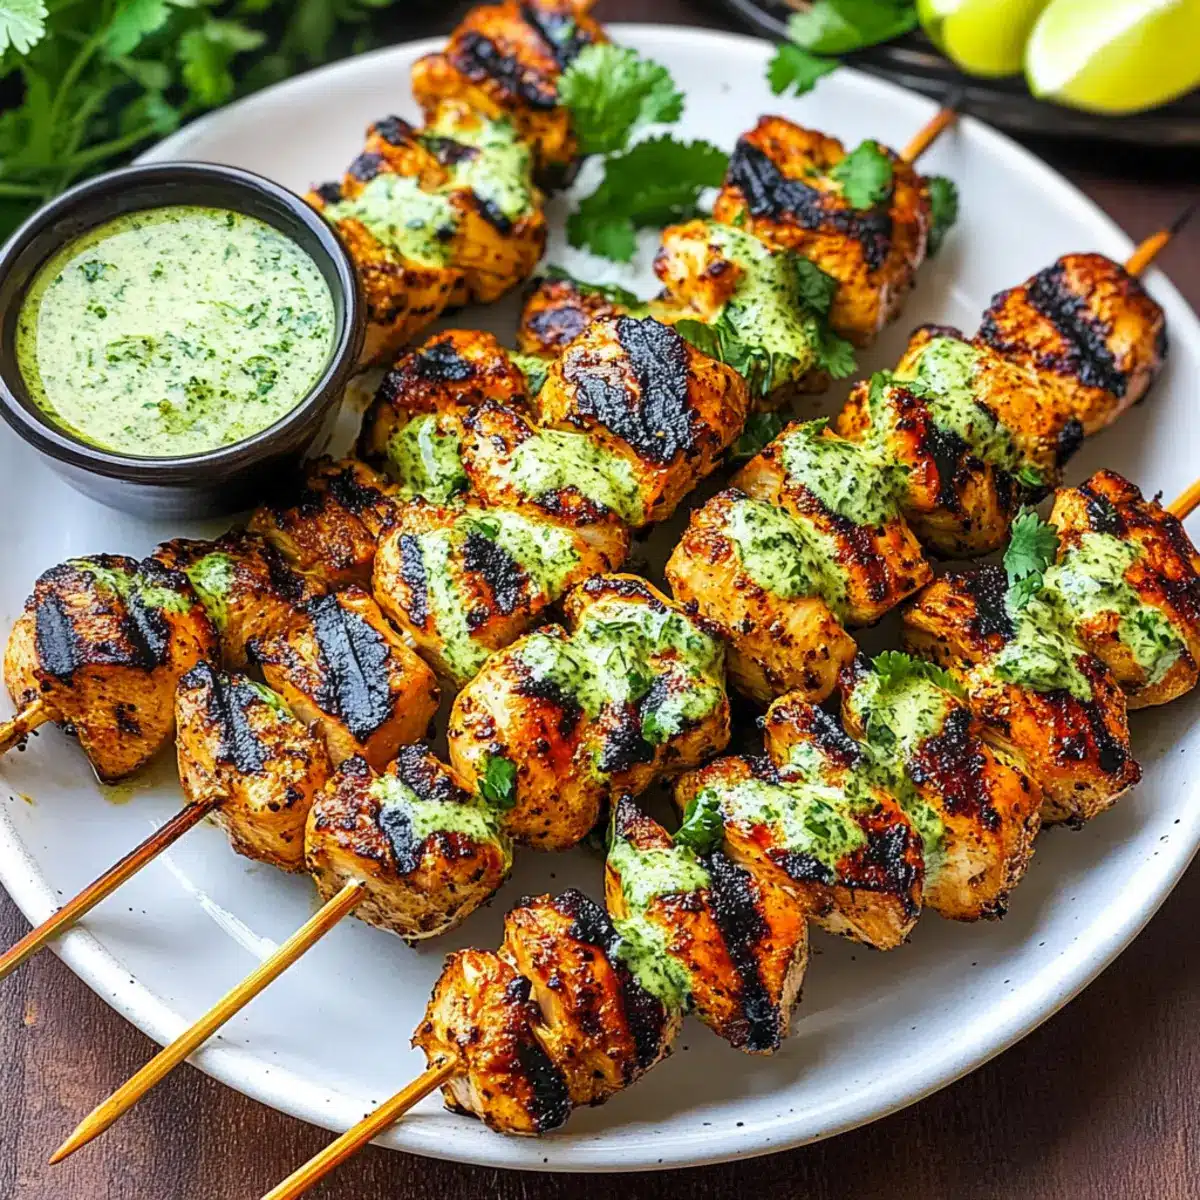
The aroma of sizzling marinated chicken fills the air, instantly whisking me away to sun-soaked outdoor barbecues. These Peruvian Style Grilled Chicken Skewers are not just a meal; they’re an invitation to gather around the grill with friends and family, sharing laughter and delicious bites. With a quick prep time of just 20 minutes, these skewers are a lifesaver for busy weeknights or spontaneous summer gatherings. Not only are they gluten-free and low-carb, making them perfect for various diets, but they also pack a punch of flavor with a delightful zing from garlic and lime that brightens each juicy bite. Are you ready to elevate your grilling game and impress your guests with a simple yet unforgettable dish? Let’s get cooking!
Why Are These Skewers a Must-Try?
Simplicity: With just a few ingredients, these Peruvian Style Grilled Chicken Skewers are incredibly easy to whip up, perfect for any skill level in the kitchen.
Flavor Explosion: The combination of garlic, lime, and spices creates an unforgettable taste that will leave your guests asking for more.
Quick Cooking: Ready in just 20 minutes, these skewers are ideal for busy weeknights or impromptu get-togethers.
Versatile Pairing: Serve them with a side of Aji Verde for dipping or alongside a light salad or grilled vegetables, which beautifully round out your meal.
Crowd-Pleasing: These skewers are gluten-free and low-carb, making them a delicious and accommodating option for all your friends and family, especially if they enjoy dishes like Garlic Parmesan Chicken or BBQ Chicken Mac.
Peruvian Grilled Chicken Skewers Ingredients
For the Marinade
• Garlic – Brings pungent flavor; freshly minced or grated is preferred for potency.
• Olive Oil – Adds moisture and helps in marinade adhesion.
• Lime Juice – Provides acidity to tenderize chicken and balance flavors; you can substitute with lemon juice if needed.
• Soy Sauce – Adds saltiness and umami; use tamari for gluten-free options.
• Honey/Brown Sugar – Acts as a sweetener to balance the marinade’s savory elements; can be replaced with agave syrup.
• Ground Cumin – Offers a warm, earthy flavor essential to these Peruvian grilled chicken skewers.
• Oregano – Introduces a herbal, aromatic note; dried oregano works well.
• Paprika – Contributes color and a mild flavor; substitute with smoked paprika for added depth.
• Ground Annatto (optional) – Used for coloring; you can omit if unavailable.
• Cayenne Pepper (optional) – Adds heat; can replace with aji panca paste for a traditional flavor.
For the Skewers
• Boneless Skinless Chicken Breasts or Thighs – The star protein, cut into bite-sized pieces for easy grilling.
Step‑by‑Step Instructions for Peruvian Grilled Chicken Skewers
Step 1: Prepare the Marinade
In a medium bowl, combine freshly minced garlic, olive oil, lime juice, soy sauce, honey, ground cumin, oregano, paprika, ground annatto, and cayenne pepper (if using). Whisk these ingredients together until you achieve a smooth, well-blended marinade. This flavorful mix is essential for infusing your Peruvian grilled chicken skewers with a rich taste that will have everyone coming back for more.
Step 2: Marinate the Chicken
Add bite-sized pieces of boneless skinless chicken breasts or thighs into the marinade, ensuring each piece is generously coated. Cover the bowl with plastic wrap or a lid and refrigerate for at least 20 minutes, but ideally up to overnight. This allows the chicken to absorb the marinade’s bold flavors, making your skewers delectably juicy and tender once grilled.
Step 3: Preheat the Grill
While the chicken marinates, preheat your grill to medium-high heat, reaching about 400°F (200°C). This temperature is perfect for achieving those beautiful grill marks while ensuring the chicken cooks thoroughly without drying out. Prepare your grill grates by lightly oiling them to prevent sticking, which will further enhance the grilling experience.
Step 4: Assemble the Skewers
Once marinated, remove the chicken from the refrigerator and let it sit for a few minutes to take off the chill. Skewer the pieces onto wooden or metal skewers, making sure to leave a little space between each piece for even cooking. If using wooden skewers, ensure they’ve been soaked in water for at least 30 minutes beforehand to avoid burning on the grill.
Step 5: Grill the Skewers
Place the skewers on the preheated grill and cook for 2-4 minutes on each side, turning them over until you see a golden brown, lightly charred exterior. The chicken is done when it reaches an internal temperature of 165°F (75°C) and juices run clear, indicating that your Peruvian grilled chicken skewers are ready to be devoured by all.
Expert Tips for Peruvian Grilled Chicken Skewers
-
Marinate Joyfully: Ensure each chicken piece is well-coated in the marinade for maximum flavor infusion. Don’t be shy; let those spices work their magic!
-
Soak Wooden Skewers: If using wooden skewers, remember to soak them in water for at least 30 minutes beforehand. This prevents burning and allows for even grilling.
-
Mind the Grill Temperature: Preheat your grill to medium-high heat (around 400°F). A properly heated grill ensures a beautifully charred exterior without drying out the chicken.
-
Avoid Overcrowding: When skewering the chicken, leave space between each piece. Crowding the skewers can lead to uneven cooking, compromising your Peruvian grilled chicken skewers.
-
Check for Doneness: Use a meat thermometer to ensure that each skewer reaches an internal temperature of 165°F. This guarantees juicy, properly cooked chicken every time!
How to Store and Freeze Peruvian Grilled Chicken Skewers
-
Fridge: Store cooked Peruvian grilled chicken skewers in an airtight container for up to 3 days. Place parchment paper between layers to maintain texture.
-
Freezer: For longer storage, freeze the skewers in a single layer on a baking sheet, then transfer to freezer bags for up to 3 months. This keeps them tasting fresh when re-heated.
-
Reheating: To reheat, place the frozen skewers in the fridge overnight, then warm them in the oven at 350°F (175°C) for about 15-20 minutes or until heated through.
-
Preparation Ahead: Marinate the chicken up to 24 hours in advance and keep it refrigerated until you’re ready to grill. This enhances the flavors and saves time on busy summer days.
Peruvian Grilled Chicken Skewers Variations
Feel free to explore these scrumptious variations to make the dish even more delightful and tailored to your taste!
-
Seafood Twist: Substitute chicken with shrimp for a succulent seafood version. The marinade complements shrimp beautifully, providing a fresh coastal vibe.
-
Veggie Delight: Add bell peppers, onions, or zucchini to your skewers for an explosion of color and flavor. These vegetables not only enhance taste but also add a delightful crunch.
-
Sweet & Savory: Include pineapple chunks on the skewers for a sweet twist that contrasts wonderfully with the savory marinade. The caramelized pineapple becomes a standout bite!
-
Heat Factor: If you’re a fan of spice, increase the cayenne pepper or try jalapeños on your skewers. This elevates the heat level and intensifies the flavor with each bite.
-
Herb Boost: Experiment with fresh herbs like cilantro or parsley for an aromatic finish. Just sprinkle them over the skewers after grilling for an added layer of freshness.
-
Smoky Flair: Swap regular paprika for smoked paprika to infuse a rich, smoky flavor into your skewers. It’s a simple change that can transport your taste buds.
Explore these variations and discover how customizable these Peruvian Grilled Chicken Skewers can be! And if you’re looking for more exciting recipes, don’t miss out on Garlic Parmesan Chicken or Chopped Chicken Bacon for tasty twists!
What to Serve with Peruvian Style Grilled Chicken Skewers
Serving up these skewers is just the beginning of a delightful meal experience that calls for tantalizing accompaniments.
-
Aji Verde: This zesty Peruvian green sauce amplifies the skewers with its fresh herbal and spicy notes, providing a refreshing dip.
-
Grilled Vegetables: Colorful bell peppers, zucchini, and corn tossed in olive oil add a charred sweetness that pairs beautifully with the savory chicken.
-
Quinoa Salad: Nutty and fluffy quinoa complemented with fresh veggies and a light dressing introduces a healthy yet hearty side that keeps the meal balanced.
-
Cilantro Lime Rice: Light and aromatic, this dish enhances the bright flavors in the grilled skewers while adding a comforting, fluffy texture to the plate.
-
Tropical Fruit Salsa: A mix of mango, pineapple, and lime creates a sweet and tangy counterpoint, capturing the essence of summer in every bite.
-
Sparkling Water with Lime: Refreshing and crisp, this beverage perfectly cleanses the palate between bites, enhancing the skewers’ zesty flavor. Enjoy with a wedge of lime for an added punch!
Make Ahead Options
These Peruvian Style Grilled Chicken Skewers are a fantastic option for meal prep enthusiasts! You can marinate the chicken pieces up to 24 hours in advance, allowing the bold flavors to fully penetrate and enhance the meat. Simply combine the marinade ingredients, add the chicken, cover, and refrigerate. For a quick serving, remove the chicken from the fridge, skewer the pieces, and grill them directly, which only takes about 8-10 minutes. If you have leftovers, cooked skewers can be stored in an airtight container in the fridge for up to 3 days; just make sure to reheat gently on the grill or in a pan to preserve their juicy goodness. Enjoy this time-saving strategy for busy weeknights!

Peruvian Style Grilled Chicken Skewers Recipe FAQs
What type of garlic should I use for the marinade?
Absolutely! Freshly minced or grated garlic is the best choice for these Peruvian grilled chicken skewers, as it brings a pungent flavor that elevates the taste of your marinade. If you can’t find fresh garlic, jarred minced garlic is a decent substitute, but try to use the freshest option available for optimal flavor.
How should I store leftover grilled chicken skewers?
Very good question! Store your cooked Peruvian grilled chicken skewers in an airtight container in the refrigerator for up to 3 days. To help maintain their texture, I recommend placing parchment paper between layers. This way, when you’re ready to enjoy the leftovers, they’ll taste just about as good as when they were first grilled!
Can I freeze the skewers for later use?
Absolutely! For freezing, first lay the skewers in a single layer on a baking sheet and freeze them until solid—about an hour. After they’re frozen, transfer them to freezer bags. They can be stored in the freezer for up to 3 months. When you’re ready to use them, just thaw them in the refrigerator overnight and reheat in the oven or on the grill.
What if my chicken skewers burn on the grill?
Oh no! If your chicken skewers are burning, it might be a sign that your grill is too hot or the skewers are overcrowded. Ensure you’re grilling at medium-high heat and give enough space between each piece for even cooking. If they start to char too quickly, lower the heat or move them to a cooler part of the grill until they finish cooking through.
Are these skewers safe for my gluten-sensitive friends?
Definitely! Your guests will appreciate that these Peruvian grilled chicken skewers are gluten-free. Just make sure to use tamari instead of soy sauce for the marinade, as tamari is naturally gluten-free and will provide that same delicious umami flavor without any gluten concerns. Always check the labels for any cross-contamination warnings!

Peruvian Grilled Chicken Skewers That Will Wow Your Guests
Ingredients
Equipment
Method
- Prepare the Marinade: In a bowl, combine garlic, olive oil, lime juice, soy sauce, honey, cumin, oregano, paprika, annatto, and cayenne. Whisk until well-blended.
- Marinate the Chicken: Add chicken pieces to the marinade, coating them well. Cover and refrigerate for at least 20 minutes, ideally overnight.
- Preheat the Grill: Heat the grill to medium-high (around 400°F). Lightly oil the grill grates.
- Assemble the Skewers: Skewer marinated chicken, leaving space between pieces. Use soaked wooden skewers if using.
- Grill the Skewers: Cook skewers on the grill for 2-4 minutes on each side until golden brown and cooked through, reaching 165°F.
Leave a Reply