
As I stood in the kitchen, the sweet scent of ripe bananas wrapped around me like a warm hug, it struck me how comforting a classic dessert can be. That’s when I decided to whip up this No Bake Banana Pudding Cheesecake—a delightful fusion of nostalgia and convenience. With no baking required, this easy dessert is perfect for busy weeknights or weekend gatherings, inviting family and friends to indulge in its creamy layers and crunchy vanilla wafer crust. Plus, it’s a crowd-pleaser that even the pickiest eaters will love! Curious to see how this simple recipe comes together without ever turning on the oven? Let’s dive in!
Why Is This Cheesecake So Irresistible?
Easy Preparation: No baking means you can whip this up in no time, perfect for busy lives.
Creamy Delight: The luscious combination of cream cheese and sweetened condensed milk creates a velvety filling that melts in your mouth.
Nostalgic Flavors: It’s like a childhood treat reinvented, with the comforting flavor of banana pudding everyone knows and loves.
Family-Friendly: This dessert is a hit with both kids and adults, making it ideal for family dinners or gatherings. Check out my Banana Split Dump Cake for another family-friendly dessert option!
Make-Ahead Magic: Prepare it the night before, and you’ll have a stunning cheesecake ready to impress without any last-minute stress. Enjoy every creamy, dreamy bite!
No Bake Banana Pudding Cheesecake Ingredients
For the Cheesecake Filling
- Cream Cheese – Provides a rich, smooth texture for the cheesecake; full-fat is best for a sturdy set.
- Sweetened Condensed Milk – Adds delightful sweetness and creaminess; reducing sugar significantly may affect the consistency.
- Instant Banana Pudding Mix – Essential for thickening the cheesecake without baking; must use instant form, as cook-and-serve will not work.
- Heavy Whipping Cream – Creates a light and fluffy filling; full-fat version is preferred for the best texture.
For the Crust
- Vanilla Wafers – Forms a crunchy crust to balance the creamy filling; graham crackers or gluten-free alternatives can be used if needed.
For the Topping
- Bananas – Fresh fruit adds flavor and decoration; use ripe bananas for the best taste and texture.
Step‑by‑Step Instructions for No Bake Banana Pudding Cheesecake
Step 1: Prepare the Crust
Begin by crushing 2 cups of vanilla wafers into fine crumbs using a food processor or a zip-top bag and rolling pin. In a mixing bowl, combine the crumbs with ½ cup of melted butter until well coated. Transfer this mixture to a springform pan and firmly press it into the bottom to create an even crust. Set aside to allow it to firm up.
Step 2: Make Cheesecake Filling
In a large mixing bowl, beat 8 ounces of cream cheese using an electric mixer until it’s velvety smooth. Gradually mix in 1 can of sweetened condensed milk and whisk in 1 package of instant banana pudding mix. Once combined, gently fold in 1 cup of heavy whipping cream that has been whipped to soft peaks until the mixture is fluffy and well incorporated, achieving a creamy consistency for your No Bake Banana Pudding Cheesecake.
Step 3: Assemble Cheesecake
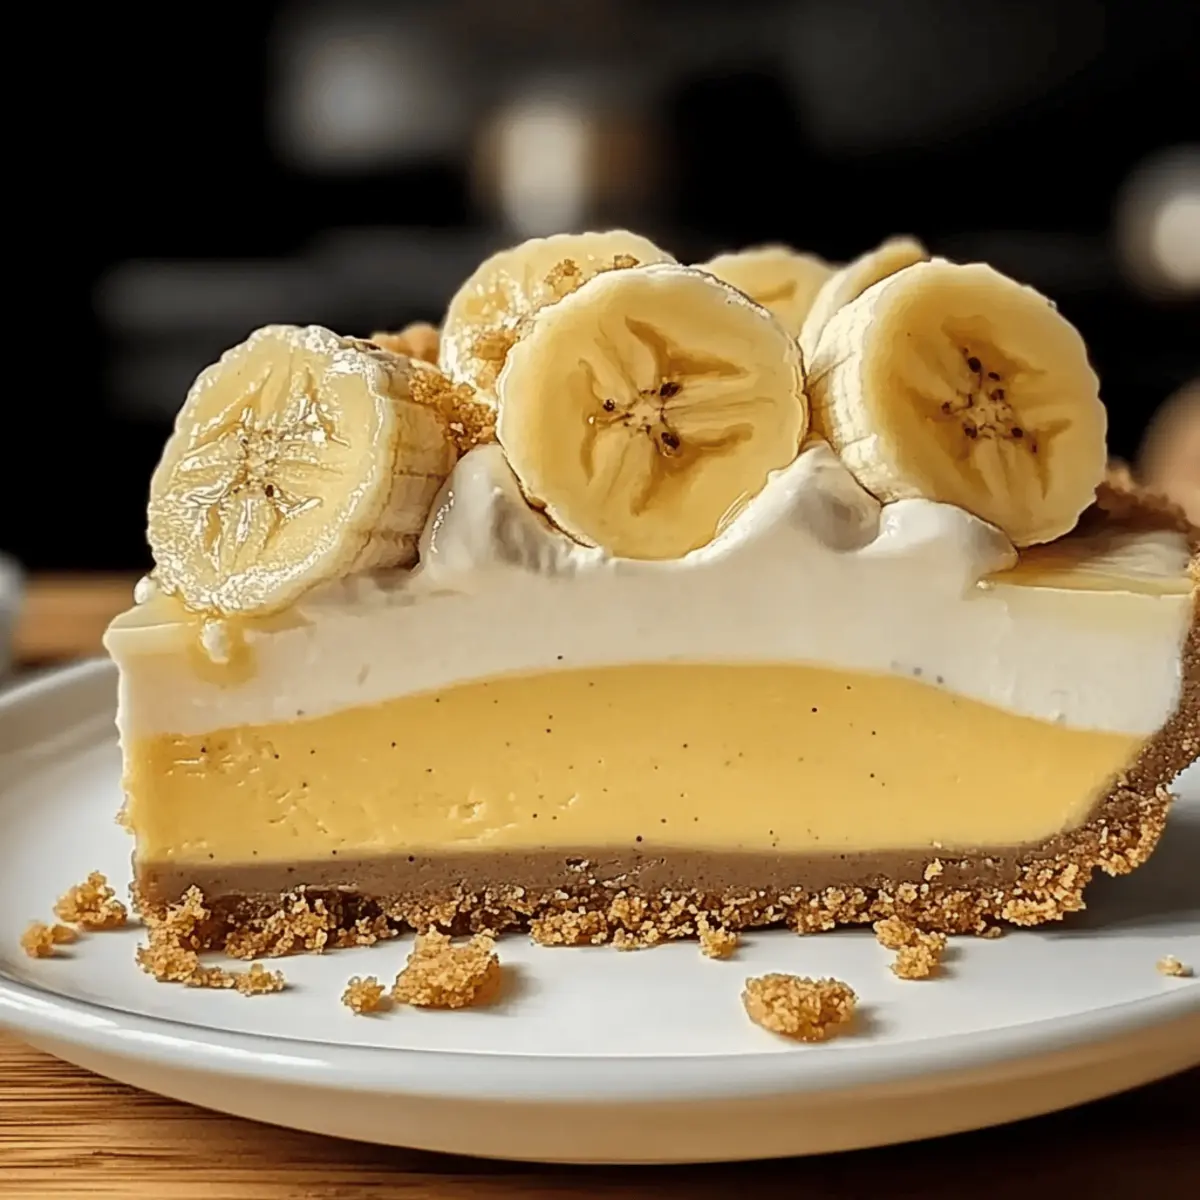
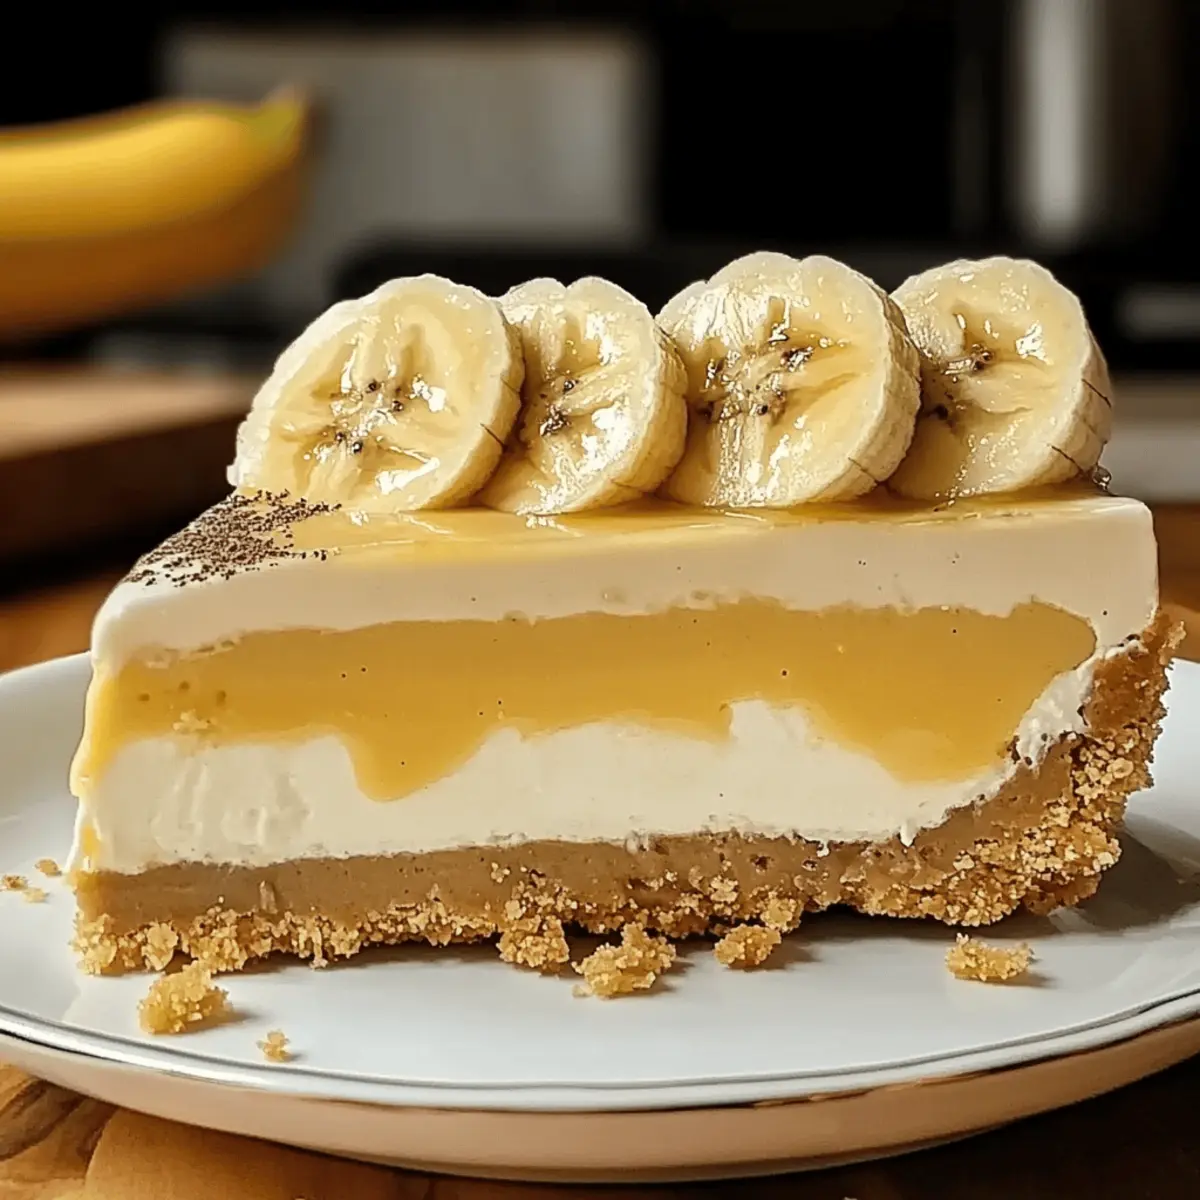
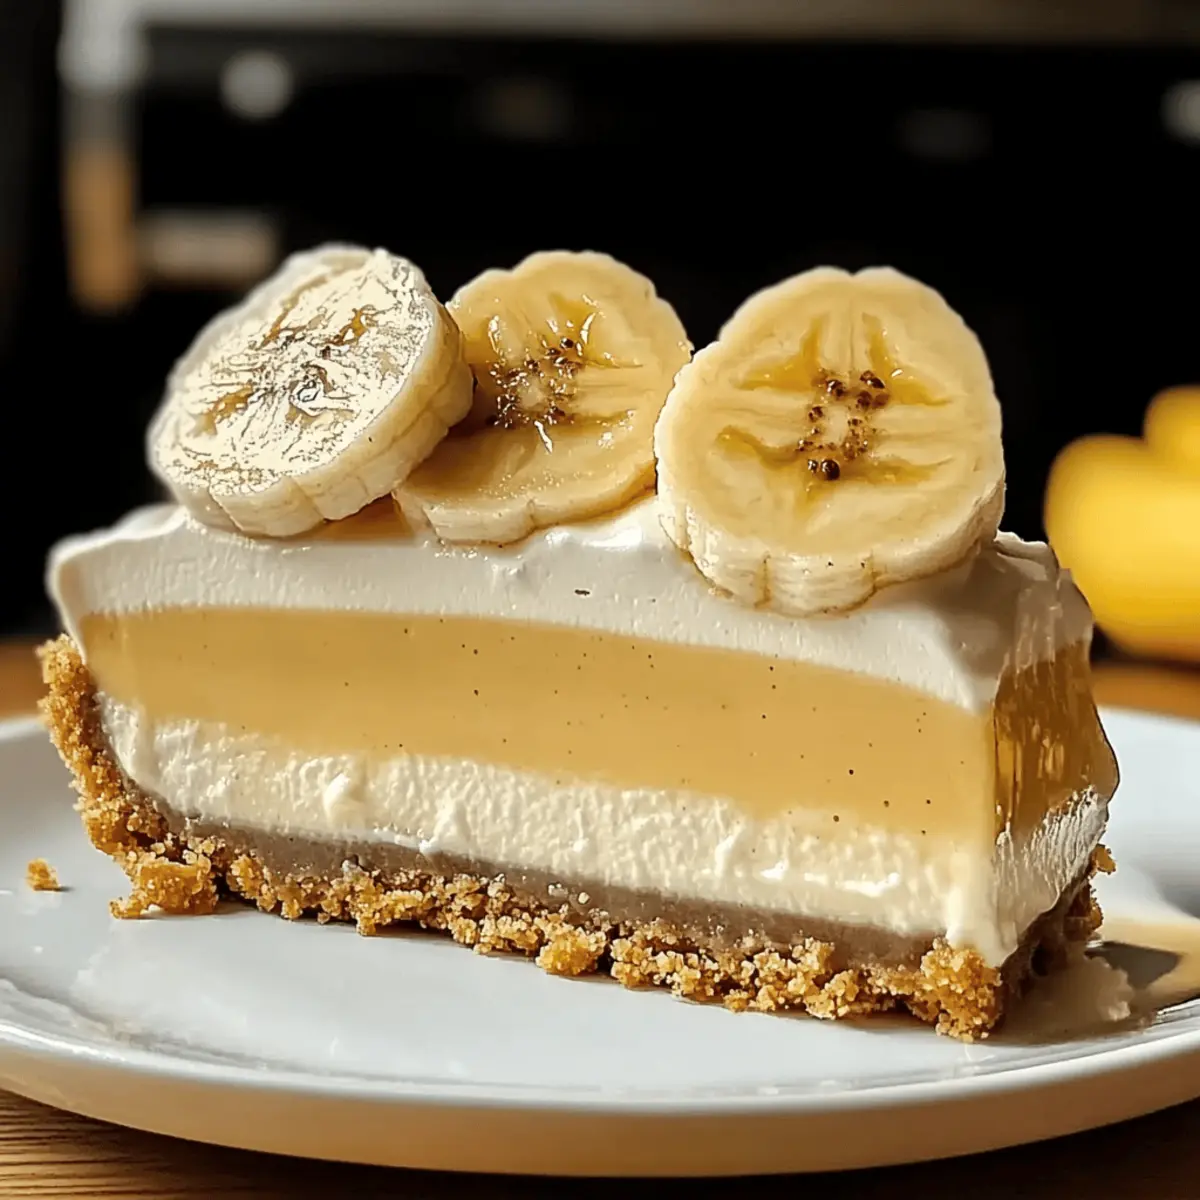
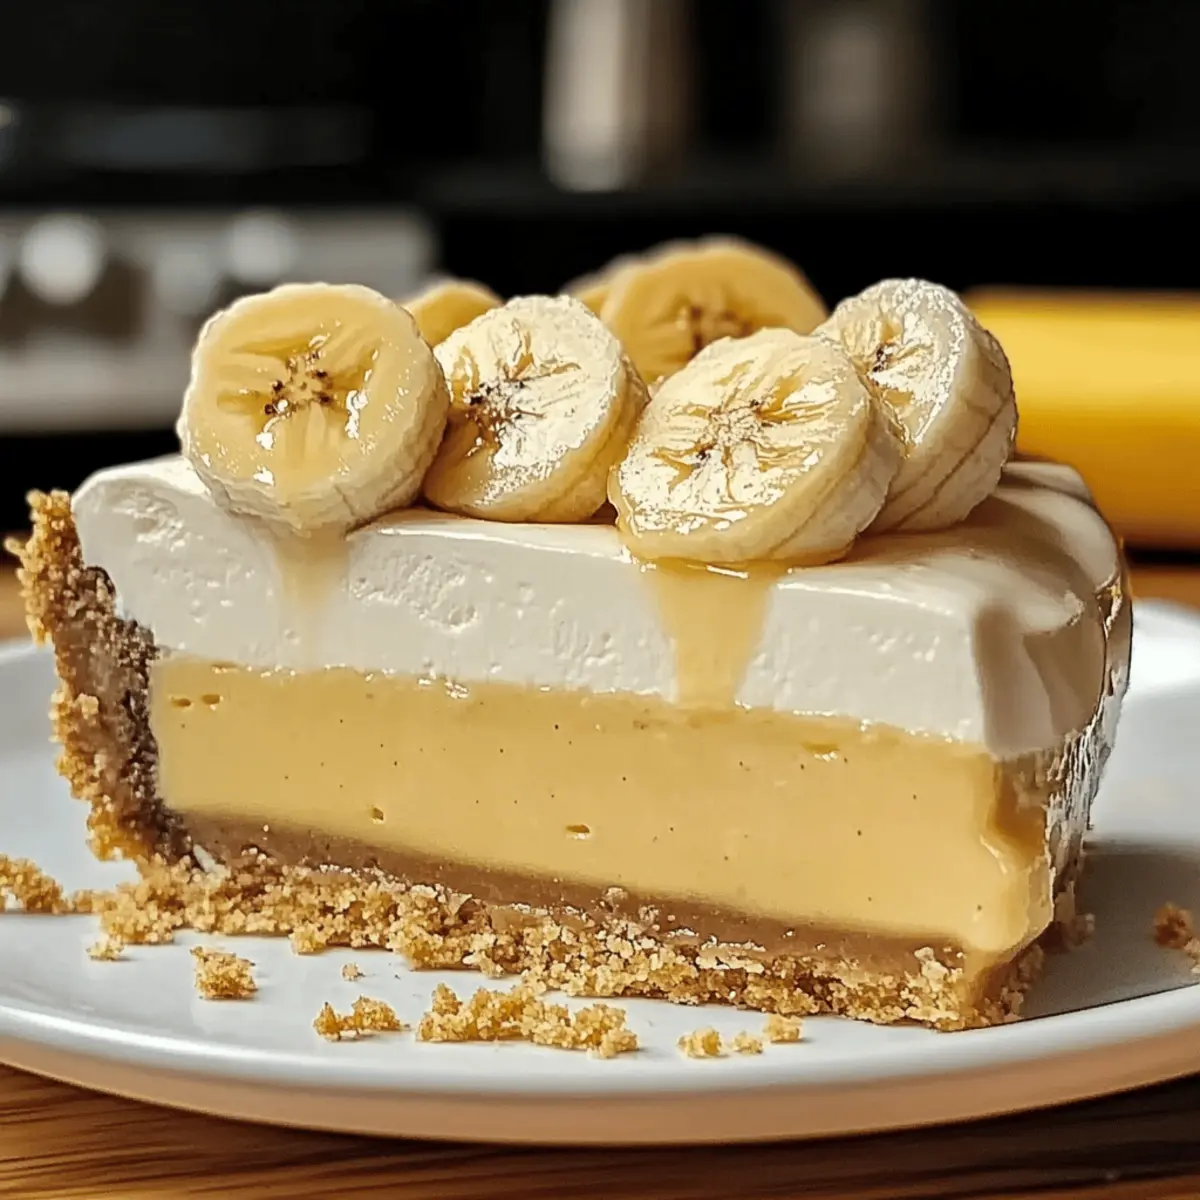
Spread the prepared cheesecake filling evenly over the crust in your springform pan. Use a spatula to smooth the top, creating a lovely, even surface. To add depth to your dessert, you can layer slices of fresh bananas on top of the filling if desired. Ensure that it’s well-distributed for a delightful burst of flavor with each slice.
Step 4: Chill
Cover your cheesecake with plastic wrap or aluminum foil, then place it in the refrigerator. Allow it to chill for a minimum of 6 hours, or preferably overnight, to let the flavors meld and the filling set properly. This crucial step ensures your No Bake Banana Pudding Cheesecake holds its shape when sliced.
Step 5: Serve
Once the cheesecake is fully chilled and set, carefully remove the sides of the springform pan. Garnish the top with additional banana slices and a sprinkle of crushed vanilla wafers for an appealing presentation. Slice the cheesecake into wedges and serve immediately, allowing everyone to enjoy the creamy, dreamy texture and nostalgic banana flavor.
No Bake Banana Pudding Cheesecake Variations
Feel free to put your personal spin on this delightful cheesecake with these creative ideas!
-
Chocolate Layer: Add a layer of chocolate ganache on top for a delicious contrast to the banana flavors. It brings richness and a decadent twist that pairs beautifully with the creamy texture.
-
Nutty Crunch: Include crushed nuts like pecans or walnuts in the crust for extra crunch and flavor. This adds a delightful texture while enhancing the overall taste profile of your cheesecake.
-
Salted Caramel Swirl: Drizzle salted caramel throughout the cheesecake filling before chilling. This will create beautifully swirled aesthetics and a sweet-savory flavor that’s irresistible.
-
Berry Bliss: Swap bananas with mixed berries like strawberries or raspberries for a fruity twist. Their natural tartness complements the sweetness perfectly, making it a refreshing summer dessert.
-
Lighter Version: Use Greek yogurt instead of cream cheese for a lighter filling. This gives you that creamy texture with fewer calories, and it introduces a tangy flavor that’s quite lovely.
-
Spicy Kick: Add a pinch of cinnamon or nutmeg to the filling for a subtle warmth that elevates the classic banana taste. These spices invoke a cozy, homey vibe that feels comforting.
-
Tropical Fusion: Replace the bananas with diced mango or pineapple for an exotic treat. The juicy fruits will infuse the cheesecake with vibrant tropical flavors, perfect for a sunny day.
For more delicious ideas, you might also enjoy trying a Millionaires Cheesecake Indulge or explore the fruity goodness of Strawberry Crunch Cheesecake. Happy baking!
Expert Tips for No Bake Banana Pudding Cheesecake
- Chill Thoroughly: Always refrigerate the cheesecake for at least 6 hours, preferably overnight, to ensure it sets firmly for clean slices.
- Choose Instant Pudding: Make sure to use instant banana pudding mix; the cook-and-serve version will lead to a runny filling.
- Use Full-Fat Dairy: Opt for full-fat cream cheese and heavy whipping cream to achieve a rich and sturdy texture in your No Bake Banana Pudding Cheesecake.
- Fresh Bananas Only: Use ripe bananas for the best flavor; underripe ones may not provide the sweetness or creaminess needed.
- Crust Tips: If using a different baking pan, ensure it’s non-stick or line it with parchment to prevent sticking when removing the cheesecake.
- Layer It Up: For an even more decadent experience, consider adding sliced bananas or a drizzle of caramel on top before chilling.
What to Serve with No Bake Banana Pudding Cheesecake
Treat your loved ones to an unforgettable dessert experience that beautifully complements the rich flavors of this delightful cheesecake.
-
Light Fruit Salad: A medley of fresh fruits adds a refreshing contrast to the creamy cheesecake, balancing its richness with vibrant flavors.
-
Whipped Cream Topping: Simple yet heavenly, a dollop of freshly whipped cream enhances the cheesecake’s fluffy texture, making every bite indulgently smooth.
-
Mint Leaves: Sprinkling fresh mint over the cheesecake not only adds a pop of color but also a touch of cool freshness that brightens the dessert.
-
Chocolate Sauce: Drizzling warm chocolate sauce over each slice elevates the dessert, offering a luscious layer of flavor that tantalizes the taste buds.
-
Coffee or Espresso: A steaming cup of coffee or a shot of espresso perfectly complements the dessert, balancing its sweetness and enhancing those nostalgic flavors.
-
Almond Biscotti: For a delightful crunch, serve slices of almond biscotti. Their nutty flavor and crisp texture contrast beautifully with the creamy cheesecake.
-
Vanilla Ice Cream: Dairy lovers will rejoice at the scoop of vanilla ice cream alongside, providing an extra chill and creaminess that makes this combo irresistible!
-
Coconut Whipped Cream: For a tropical twist, serve the cheesecake with coconut whipped cream, adding a dreamy, tropical flair to each slice.
-
Caramel Drizzle: A drizzle of caramel sauce can transform the cheesecake, introducing a sweet, buttery flavor that complements the bananas magnificently.
Storage Tips for No Bake Banana Pudding Cheesecake
Fridge: Store your cheesecake tightly covered in the refrigerator for up to 2–3 days. This keeps it fresh and maintains that creamy texture everyone loves!
Freezer: If you want to extend its life, freeze the cheesecake for up to 1–2 months. Wrap it securely in plastic wrap and aluminum foil to prevent freezer burn.
Thawing: When ready to enjoy, thaw your No Bake Banana Pudding Cheesecake in the refrigerator for several hours or overnight. This way, it retains its delicious texture.
Reheating: Enjoy it chilled as is—no reheating is necessary! Just slice and serve for a delightful dessert anytime.
Make Ahead Options
These No Bake Banana Pudding Cheesecake treats are perfect for busy home cooks looking to save time without sacrificing flavor! You can prepare the cheesecake filling and crust up to 24 hours in advance, granting you a delicious dessert ready for serving. Simply crush the vanilla wafers and mix them with melted butter, then refrigerate the crumbly mixture. For the filling, whip together the cream cheese, sweetened condensed milk, and banana pudding mix, folding in the whipped cream until fluffy. Store the filling separately in the fridge until you’re ready to assemble. Just before serving, layer the filling over the crust, chill for another hour to ensure it sets just right, and enjoy this comforting dessert that tastes just as delightful after prep!
No Bake Banana Pudding Cheesecake Recipe FAQs
What type of bananas should I use for the recipe?
Absolutely! For the best flavor and texture in your No Bake Banana Pudding Cheesecake, choose ripe bananas. Look for bananas that are slightly speckled with brown spots—this indicates they’re sweet and ready to use. Avoid underripe bananas, as they can be too starchy and not as flavorful.
How should I store leftover cheesecake?
Very good question! After enjoying your cheesecake, store any leftovers in the refrigerator, tightly covered, for up to 2-3 days. This will help maintain its creamy texture. Avoid leaving it out at room temperature for more than 2 hours to ensure food safety.
Can I freeze No Bake Banana Pudding Cheesecake?
Absolutely! To freeze your cheesecake properly, allow it to cool completely and then wrap it tightly in plastic wrap followed by aluminum foil to prevent freezer burn. It can be stored in the freezer for up to 1-2 months. When you’re ready to enjoy, let it thaw in the refrigerator for several hours or overnight before serving.
What can I do if my cheesecake filling is too runny?
No worries! If your No Bake Banana Pudding Cheesecake filling turns out runny, it’s likely due to using a cook-and-serve pudding mix instead of instant. To fix this, you can carefully whisk in a few tablespoons of extra instant pudding mix while mixing until it thickens. Then, try re-chilling the cheesecake for at least another hour to ensure it sets properly.
Is this cheesecake safe for dogs?
I recommend caution! While bananas are generally safe for dogs, the other ingredients in this cheesecake—especially cream cheese and sweetened condensed milk—can be rich and may upset your dog’s stomach. It’s best to keep this dessert for human enjoyment only.
Can I make this cheesecake ahead of time?
Very much so! You can make your No Bake Banana Pudding Cheesecake a day in advance. Just prepare it, follow the chilling instructions, and let it set overnight in the refrigerator. This not only saves you time but also allows the flavors to meld beautifully. You’ll have a delightful dessert ready to impress guests without any last-minute fuss!
No Bake Banana Pudding Cheesecake that's Easy and Irresistible
Ingredients
Equipment
Method
- Begin by crushing 2 cups of vanilla wafers into fine crumbs using a food processor or a zip-top bag and rolling pin. In a mixing bowl, combine the crumbs with ½ cup of melted butter until well coated. Transfer this mixture to a springform pan and firmly press it into the bottom to create an even crust. Set aside to allow it to firm up.
- In a large mixing bowl, beat 8 ounces of cream cheese using an electric mixer until it's velvety smooth. Gradually mix in 1 can of sweetened condensed milk and whisk in 1 package of instant banana pudding mix. Once combined, gently fold in 1 cup of heavy whipping cream that has been whipped to soft peaks until the mixture is fluffy and well incorporated, achieving a creamy consistency for your No Bake Banana Pudding Cheesecake.
- Spread the prepared cheesecake filling evenly over the crust in your springform pan. Use a spatula to smooth the top, creating a lovely, even surface. To add depth to your dessert, you can layer slices of fresh bananas on top of the filling if desired. Ensure that it's well-distributed for a delightful burst of flavor with each slice.
- Cover your cheesecake with plastic wrap or aluminum foil, then place it in the refrigerator. Allow it to chill for a minimum of 6 hours, or preferably overnight, to let the flavors meld and the filling set properly. This crucial step ensures your No Bake Banana Pudding Cheesecake holds its shape when sliced.
- Once the cheesecake is fully chilled and set, carefully remove the sides of the springform pan. Garnish the top with additional banana slices and a sprinkle of crushed vanilla wafers for an appealing presentation. Slice the cheesecake into wedges and serve immediately, allowing everyone to enjoy the creamy, dreamy texture and nostalgic banana flavor.
Leave a Reply