
As the sweet aroma of baked bananas wafts through my kitchen, my mind dances back to countless afternoons spent crafting treats that warm the soul. Today, I’m excited to share my take on Healthy Banana Bread Blondies—a delightful twist that harmonizes the comforting essence of classic banana bread with the chewy goodness of blondies. These gems are naturally sweetened with ripe bananas and maple syrup, creating a guilt-free dessert option that’s both nourishing and satisfying. With quick prep in just one bowl, they’re ideal for whipping up anytime you need to use those overripe bananas lurking on your counter. Plus, they’re gluten-free and dairy-free, making them a treat everyone can enjoy! Are you ready to treat yourself to this wholesome indulgence? Let’s dive into the recipe!
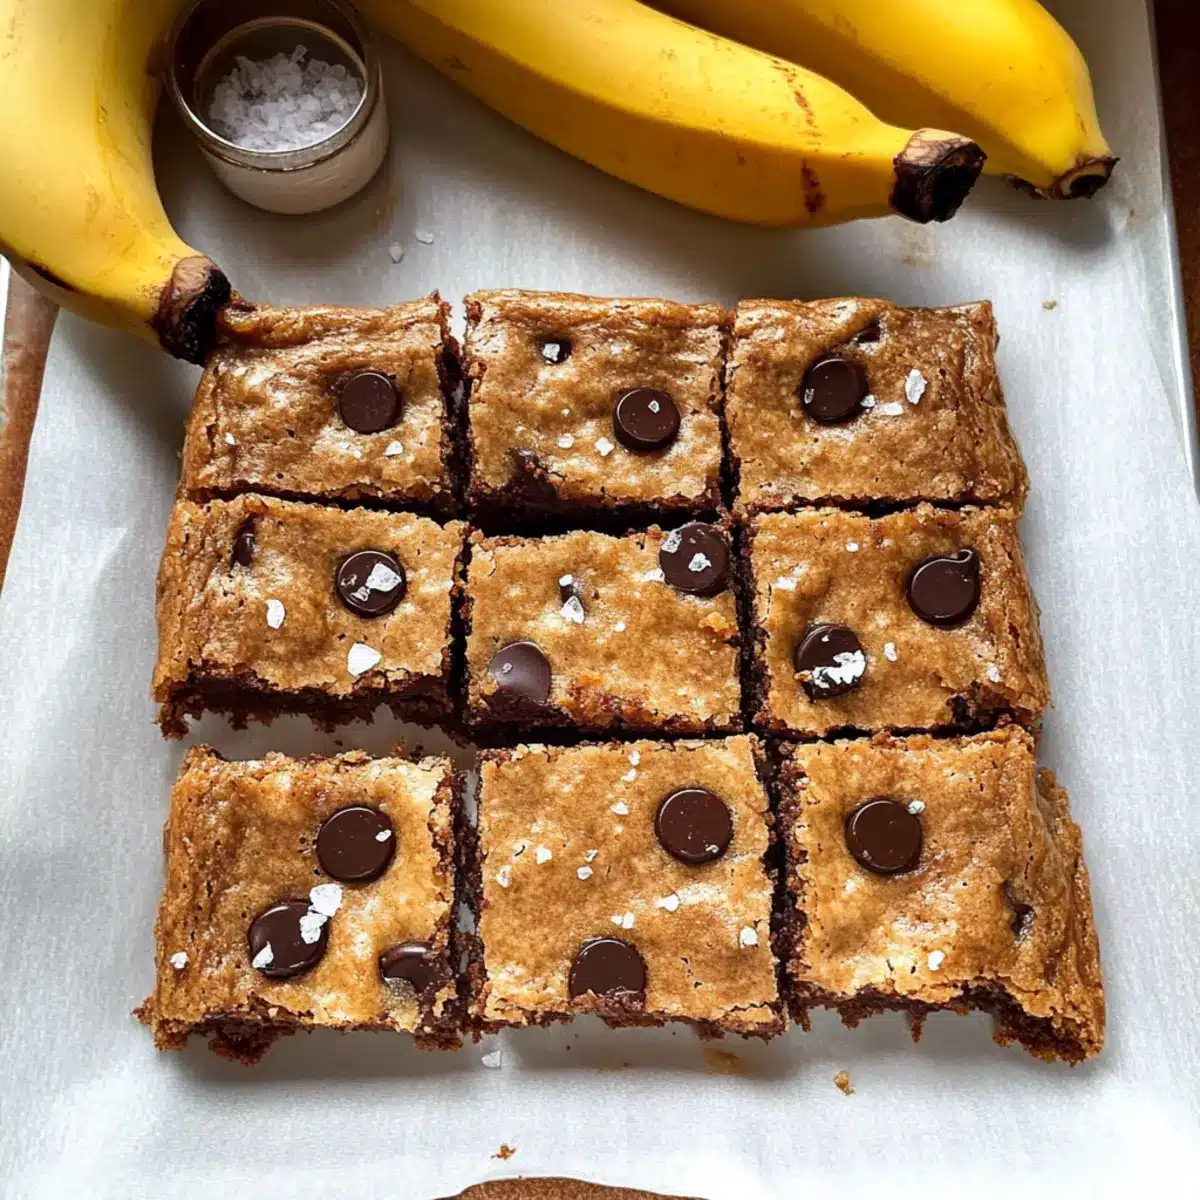
Why Are These Blondies So Irresistible?
Nutritious and delicious, these Healthy Banana Bread Blondies are a guilt-free treat everyone will love! Quick and easy to whip up in just one bowl, you’ll savor every moment of baking. Naturally sweetened with ripe bananas and maple syrup, they make for a wholesome dessert option. Versatile enough to customize with your favorite add-ins, these blondies are a fantastic way to use up those overripe bananas. Whether as a snack or dessert, they guarantee crowd-pleasing appeal for both kids and adults alike—perfect for snack time or any occasion!
Healthy Banana Bread Blondies Ingredients
• Get ready to create a wonderfully moist treat with these Healthy Banana Bread Blondies!
For the Blondies
- Ripe Bananas – These are your sweetener and moisture booster; use very ripe bananas for optimal flavor.
- Maple Syrup – Provides natural sweetness; feel free to substitute with honey if needed, but it will slightly alter the taste.
- Peanut Butter – Acts as a binder and adds richness; creamy, runny varieties work best, but sunflower seed butter can make it nut-free.
- Oat Flour – This gluten-free option gives structure; you can swap in all-purpose flour for a non-gluten-free version.
- Baking Soda – Essential for a light, fluffy texture; no substitutes necessary here!
- Flaky Sea Salt – A little sprinkle enhances the sweetness; use sparingly before baking, and optionally garnish post-baking.
- Chocolate Chips – Adds indulgent gooeyness; opt for dairy-free chocolate chips for a fully dairy-free treat.
Step‑by‑Step Instructions for Healthy Banana Bread Blondies
Step 1: Preheat the Oven
Begin by preheating your oven to 350°F (175°C). While the oven warms up, line an 8×8-inch baking dish with parchment paper, allowing some overhang for easy removal later. This is a crucial first step to ensure your Healthy Banana Bread Blondies bake evenly and do not stick to the pan.
Step 2: Mash the Bananas
In a large mixing bowl, take your very ripe bananas and mash them until smooth, ensuring no lumps remain. This should take about 1-2 minutes. Next, add in the creamy peanut butter and maple syrup, stirring until everything is well combined. The mixture should have a silky texture and enticing aroma, setting a sweet foundation for your blondies.
Step 3: Combine Dry Ingredients
Now, sprinkle the oat flour and baking soda directly into the banana mixture. Using a spatula, stir these dry ingredients into the wet mixture until just combined; a few flour streaks are okay. Be careful not to overmix, as this can affect the chewy texture of your Healthy Banana Bread Blondies.
Step 4: Fold in Chocolate Chips
Gently fold in your chocolate chips until they are evenly distributed throughout the batter. This step adds delightful bursts of chocolate to your blondies. Make sure to leave some chocolate chips for the top if you desire an extra indulgent touch.
Step 5: Bake the Blondies
Pour the batter into the lined baking dish, using your spatula to smooth the top evenly. If using, sprinkle the flaky sea salt over the surface, enhancing the flavor profile. Place the dish in the oven and bake for 20-25 minutes, or until a toothpick inserted in the center comes out clean or with a few moist crumbs.
Step 6: Cool and Slice
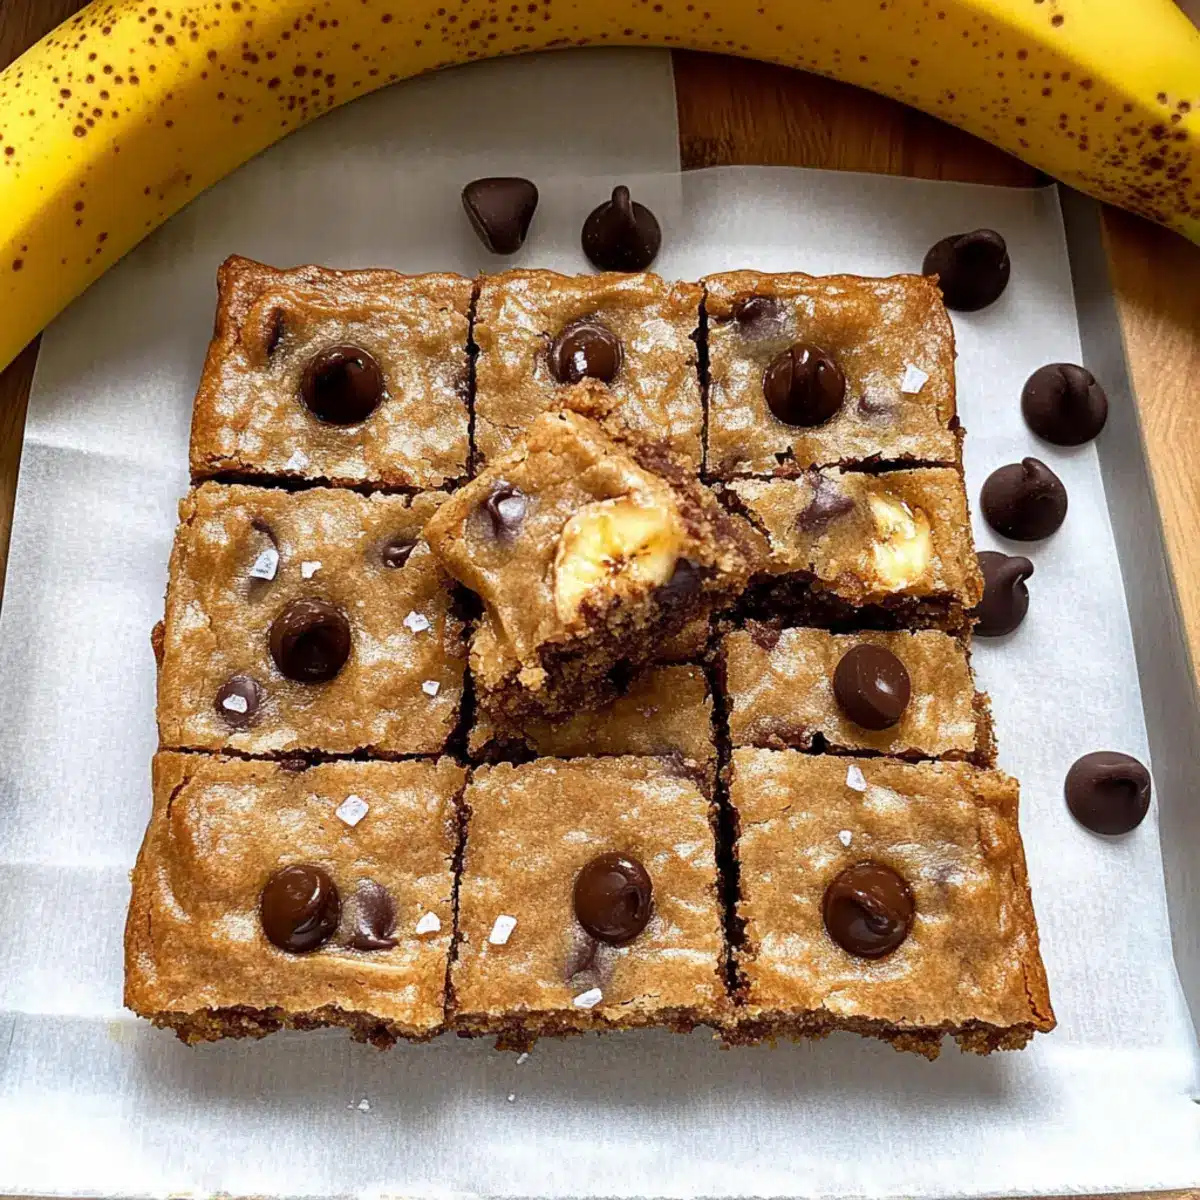
Once baked, remove the dish from the oven and let your Healthy Banana Bread Blondies cool in the pan for at least 10 minutes. This cooling time is essential for firming up the blondies, making slicing much easier later on. After cooling, lift them out using the parchment paper and slice into squares to serve.
Make Ahead Options
These Healthy Banana Bread Blondies are perfect for busy home cooks looking to save time! You can mash the ripe bananas and combine them with the peanut butter and maple syrup up to 24 hours in advance. Store this mixture covered in the refrigerator to keep it fresh. You can also measure out the dry ingredients (oat flour and baking soda) and keep them in a separate container for up to 3 days. When you’re ready to bake, simply combine the wet and dry ingredients, fold in the chocolate chips, and pour the batter into the baking dish. This way, your blondies will be just as delicious and fresh, with minimal effort on the day you wish to enjoy them!
What to Serve with Healthy Banana Bread Blondies
Indulging in these delightful squares is just the beginning; let’s elevate the experience by pairing them with the perfect accompaniments!
-
Creamy Greek Yogurt: A dollop adds a tangy, creamy dimension, balancing out the sweetness of the blondies and making your snack feel wholesome.
-
Fresh Berries: A vibrant burst of antioxidants, juicy berries like strawberries or blueberries offer a refreshing contrast to the chewy blondies.
-
Nut Butter Drizzle: Drizzling almond or peanut butter over warm blondies intensifies the flavor and adds a satisfying richness that’s hard to resist.
-
Chilled Almond Milk: Refreshing and nutty, almond milk pairs beautifully as a lighter drink option, enhancing the flavors of the banana and chocolate.
-
Coconut Whipped Cream: This lightly sweet, airy topping brings an exotic twist, perfect for special occasions or a cozy night in.
-
Iced Coffee: The boldness of coffee counters the sweetness of the blondies, creating a delightful afternoon pick-me-up that’s both delicious and energizing.
These pairings not only complement your Healthy Banana Bread Blondies but also elevate them into a memorable meal or snack!
Expert Tips for Healthy Banana Bread Blondies
-
Use Very Ripe Bananas: Selecting bananas with blackened skins ensures maximum sweetness and moisture for your blondies, avoiding any unpleasant bitterness.
-
Don’t Overmix: Stir the batter just until combined. Overmixing can lead to dense blondies instead of the desired soft and chewy texture.
-
Cool Completely Before Slicing: Patience is key! Allow the blondies to cool in the pan for at least 10 minutes to firm up, making slicing easier and cleaner.
-
Adjusting Sweetness: If you prefer sweeter blondies, feel free to increase the amount of maple syrup or chocolate chips. Just remember not to lose the essence of your Healthy Banana Bread Blondies!
-
Experiment with Add-ins: Customize your healthy blondies by adding nuts, shredded coconut, or spices like cinnamon for a unique flavor boost.
Healthy Banana Bread Blondies Variations
Feel free to unleash your creativity with these charming twists on your Healthy Banana Bread Blondies!
-
Nut-Free: Replace peanut butter with sunflower seed butter or tahini for a delightful nut-free version. Your blondies will still be creamy and delicious without the nuts.
-
Add Some Crunch: Stir in chopped walnuts or pecans for an extra layer of texture and flavor. The nuttiness blends beautifully with the banana and chocolate.
-
Coconut Bliss: Mix in shredded coconut for a tropical flair. This addition adds both flavor and chewiness, reminiscent of island vacations right in your kitchen.
-
Spice it Up: Enhance the flavor with a teaspoon of cinnamon or nutmeg. These spices deepen the sweetness and create a cozy aroma during baking.
-
Swirl of Nutella: Before baking, swirl in some Nutella for an indulgent chocolate hazelnut twist. This decadent touch will melt hearts and taste buds alike!
-
Double Your Delight: Double the recipe and bake in a 9×13-inch pan. Just keep an eye on the baking time—longer is often better for a larger batch.
-
Fruit Fusion: Toss in fresh blueberries or chopped strawberries for an extra burst of flavor. This fruity addition transforms your blondies into a colorful delight.
-
Chocolate Overload: Use extra chocolate chips, or mix in chunks of your favorite chocolate bar. The result? A gooey, chocolate-rich treat that’s pure bliss.
As you whip up these blondies, consider pairing them with a warm goodie like this Cottage Cheese Bread or indulge in a sweet sensation with Sugar Donut Bread. You might discover new favorites along the way!
How to Store and Freeze Healthy Banana Bread Blondies
Room Temperature: Store your Healthy Banana Bread Blondies in an airtight container at room temperature for up to 3 days to maintain their soft texture and flavor.
Fridge: For longer freshness, keep the blondies in the fridge for up to 5 days. Ensure they are covered to prevent drying out.
Freezer: Freeze the blondies in an airtight container or wrapped tightly in plastic wrap for up to 2 months. Thaw at room temperature before enjoying.
Reheating: To enjoy your blondies warm, simply microwave them for 10-15 seconds to refresh their gooey goodness before serving!
Healthy Banana Bread Blondies Recipe FAQs
What bananas should I use for the healthiest banana bread blondies?
Absolutely! For the best results, use very ripe bananas with blackened skins. These super ripe bananas are not only sweeter but also provide more moisture, making your blondies incredibly soft and flavorful. Green bananas won’t work as well, as they lack the necessary sweetness.
How should I store my healthy banana bread blondies?
You can keep your Healthy Banana Bread Blondies in an airtight container at room temperature for up to 3 days. If you want to extend their freshness, store them in the refrigerator for up to 5 days, ensuring they are well covered to avoid drying out.
Can I freeze healthy banana bread blondies?
Yes, freezing is an excellent option! To freeze your blondies, wrap them tightly in plastic wrap or store them in an airtight container. They can last in the freezer for up to 2 months. When you’re ready to enjoy, simply thaw them at room temperature or warm them up in the microwave for about 10-15 seconds for that fresh-out-of-the-oven taste!
What do I do if my blondies turn out too dense?
If you find your Healthy Banana Bread Blondies are too dense, it may be due to overmixing the batter. For a lighter texture, mix until just combined – a few flour streaks are perfectly okay! Also, ensuring you use very ripe bananas will help keep them soft and moist. Alternatively, try adding a bit more baking soda for lift.
Can I substitute ingredients for dietary restrictions?
Very! To make the blondies nut-free, replace peanut butter with sunflower seed butter or tahini. For gluten-free needs, stick with oat flour, but all-purpose flour can be used if gluten isn’t a concern. If you have a sensitivity to eggs, you can try using unsweetened applesauce as a binder instead; approximately 1/4 cup should suffice for your Healthy Banana Bread Blondies!
Are these blondies safe for my pets?
No, it’s wise to be cautious. While bananas are generally safe in moderation for dogs, peanut butter often contains xylitol, which is toxic to pets. If making these blondies for a gathering including animals, be sure to opt for a pet-safe version without any harmful ingredients.
Deliciously Healthy Banana Bread Blondies You’ll Love
Ingredients
Equipment
Method
- Preheat your oven to 350°F (175°C) and line an 8x8-inch baking dish with parchment paper.
- In a large mixing bowl, mash the very ripe bananas until smooth, then mix in the peanut butter and maple syrup.
- Sprinkle the oat flour and baking soda into the mixture and stir until just combined, avoiding overmixing.
- Carefully fold in the chocolate chips, leaving some for topping if desired.
- Pour the mixture into the lined baking dish and smooth the top. Optionally sprinkle flaky sea salt on top.
- Bake for 20-25 minutes until a toothpick inserted into the center comes out clean or with a few moist crumbs.
- Allow the blondies to cool in the pan for at least 10 minutes before lifting out and slicing into squares.
Leave a Reply