
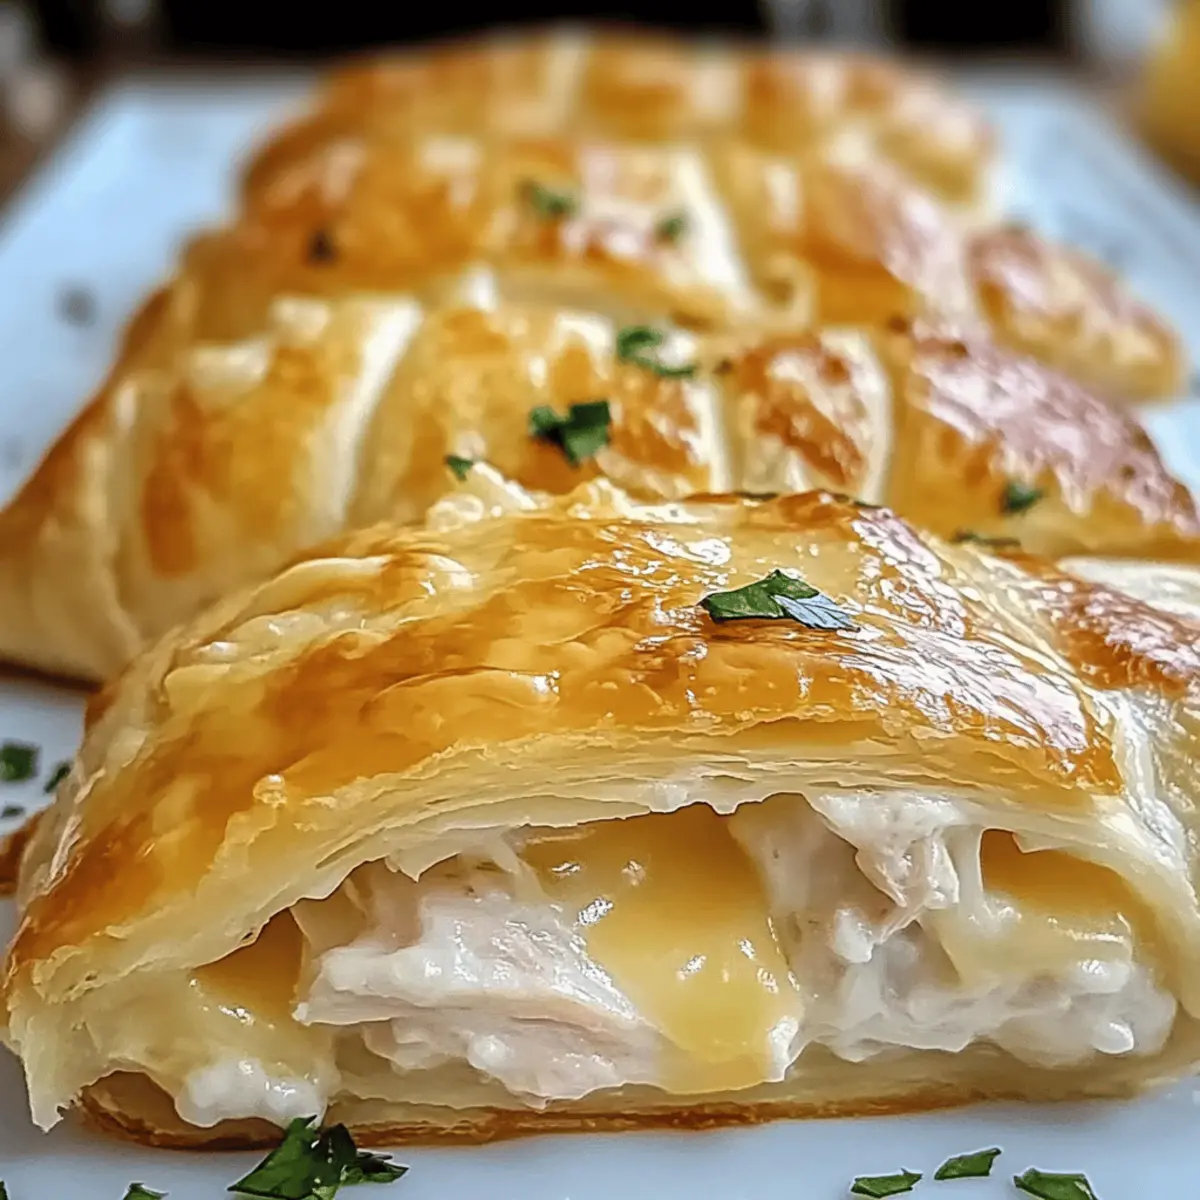
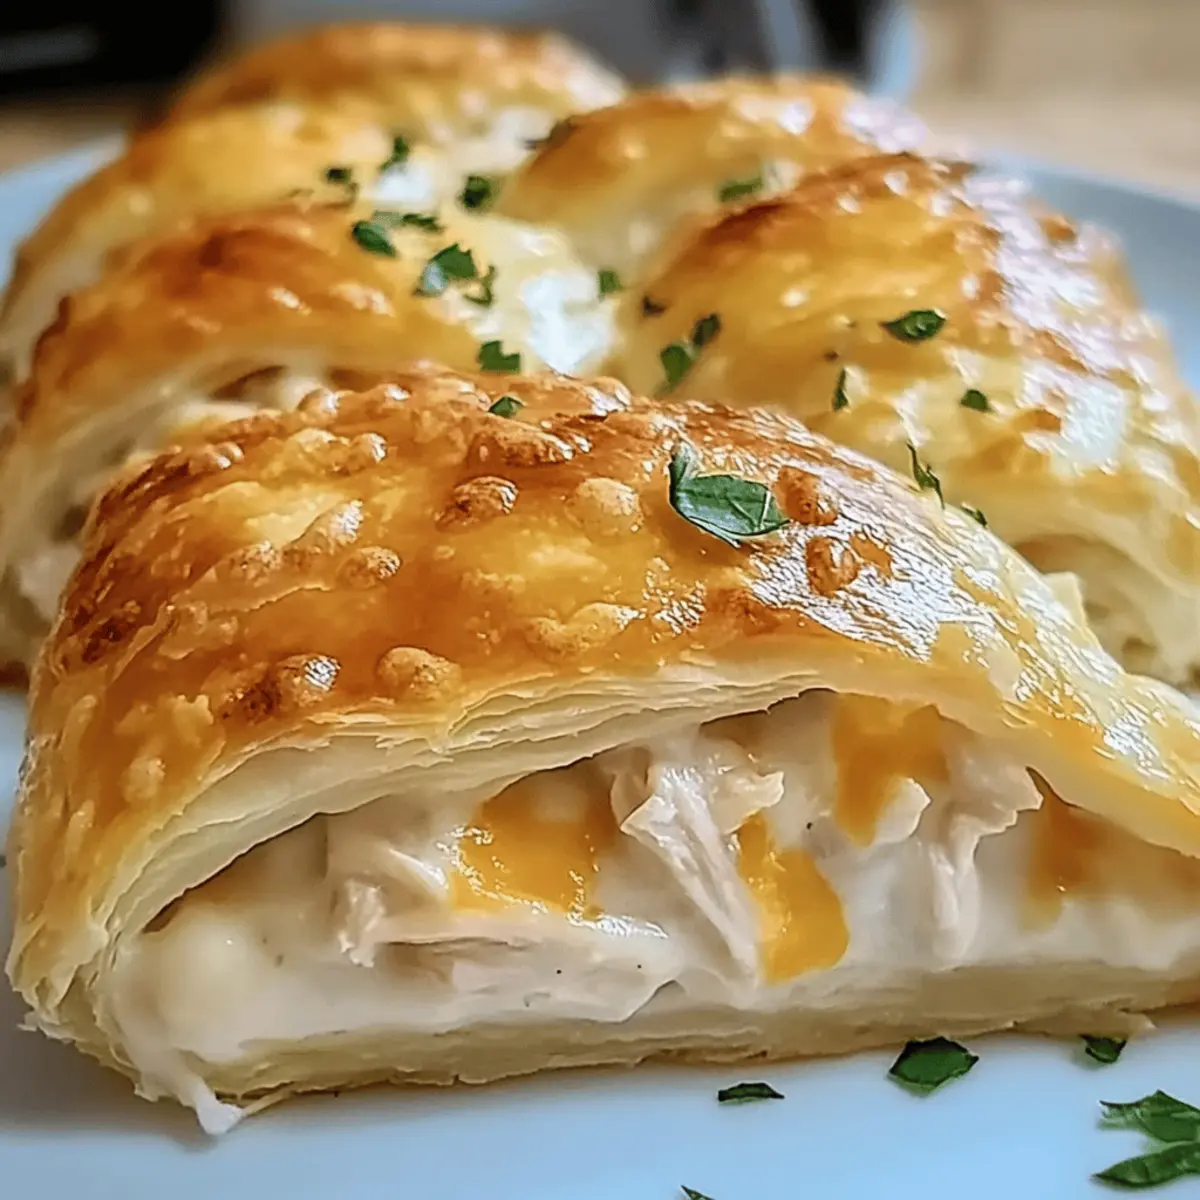
As I was rummaging through my fridge last weekend, an idea struck me: why not take the classic comfort of chicken and cheese and wrap it all up in a fluffy, buttery crescent dough? Enter my Cheesy Chicken Crescent Rolls! These delightful morsels are not only a treat for the taste buds, but they’re also a breeze to make—perfect for a quick weeknight dinner or an upscale appetizer for your next gathering. With a creamy filling that can be customized to your liking, they’re a versatile addition to any meal plan. Plus, these rolls are freezer-friendly, making them an ideal option for those busy days when cooking seems impossible. Are you ready to roll your way into a satisfying culinary adventure?

Why Will You Love These Rolls?
Flavorful Cheesy Chicken Crescent Rolls capture the essence of comfort food in every bite! Customizable With easy variations like adding spinach or your favorite spices, you can tailor them to suit any palate. Quick Prep This recipe is perfect for busy weeknights, taking only 30 minutes from start to finish. Crowd-Pleaser Great for gatherings, these rolls are sure to impress your guests while satisfying those late-night snack cravings. And if you’re looking for another crowd favorite, try the delicious Chipotle Cheesy Chicken for a zesty twist!
Cheesy Chicken Crescent Rolls Ingredients
For the Dough
• Crescent Roll Dough – Provides the flaky texture and structure for the rolls; puff pastry or biscuit dough can also work beautifully.
For the Filling
• Shredded Cooked Chicken – Adds protein and substance; using rotisserie chicken is a time-saving option!
• Cream Cheese – Delivers creaminess and richness; consider using Neufchâtel cheese for a lighter version.
• Shredded Cheddar Cheese – Brings a gooey, flavorful punch; mozzarella offers stretchiness, while pepper jack adds some heat.
• Garlic Powder – Enhances the filling’s flavor; fresh minced garlic can be used for a more intense taste.
• Chopped Fresh Parsley – Adds a pop of color and freshness; feel free to substitute with chives or dill for variety.
• Salt & Pepper – Essential for bringing all the flavors together; always adjust to your taste preference.
For Serving
• Dipping Sauce – Try ranch dressing, spicy buffalo sauce, or garlic aioli for a delightful pairing with your cheesy chicken crescent rolls!
Step‑by‑Step Instructions for Cheesy Chicken Crescent Rolls
Step 1: Preheat the Oven
Begin by preheating your oven to 375°F (190°C). While the oven heats up, take a moment to lightly grease a baking sheet with cooking spray or a thin layer of oil. This will help the Cheesy Chicken Crescent Rolls brown evenly and prevent sticking during baking.
Step 2: Prepare the Filling
In a large mixing bowl, combine shredded cooked chicken, cream cheese, shredded cheddar cheese, garlic powder, chopped fresh parsley, salt, and pepper. Mix everything together until well incorporated and the mixture is creamy and smooth. This flavorful filling is the heart of your rolls, so make sure it’s nicely blended.
Step 3: Unroll the Dough
Carefully unroll the crescent roll dough onto a clean, flat surface. Separate the dough into individual triangles, laying them out with the wider end facing you. You should have a nice spread of triangles ready to be filled, which will quickly transform into delicious Cheesy Chicken Crescent Rolls!
Step 4: Fill the Dough
Place a generous spoonful of the cheesy chicken filling at the wider end of each crescent triangle. Gently roll the dough toward the point, tucking in the sides as you go to secure the filling inside. This step is crucial for keeping the filling from escaping during baking, so ensure it’s snugly wrapped.
Step 5: Arrange on Baking Sheet
Once all the rolls are formed, place them on the prepared baking sheet with the pointed end facing down. This positioning helps keep the rolls closed while they bake. Make sure to leave some space between each roll to allow for puffing up and browning as they cook.
Step 6: Bake to Perfection
Slide the baking sheet into the preheated oven and bake the Cheesy Chicken Crescent Rolls for 12-15 minutes. Keep an eye on them! They should puff up beautifully and turn a glorious golden brown color. You’ll know they’re ready when they look mouthwateringly crispy!
Step 7: Cool and Serve
After baking, remove the rolls from the oven and let them cool for a couple of minutes on the baking sheet. This brief cooling period allows the filling to set slightly, making them easier to handle. Serve your Cheesy Chicken Crescent Rolls warm, accompanied by your favorite dipping sauce for a delightful treat!

Make Ahead Options
These Cheesy Chicken Crescent Rolls are perfect for meal prep enthusiasts! You can assemble the rolls and refrigerate them up to 24 hours before baking; just cover them gently with plastic wrap to keep them fresh. For even easier preparation, prepare the filling and store it in an airtight container in the fridge for up to 3 days. This way, when you’re ready to serve, all you need to do is unroll the dough, fill the triangles, and bake until golden brown—creating restaurant-quality results with minimal effort. By prepping ahead, you can enjoy these delicious rolls with family or friends on busy weeknights!
Expert Tips for Cheesy Chicken Crescent Rolls
- Don’t Overfill: Ensure not to overstuff the rolls to prevent any filling from leaking out during baking. A generous spoonful per roll works perfectly.
- Alternative Doughs: If you’re using puff pastry or biscuit dough, be mindful of the baking time, as it may vary compared to traditional crescent roll dough.
- Add Veggies: For more flavor and nutrition, consider incorporating cooked spinach or diced jalapeños into the filling. They add a delightful twist!
- Watch for Color: Keep an eye on the rolls towards the end of the baking time; they should be golden brown. If they brown too quickly, you can cover them lightly with foil.
- Serve Hot: For the best flavor experience, serve your Cheesy Chicken Crescent Rolls warm, paired with your favorite dipping sauce for extra deliciousness!
Cheesy Chicken Crescent Rolls Variations
Feel free to unleash your creativity with these delightful twists that will elevate your Cheesy Chicken Crescent Rolls!
- Dairy-Free: Substitute cream cheese and cheddar with plant-based alternatives like cashew cream and vegan cheese for a scrumptious vegan option.
- Gluten-Free: Use gluten-free crescent roll dough or make your own using almond flour to enjoy these rolls without gluten.
- Spicy Kick: Add diced jalapeños or a splash of hot sauce into the filling for a fiery flavor that packs a punch! It’ll ignite excitement on your taste buds.
- Herb-Infused: Experiment with fresh herbs—try basil or cilantro for a unique flavor profile that will brighten up each bite.
- Veggie Boost: Toss in chopped spinach or bell peppers to the filling for added nutrition and a pleasing crunch. It creates a colorful surprise in every mouthful.
- Cheese Variation: Mix different cheeses like pepper jack for heat or mozzarella for gooeyness to amplify the filling’s flavor. The more, the merrier!
- Saucy Delight: Serve alongside a rich Garlic Parmesan Chicken dipping sauce for that extra culinary indulgence! It’s a match made in heaven.
- Extra Crunch: Sprinkle breadcrumbs or crushed crackers on top before baking for an added crispy texture that will make your rolls irresistibly crunchy.
Feel free to mix and match these variations to create your perfect batch of Cheesy Chicken Crescent Rolls! Enjoy the journey of flavors and surprise your loved ones with each delicious twist.
How to Store and Freeze Cheesy Chicken Crescent Rolls
Room Temperature: Store baked rolls at room temperature for up to 2 hours; after that, transfer them to the fridge to avoid spoilage.
Fridge: Keep leftover Cheesy Chicken Crescent Rolls in an airtight container in the refrigerator for up to 3-4 days. Reheat in the oven for best results, maintaining their flaky texture.
Freezer: For longer storage, freeze unbaked rolls on a baking sheet until solid; then place in a zip-top freezer bag for up to 2 months. Bake directly from frozen, adding a few minutes to the cooking time.
Reheating: When reheating, use the oven to keep them crispy. Place rolls in a preheated oven at 350°F (175°C) for about 10-15 minutes.
What to Serve with Cheesy Chicken Crescent Rolls
Transform your Cheesy Chicken Crescent Rolls into a full meal with these delightful accompaniments that will satisfy your cravings.
-
Creamy Mashed Potatoes: A classic side, their buttery smoothness contrasts perfectly with the crispy rolls, creating a comforting plateful.
-
Garlic Green Beans: Brightly sautéed with garlic, these green beans add a fresh crunch that balances the richness of the rolls. A sprinkle of lemon zest will elevate the flavors beautifully.
-
Caesar Salad: Crisp romaine, tangy dressing, and crunchy croutons come together for a light side that complements the cheesiness of the rolls. It’s a refreshing choice for any meal.
-
Spicy Buffalo Sauce: For those who crave a little kick, serve these rolls with buffalo sauce on the side. The heat provides a compelling contrast to the cheesy goodness.
-
Homemade Ranch Dressing: Creamy and flavorful, ranch dressing offers a delicious dipping option that enhances the cheesy filling’s flavors. It’s a crowd-pleaser that never fails to deliver.
-
Fruit Salad: Mix up your meal with a refreshing fruit salad. The natural sweetness and bright flavors pair beautifully with the savory rolls, making for an impressive and balanced meal.
Cheesy Chicken Crescent Rolls Recipe FAQs
What type of chicken should I use for the filling?
Absolutely! Shredded cooked chicken works best, providing a hearty substance. You can use rotisserie chicken for a quick and flavorful option, or even leftover chicken if you have it on hand. It not only adds convenience but also enhances the overall flavor profile of your Cheesy Chicken Crescent Rolls.
How should I store leftovers?
Very simply! Store any leftover Cheesy Chicken Crescent Rolls in an airtight container in the refrigerator for up to 3-4 days. When you’re ready to enjoy them again, I recommend reheating them in the oven at 350°F (175°C) for about 10-15 minutes to bring back that delightful crispiness. You can also microwave them, but they won’t retain the flaky texture quite as well.
Can I freeze the rolls? How?
Yes, you can! For optimal results, I suggest freezing the unbaked Cheesy Chicken Crescent Rolls. After assembling them, lay them flat on a baking sheet and freeze until solid. Once frozen, transfer them into a zip-top freezer bag, where they can be stored for up to 2 months. When you’re ready to bake, you can pop them straight into the oven from frozen; just add an extra few minutes to the baking time.
What can I do if my crescent rolls are leaking during baking?
If you run into a leaking situation, no worries! This usually happens if the rolls are overfilled. Make sure to place a generous but restrained spoonful of filling at the wider end when you assemble them. Also, ensure that you tuck in the sides tightly while rolling. If leaks occur, you can patch them with a little extra dough if you have some left over.
Are these rolls suitable for a gluten-free diet?
While traditional crescent roll dough contains gluten, you can easily make these Cheesy Chicken Crescent Rolls gluten-free by using gluten-free crescent roll dough or a gluten-free biscuit dough alternative. Just check the labels to ensure that the substitutes are certified gluten-free. Enjoying this comforting recipe even with dietary restrictions is totally achievable!
What if I have allergies or dietary restrictions?
You can tailor these rolls to fit various dietary needs! For dairy allergies, try using dairy-free cream cheese and cheese alternatives. If you’re looking for lower-fat options, Neufchâtel cheese can be a great substitute for cream cheese. Always remember to check labels for any packaged ingredients to ensure they meet your dietary requirements.
Cheesy Chicken Crescent Rolls: Easy Comfort Food Perfection
Ingredients
Equipment
Method
- Preheat your oven to 375°F (190°C) and grease a baking sheet.
- In a large mixing bowl, combine shredded chicken, cream cheese, cheddar cheese, garlic powder, parsley, salt, and pepper. Mix until creamy.
- Unroll the crescent roll dough and separate it into triangles.
- Place a spoonful of the filling at the wide end of each dough triangle and roll it toward the point, tucking in the sides.
- Place the rolled dough on the prepared baking sheet with pointed ends facing down.
- Bake for 12-15 minutes until golden brown.
- Let them cool for a couple of minutes before serving with dipping sauce.
Leave a Reply