
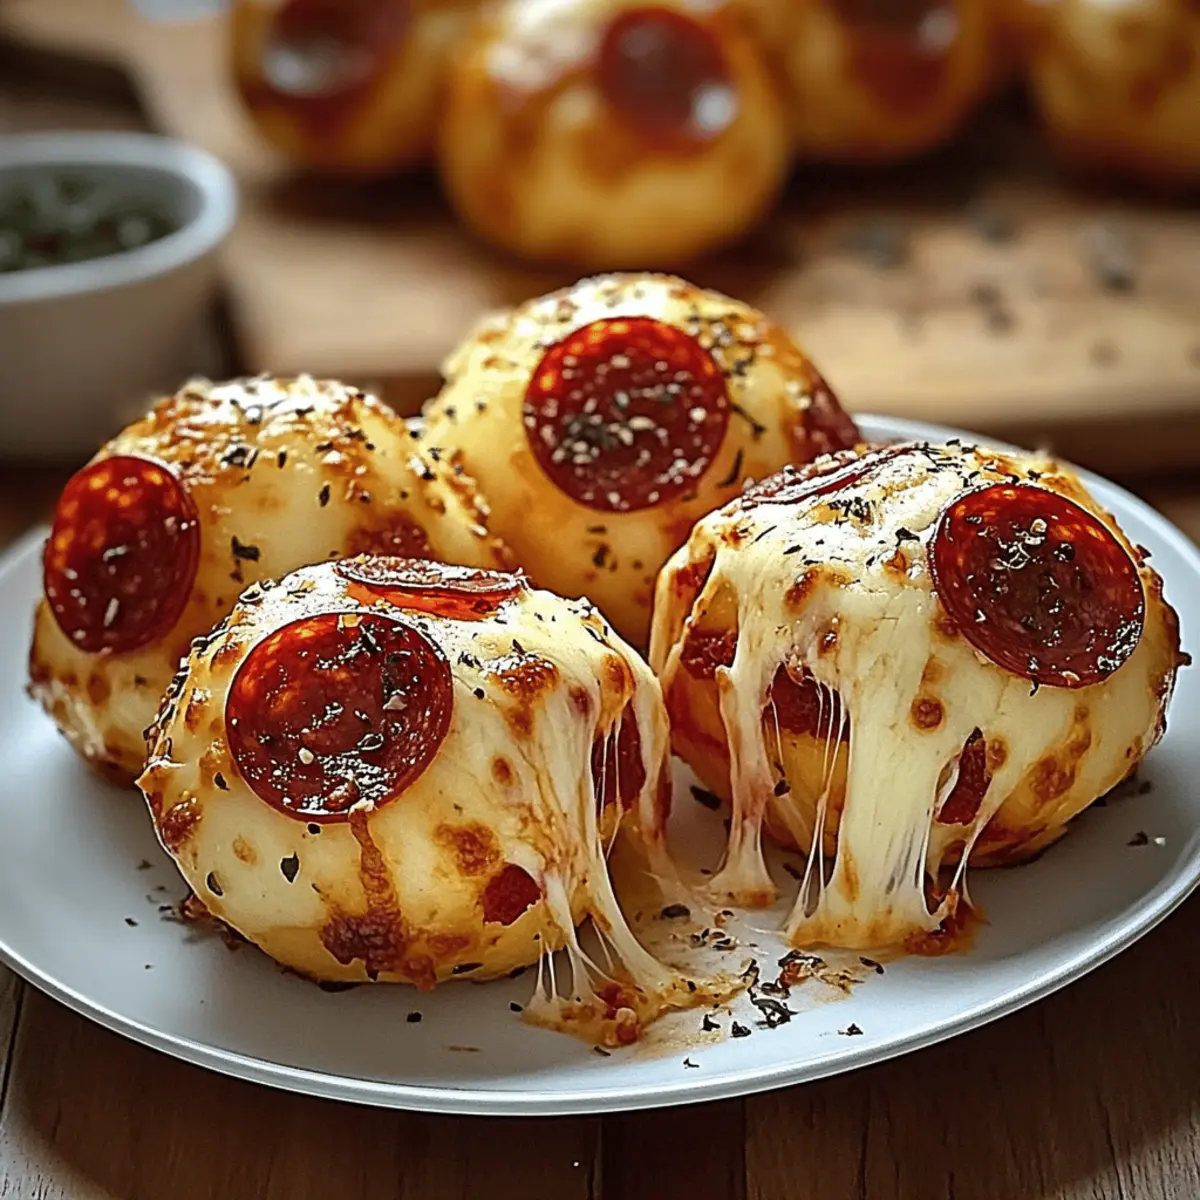
As I stood in the kitchen, the irresistible aroma of melting cheese and savory pepperoni wafted through the air, instantly pulling me back to my childhood pizza parties. These Easy Pepperoni Pizza Bombs encapsulate all the joy of pizza into a delightful, bite-sized snack that’s just perfect for any gathering. What makes them truly special is that they become golden-brown and buttery in no time—ready to impress family and friends for game nights or casual dinners. In under 30 minutes, you’ll have a crowd-pleaser that’s both versatile and kid-friendly, with options for every taste. Whether you stick with the classic pepperoni or opt for a creative veggie twist, these pizza bombs are sure to become a staple in your home. Curious about how to make these delicious little treats? Let’s dive into the recipe!
Why Are These Pizza Bombs a Must-Try?
Family-friendly fun to make together: These Easy Pepperoni Pizza Bombs are perfect for cooking with loved ones, making mealtime a delightful bonding experience.
Quick to prepare in under 30 minutes: Ideal for busy weekdays or spontaneous gatherings, you won’t need to sacrifice time for deliciousness.
Versatile ingredient options: Whether you crave traditional pepperoni or prefer a veggie option, this recipe easily accommodates every taste.
Perfectly portable for on-the-go snacking: Enjoy these warm treats while watching the game or during family movie night.
Pair these pizza bombs with a side of Roasted Garlic Pizza for a delightful feast that everyone will love!
Pepperoni Pizza Bombs Ingredients
For the Filling
- Shredded Mozzarella Cheese – Melts beautifully, giving you that gooey center everyone loves. Feel free to substitute with cheddar or a cheese blend for varied flavors.
- Mini Pepperoni Slices – Perfectly sized for fitting into each bomb; regular pepperoni can be chopped to fit or swapped for turkey pepperoni for a lighter option.
- Garlic Powder – Offers a bold garlic punch to enhance each bite; consider using fresh minced garlic for a more intense flavor.
For the Dough
- Refrigerated Biscuit Dough – The shortcut hero that simplifies prep; you can also use crescent roll dough or homemade pizza dough if you prefer.
For the Topping
- Melted Butter – Adds a golden sheen and rich flavor to the outer crust; brushing with extra melted butter post-baking gives them a delightful shine.
- Italian Seasoning – Enhances that classic pizza flavor with a medley of herbs like oregano and basil; feel free to add extra for more herbal notes.
These Pepperoni Pizza Bombs are not just easy—they’re a fun way to bring the family together over cooking and making lasting memories!
Step‑by‑Step Instructions for Pepperoni Pizza Bombs
Step 1: Preheat the Oven
Begin by preheating your oven to 375°F (or set your air fryer to 350°F) to ensure even cooking. While the oven is heating up, line a baking sheet with parchment paper, creating a non-stick surface for your delicious Pepperoni Pizza Bombs. This step sets the stage for perfectly golden and crispy treats.
Step 2: Prepare the Seasoned Butter
In a small bowl, combine melted butter, garlic powder, and Italian seasoning. Mix well until the ingredients are thoroughly combined into a fragrant, buttery mixture. Set this flavorful blend aside, as it will be essential for brushing on top of the pizza bombs for added richness and aroma before and after baking.
Step 3: Separate and Flatten Dough
Open the refrigerated biscuit dough and gently separate it into individual pieces. Lay each biscuit flat on a clean surface, using your hands to flatten them slightly. This will create a base that is large enough to hold the tasty filling of shredded mozzarella and mini pepperoni, ensuring that every bite is packed with flavor.
Step 4: Add the Filling
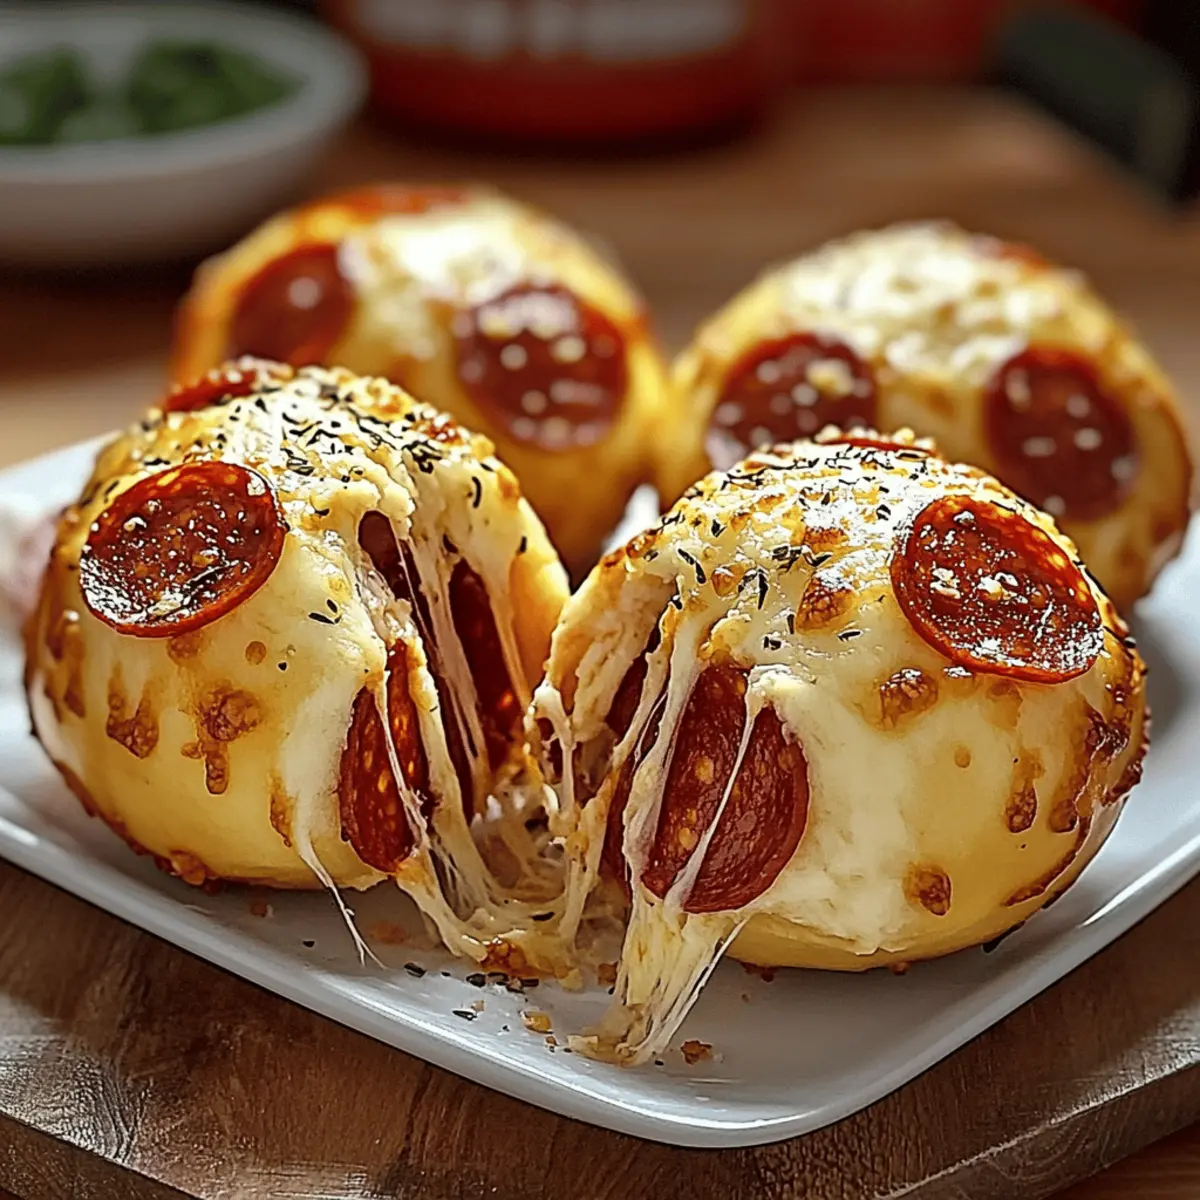
Place a generous amount of shredded mozzarella cheese and a few mini pepperoni slices in the center of each flattened biscuit. Be careful not to overstuff, as you want to ensure the filling stays neatly inside the dough while baking. This step is crucial for achieving that gooey, melty center that everyone loves in Pepperoni Pizza Bombs.
Step 5: Seal the Bombs
With the filling in place, pinch the edges of each biscuit together to seal the filling inside. Roll each bomb gently in your hands to form a smooth ball. This ensures that the ingredients stay contained during baking, resulting in a delightful burst of pizza goodness with each bite.
Step 6: Arrange on Baking Sheet
Carefully place each sealed dough ball onto the prepared baking sheet, making sure to position them seam-side down. This helps keep them secure while they bake. Leave space between each bomb, allowing them to puff up perfectly in the oven and not stick together.
Step 7: Brush with Butter Mixture
Using a pastry brush, generously brush the tops of each pizza bomb with the seasoned butter mixture, allowing the flavor to seep into the dough. This also promotes a beautiful golden-brown color as they bake. Feel free to add extra seasoning if you desire enhanced flavors in your Pepperoni Pizza Bombs.
Step 8: Bake to Perfection
Place the baking sheet in the preheated oven and bake for 12-15 minutes, or until the pizza bombs are golden-brown and puffed up. Keep an eye on them as they bake, and when they reach that irresistible color, you’ll know they’re ready to come out, filling your kitchen with a mouthwatering aroma.
Step 9: Cool and Serve
Once baked, remove the Pepperoni Pizza Bombs from the oven and allow them to cool for a few minutes on the baking sheet. This resting time will ensure you don’t burn your tongue on the hot, cheesy center. Serve them warm with marinara or ranch dip for a delightful snack that everyone will enjoy!

Make Ahead Options
These Easy Pepperoni Pizza Bombs are perfect for meal prep enthusiasts! You can assemble the bombs up to 24 hours in advance. To do this, prepare each bomb, seal them, and place them on a baking sheet. Cover the sheet tightly with plastic wrap or foil, and refrigerate to maintain freshness. When you’re ready to enjoy them, simply remove them from the fridge, brush with the seasoned butter, and bake as instructed (add an extra minute or two to the baking time if they’re starting from cold). Freezing is also an option; just allow them to cool completely after baking, and then store in an airtight container for up to 3 months. Reheat in the oven or air fryer for a quick snack any time, ensuring they stay just as delicious!
Expert Tips for Perfect Pizza Bombs
-
Don’t Overstuff: Fill with just enough cheese and pepperoni to avoid spilling during baking. This will keep your Pepperoni Pizza Bombs intact and easy to enjoy.
-
Seal Properly: Pinch edges tightly to prevent filling from escaping while baking. A well-sealed bomb makes for a delicious gooey center.
-
Watch the Bake Time: Ovens can vary, so check for that golden-brown color between 12-15 minutes. Less time can yield undercooked dough.
-
Brush with Care: Use a pastry brush for even butter application on tops before and after baking for that irresistible shine and flavor.
-
Experiment with Fillings: Don’t hesitate to swap pepperoni for veggies or different cheeses based on your preferences. This versatility ensures everyone loves the pizza bombs!
What to Serve with Easy Pepperoni Pizza Bombs
Transform your pizza bomb experience into a delightful feast with these perfect pairings that enhance every bite.
-
Marinara Sauce: The classic choice; its tangy flavor perfectly complements the cheesy goodness of the pizza bombs.
-
Garlic Aioli: Creamy and rich, this dip adds a luxurious touch and garlic kick that everyone will love.
-
Crisp Side Salad: Fresh greens with a light vinaigrette offer a crunchy contrast, balancing the richness of the bombs.
-
Veggie Sticks: Serve with carrot and celery sticks for a refreshing crunch that adds a touch of healthiness to your gathering.
-
Cheesy Breadsticks: Keep the pizza vibes going with warm, cheesy breadsticks, perfect for dipping in marinara.
-
Fruit Platter: A colorful sweet selection of fresh fruits provides a vibrant contrast to the savory flavors.
-
Sparkling Lemonade: The zesty bubbles of lemonade refresh your palate between bites, making each one even more enjoyable.
-
Chocolate Chip Cookies: End your meal on a sweet note with soft, gooey cookies that pair perfectly with the cheesy snacks.
How to Store and Freeze Pepperoni Pizza Bombs
Fridge: Store any leftover Pepperoni Pizza Bombs in an airtight container for up to 3 days. Reheat them in the microwave or air fryer until warmed through for a quick snack.
Freezer: For long-term storage, assemble the pizza bombs and freeze them before baking. Wrap individually in plastic wrap, then store in an airtight container for up to 3 months.
Baked Storage: If you prefer to bake them first, let the pizza bombs cool completely, then freeze in an airtight container. Reheat from frozen in the oven at 375°F for about 20-25 minutes until heated through.
Meal Prep: These Pepperoni Pizza Bombs are perfect for meal prep; make a big batch ahead of time, and you’ll always have a delicious, quick meal or snack on hand!
Pepperoni Pizza Bombs Variations
Feel free to get creative with your pizza bombs, transforming them into a dish uniquely yours that tantalizes the taste buds!
-
Vegetarian Option: Replace the pepperoni with diced mushrooms, bell peppers, or spinach for a flavorful veggie-packed twist. These alternatives provide a fresh burst of flavor while keeping the pizza bomb fun and satisfying.
-
Cheese Medley: Swap out the mozzarella for a blend of cheddar, provolone, or even a spicy pepper jack. Each cheese will introduce a different layer of richness, making for an exciting cheesy experience with every bite.
-
Gourmet Garlic: Include minced garlic in the filling for a bolder flavor, or even roast the garlic beforehand for a sweet, nutty essence that adds layers to your pizza bombs.
-
Spicy Kick: Stir in some crushed red pepper flakes or use spicy cheese options to give your pizza bombs a delightful heat. For an adventurous touch, consider jalapeño slices for an extra punch!
-
Herb Infusion: Add fresh herbs like basil or parsley into the filling mixture to really elevate the pizza flavor. A sprinkle of fresh herbs before serving brightens the flavors and adds a lovely touch.
-
Sweet and Savory: Try a fusion twist by incorporating bacon or a drizzle of barbecue sauce inside the filling for a unique taste. The smoky notes from bacon will beautifully complement the classic pizza flavors.
These delightful variations show just how versatile your pizza bombs can be! For an extra treat, serve them alongside a side of Roasted Garlic Pizza for a feast that everyone will adore!

Easy Pepperoni Pizza Bombs Recipe FAQs
What kind of dough is best for pizza bombs?
I recommend using refrigerated biscuit dough because it’s quick and convenient, but you can also opt for crescent roll dough or pizza dough for a homemade touch. Each option brings its unique texture and flavor, so choose what suits your preference!
How can I tell if the pepperoni is fresh?
Absolutely! Look for pepperoni that is bright red and firm. Avoid any slices that show dark spots all over or have a slimy texture, as this can indicate spoilage. Fresh ingredients lead to a better tasting pizza bomb!
What is the best way to store leftover pizza bombs?
For leftovers, place your Pepperoni Pizza Bombs in an airtight container and store them in the fridge for up to 3 days. When you’re ready to enjoy them again, reheat in the microwave for about 30 seconds or air fryer on low heat until warmed through.
Can I freeze pizza bombs before baking?
Yes, you can! If you choose to freeze your Pepperoni Pizza Bombs, assemble them completely, wrap each bomb individually in plastic wrap, and place them in an airtight container. They will stay fresh for up to 3 months. To bake, no need to thaw—just cook them for an additional 3-5 minutes beyond the normal time.
Are these pizza bombs suitable for kids with allergies?
Very! However, it’s important to consider specific allergies. If someone is allergic to dairy, you can use a dairy-free cheese alternative. For gluten sensitivity, gluten-free biscuit dough or pizza dough is an excellent substitute. Always check labels to ensure safety for your little ones!
What should I do if my pizza bombs are too doughy?
If your Pepperoni Pizza Bombs turn out too doughy, it could be that they need a little more baking time. Each oven is different, but aim for a golden-brown color and check them closely after the initial 12 minutes. You can lower the temperature and bake longer to ensure a thorough cook without burning.
Dazzling Pepperoni Pizza Bombs for Easy Family Fun
Ingredients
Equipment
Method
- Preheat your oven to 375°F (or set your air fryer to 350°F) and line a baking sheet with parchment paper.
- Combine melted butter, garlic powder, and Italian seasoning in a small bowl. Mix well.
- Separate and flatten the refrigerated biscuit dough into individual pieces.
- Place shredded mozzarella cheese and mini pepperoni slices in the center of each flattened biscuit.
- Pinch the edges of each biscuit to seal the filling inside and roll into a ball.
- Place each sealed dough ball onto the prepared baking sheet seam-side down.
- Brush the tops of each pizza bomb with the seasoned butter mixture.
- Bake for 12-15 minutes until golden-brown and puffed up.
- Remove from the oven and allow to cool for a few minutes before serving.
Leave a Reply