
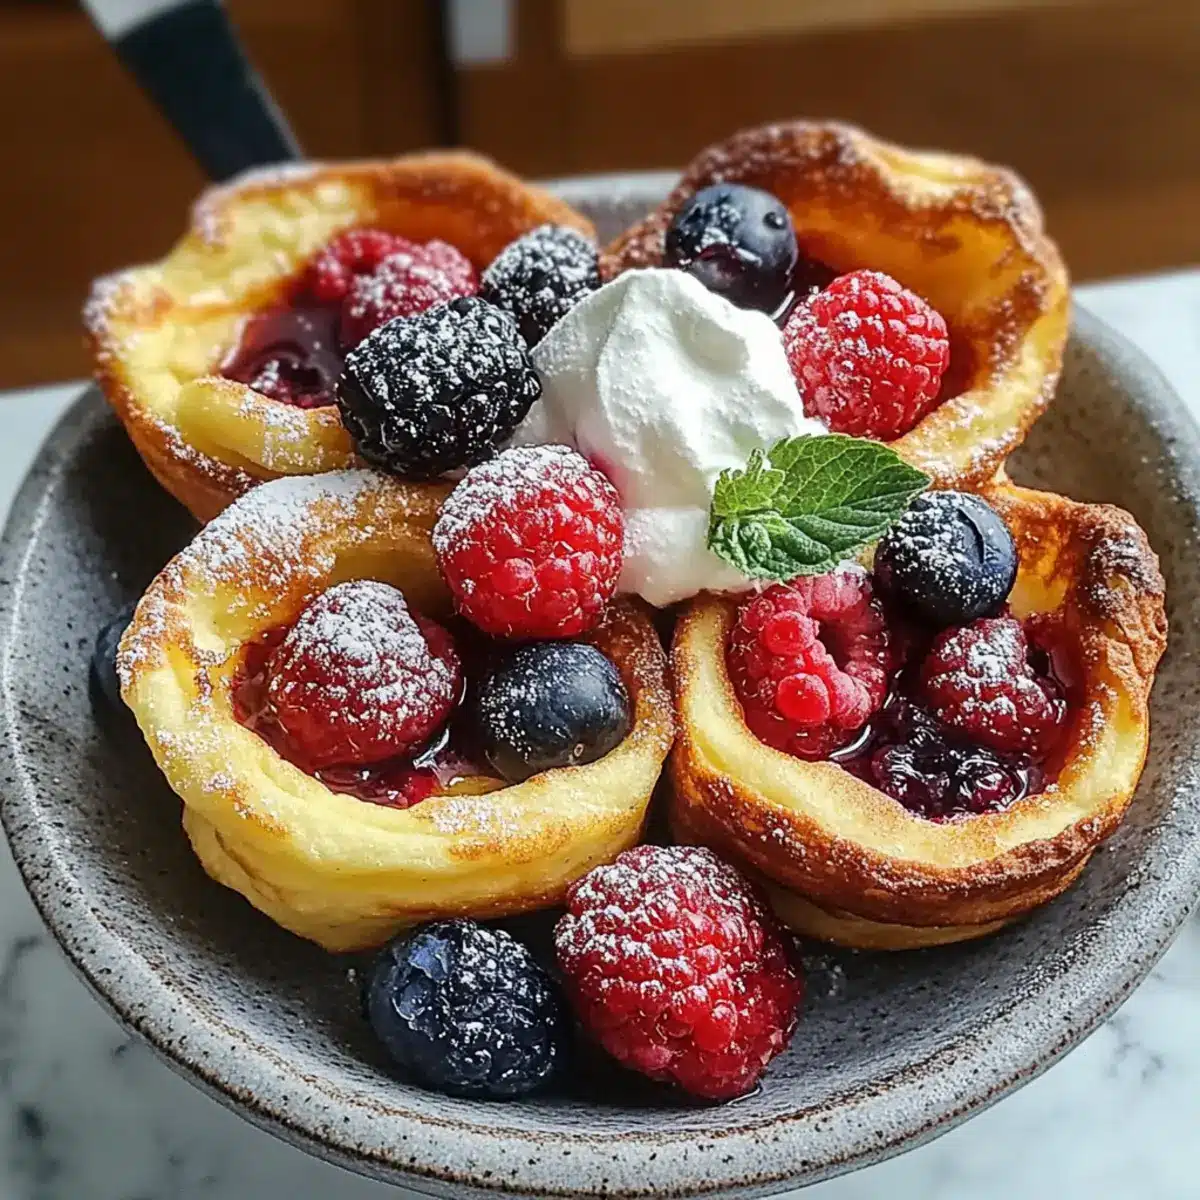
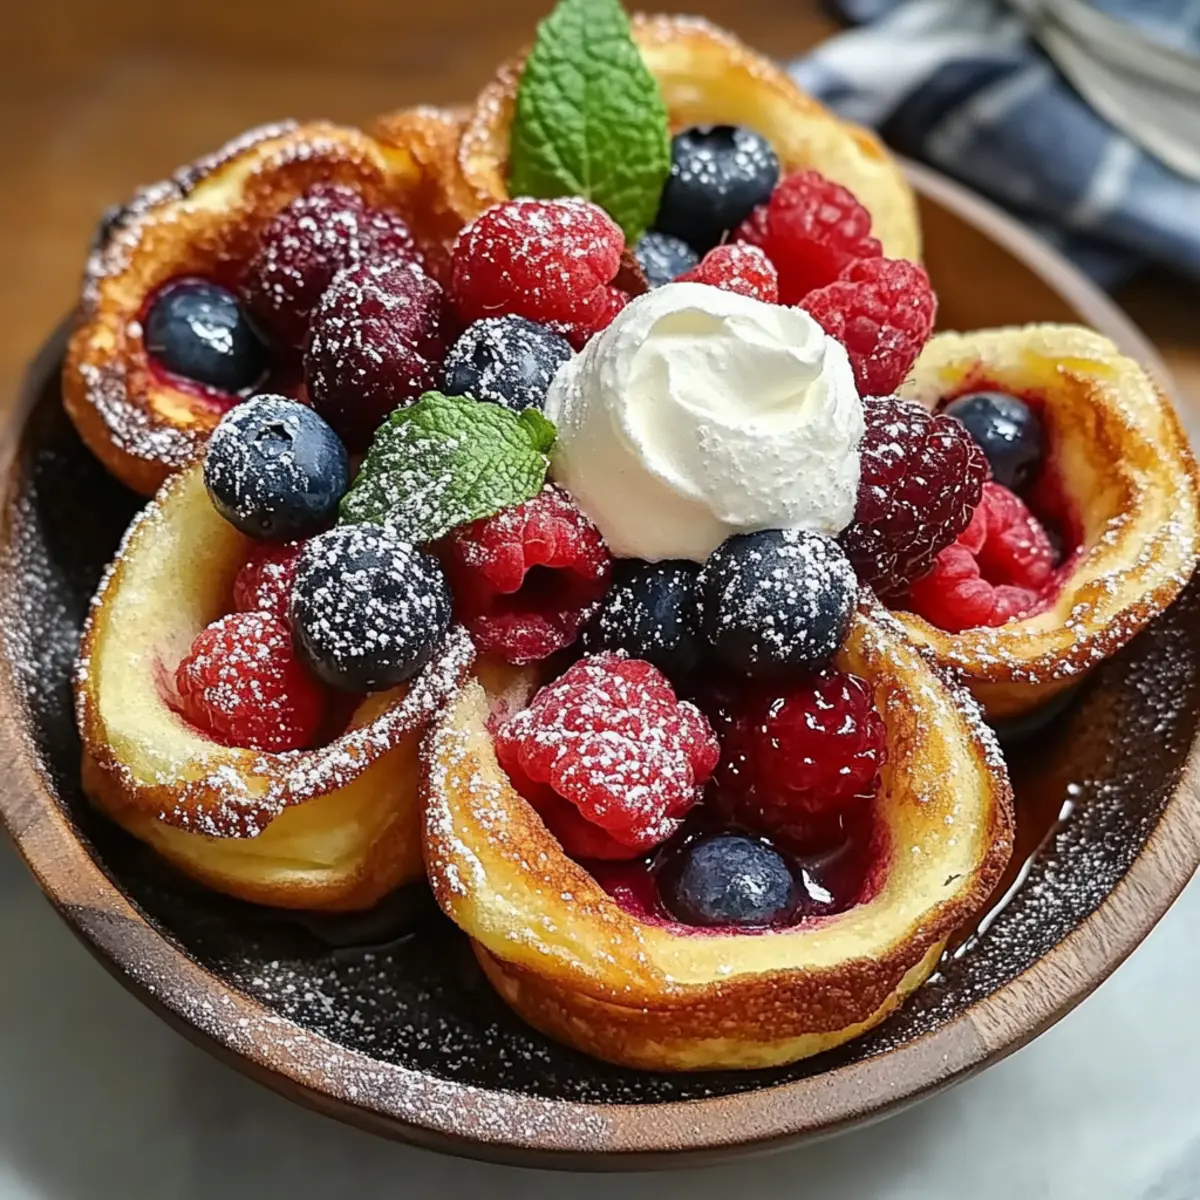
As I pulled the golden little clouds from the oven, I couldn’t help but smile. These Adorable Mini Dutch Baby Pancakes are not just a feast for the eyes; they’re a fusion of whimsy and comfort that transforms any breakfast table into a joyous gathering. Fluffy, airy, and perfectly puffed, these oven-baked delights are a breeze to whip up, making them a fantastic choice for busy mornings or leisurely brunches. Plus, their versatility allows you to customize each mini pancake with your favorite toppings—think fresh berries, a drizzle of syrup, or a dollop of whipped cream. Whether you’re looking to impress guests or simply indulge in a sweet treat at home, these mini pancakes are sure to become a cherished staple in your kitchen. So, what will you top yours with?

Why Are Mini Dutch Baby Pancakes Irresistible?
Delightfully Fluffy: The airy texture of these pancakes brings a unique twist to your breakfast routine, creating a light and enjoyable bite that will have everyone coming back for more.
Versatile Toppings: Whether you crave fresh fruits or a sweet drizzle of syrup, the options are endless! Top with whipped cream for a touch of decadence or experiment with a sprinkle of cinnamon for a cozy twist.
Quick and Easy: Ready in mere minutes, these mini delights are perfect for busy mornings or unexpected guests, making breakfast effortless yet impressive.
Crowd Pleaser: Their fun size makes them ideal for sharing, turning any meal into a delightful gathering with friends and family.
Make Ahead Convenience: Prepare the batter in advance and store it in the fridge; these pancakes are as flexible as they are delicious! You can easily whip them up whenever the craving strikes. Don’t forget to explore our Gluten-Free Options for even more versatility in your cooking!
Adorable Mini Dutch Baby Pancake Ingredients
• For the Batter
- Eggs – Provide structure and moisture; substitute with a flax egg for a vegan option.
- Milk – Adds creaminess; use almond milk for a dairy-free choice.
- Flour – Main structure; both all-purpose and gluten-free flour work well, though texture may vary with gluten-free options.
- Sugar – Adds sweetness; can be reduced or swapped with a sugar substitute for a lower-calorie option.
- Vanilla Extract – Enhances flavor; opt for pure vanilla for the best taste.
- Salt – Balances sweetness; omit if making a low-sodium version.
- Butter – Adds richness; replace with coconut oil for a dairy-free alternative.
• For Toppings
- Fresh Fruits – Berries, apple slices, or peaches add a delightful freshness and color to your pancakes.
- Whipped Cream – A dollop brings a touch of indulgence that pairs beautifully with the fluffy texture of the pancakes.
- Syrups – Maple syrup or chocolate sauce for a sweet touch; perfect for drizzling over your adorable mini Dutch baby pancakes.
Step‑by‑Step Instructions for Adorable Mini Dutch Baby Pancakes
Step 1: Preheat and Prepare
Begin by preheating your oven to 425°F (220°C). While it warms up, take out a muffin tin or a mini pancake pan and generously coat each cup with non-stick spray or melted butter. This will help the adorable mini Dutch baby pancakes rise beautifully and prevent them from sticking.
Step 2: Whisk the Batter
In a large mixing bowl, whisk together 4 eggs, 1 cup of milk, 1 cup of flour, 2 tablespoons of sugar, 1 teaspoon of vanilla extract, and a pinch of salt. Mix until the batter is smooth, ensuring there are only a few lumps left, as overmixing may affect the fluffiness of your mini pancakes.
Step 3: Fill the Pans
Carefully pour the batter into your prepared muffin or mini pancake pans, filling each cup about halfway. This allows enough space for the adorable mini Dutch baby pancakes to puff up dramatically as they bake.
Step 4: Bake to Perfection
Place the filled pans into the preheated oven and bake for 15-20 minutes, or until the pancakes are puffed and golden brown around the edges. Keep an eye on them as they bake; the visual cue of a golden, puffy surface indicates they’re ready to come out.
Step 5: Cool Slightly
Once baked, remove the pans from the oven and let the miniature delights cool for about 5 minutes. This cooling period helps them firm slightly, making it easier to lift them out of the pan without losing their delightful shape.
Step 6: Serve with Toppings
Gently remove the adorable mini Dutch baby pancakes from the pans and transfer them to a serving platter. Serve warm and invite everyone to top theirs with an array of delicious options, such as fresh fruits, whipped cream, or a drizzle of maple syrup for an extra special touch.
What to Serve with Adorable Mini Dutch Baby Pancakes
Imagine your morning spread transformed with deliciousness, each bite a perfect blend of fluffy wonder and delightful flavor.
-
Crispy Bacon: The savory crunch of bacon adds a satisfying contrast, enhancing the sweetness of your mini pancakes.
-
Fresh Mixed Berries: Juicy strawberries, blueberries, and raspberries provide a burst of freshness that complements the fluffy pancakes beautifully.
-
Maple Syrup Drizzle: A classic choice that brings out the sweetness in every bite, adding a comforting warmth to your meal.
-
Whipped Cream: A dollop on top adds richness and a touch of indulgence, making breakfast feel like a special treat.
-
Yogurt Parfait: Serve with a side of Greek yogurt layered with granola for a creamy and crunchy textural contrast that feels luxe.
-
Fruit Salad: A colorful blend of seasonal fruits brings brightness and balance to your plate, enhancing flavors while keeping things light.
-
Coffee or Tea: A warm, rich beverage like freshly brewed coffee or herbal tea pairs perfectly, rounding out your breakfast experience.
-
Sparkling Water with Citrus: For a refreshing twist, try a glass of sparkling water with a slice of lemon or lime; the effervescence complements the fluffiness.
-
Chocolate Sauce: For a sweet-tooth indulgence, serve chocolate sauce for drizzling—a delightful treat during brunch or dessert!
Expert Tips for Adorable Mini Dutch Baby Pancakes
-
Room Temperature Ingredients: Ensure all ingredients are at room temperature for a smoother batter, resulting in perfect fluffy Adorable Mini Dutch Baby Pancakes.
-
Mind the Mixing: Avoid overmixing the batter; a few lumps are acceptable. This step is crucial for maintaining the pancakes’ delightful fluffiness.
-
Watch the Oven: Keep an eye on your baking time! Ovens can vary, so check your pancakes a few minutes before the recommended time to prevent overbaking.
-
Creative Toppings: Get adventurous with your toppings! Seasonal fruits, nuts, or flavored syrups can elevate your adorable mini Dutch baby pancakes from delicious to extraordinary.
-
Storage Solutions: For make-ahead convenience, prepare your batter the night before and store it in the fridge. Bake fresh pancakes in minutes whenever the craving strikes!
Adorable Mini Dutch Baby Pancakes Variations & Substitutions
Feel free to get creative with these delightful mini pancakes, making them uniquely yours with fun twists and substitutions!
- Dairy-Free: Swap regular milk with almond or oat milk for a creamy, lactose-free version.
- Gluten-Free: Use a gluten-free all-purpose flour blend for a similar fluffy texture without the gluten. Just be mindful of the texture, as it may vary slightly.
- Vegan Option: Replace eggs with a flax egg (1 tablespoon of flaxseed meal mixed with 2.5 tablespoons of water) for a plant-based delight. They’re just as fluffy and delicious!
- Spiced Delight: Add 1 teaspoon of cinnamon or nutmeg to the batter for a warm, cozy flavor that elevates your breakfast experience.
- Nutty Twist: Mix in a handful of finely chopped nuts, like pecans or walnuts, for added crunch and a satisfying twist to your mini pancakes.
- Seasonal Fruits: Experiment with different toppings! Use seasonal fruits like strawberries, blueberries, or caramelized bananas for an exciting and fresh flair.
- Sweet Enhancements: Drizzle with flavored syrups, such as chai spice or lavender, to give your pancakes an elegant touch that’s sure to impress.
- Chocolate Lovers: For a sweeter treat, fold in chocolate chips into the batter before baking, creating mini pancakes that are a dream come true for chocolate fans.
These variations not only enhance flavor and texture but also add a personal touch! As you play around with the recipe, don’t hesitate to discover what works best for you. Perhaps you’ll want to try pairing your fluffy pancakes with a side of homemade Whipped Cream or a comforting fruit compote—your breakfast table will never be boring again!
Storage Tips for Adorable Mini Dutch Baby Pancakes
-
Room Temperature: Enjoy freshly baked miniature pancakes right away! If left out, they can sit at room temperature for up to 2 hours before being covered to maintain freshness.
-
Fridge: Store leftovers in an airtight container in the refrigerator for up to 3 days. Reheat in the microwave for about 20–30 seconds or in the oven at 350°F (175°C) until warmed through.
-
Freezer: If you want to make these adorable mini Dutch baby pancakes in advance, freeze them in a single layer on a baking sheet, then transfer to a zip-top bag for up to 2 months. Reheat in the oven for 10–15 minutes at 350°F (175°C).
-
Reheating: To restore their puffiness, reheat frozen pancakes in a preheated oven instead of the microwave. This method will help them retain their delightful texture!
Make Ahead Options
These Adorable Mini Dutch Baby Pancakes are perfect for busy home cooks looking to save time during hectic mornings! You can prepare the batter up to 24 hours in advance by mixing the eggs, milk, flour, sugar, vanilla extract, and salt, then refrigerating it in an airtight container. To maintain their fluffy texture, remember to bring the batter to room temperature before pouring it into the pans and baking. If you have leftovers, they can be stored in the refrigerator for up to 3 days. When ready to serve, simply reheat the pancakes in a warm oven or microwave until they’re warmed through, and enjoy the same delightful taste with minimal effort!

Adorable Mini Dutch Baby Pancakes Recipe FAQs
What type of flour works best for Adorable Mini Dutch Baby Pancakes?
You can use both all-purpose flour and gluten-free flour for this recipe. Each option yields delightful results, though gluten-free flour may produce a slightly different texture. If using gluten-free flour, I recommend a blend designed for baking to enhance the fluffiness.
How should I store leftover Adorable Mini Dutch Baby Pancakes?
Leftovers can be stored in an airtight container in the refrigerator for up to 3 days. To reheat, simply microwave for 20–30 seconds or place in a preheated oven at 350°F (175°C) until warmed through. This will help restore their delightful fluff!
Can I make the pancake batter ahead of time?
Absolutely! You can prepare the batter in advance and store it in the refrigerator for up to 2 hours before baking. This makes it super convenient for busy mornings, allowing you to whip up fresh pancakes in a jiffy!
How do I freeze Adorable Mini Dutch Baby Pancakes?
To freeze, first bake the pancakes and let them cool completely. Then, arrange them in a single layer on a baking sheet and freeze for 1–2 hours. Once frozen, transfer the pancakes to a zip-top bag and store them in the freezer for up to 2 months. When you’re ready to enjoy, simply reheat them in a preheated oven at 350°F (175°C) for 10–15 minutes to regain their puffiness.
Are there any dietary adjustments for allergies?
Yes, you can easily adapt this recipe for various dietary needs. To make these Adorable Mini Dutch Baby Pancakes dairy-free, use almond milk instead of regular milk, and replace butter with coconut oil. For a vegan option, substitute eggs with flax eggs. Simply mix 1 tablespoon of ground flaxseed with 2.5 tablespoons of water and let it sit until it thickens!
What do I do if my pancakes don’t puff up?
If your pancakes don’t puff up as expected, a few factors could be at play: ensure that your oven is preheated to the correct temperature, avoid overmixing the batter (a few lumps are okay for fluffiness), and check that your baking powder is fresh, as expired leavening agents can hinder the puffing process.
Adorable Mini Dutch Baby Pancakes for Effortless Breakfast Bliss
Ingredients
Equipment
Method
- Preheat your oven to 425°F (220°C) and coat a muffin tin with non-stick spray or melted butter.
- In a mixing bowl, whisk together 4 eggs, 1 cup of milk, 1 cup of flour, 2 tablespoons of sugar, 1 teaspoon of vanilla extract, and a pinch of salt until smooth.
- Pour the batter into the prepared muffin tin, filling each cup about halfway.
- Bake for 15-20 minutes, until the pancakes are puffed and golden brown.
- Remove from the oven and cool for about 5 minutes.
- Transfer to a serving platter and serve warm with fresh fruits, whipped cream, or syrup.
Leave a Reply