
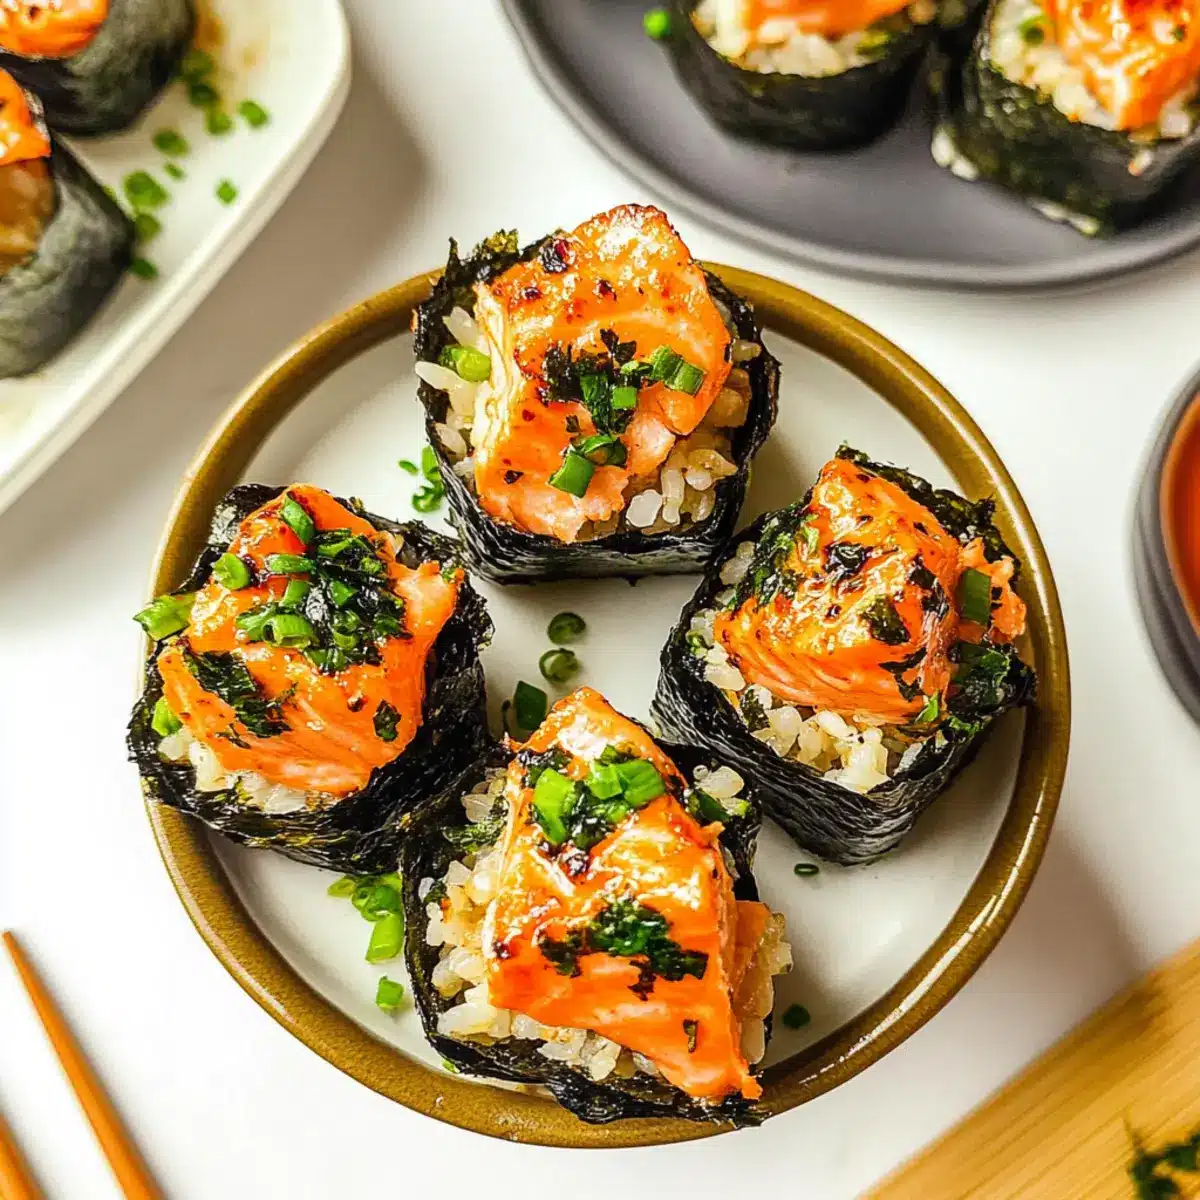
As I scrolled through yet another evening of TikTok, I stumbled upon a recipe that instantly caught my eye: Easy Baked Salmon Sushi Cups. This innovative take on deconstructed sushi not only satisfies all your sushi cravings but also transforms a favorite dish into an easy, bite-sized appetizer that’s perfect for gatherings. With minimal prep time and a delightful combination of fluffy sushi rice and tender salmon, these little cups become a crowd-pleaser in no time. Topped with a spicy mayo drizzle, they’re not just a quick fix but also offer that heartwarming comfort we crave. Ready to shake up your appetizer game? Let’s dive into the details that will make you the star of your next get-together!

Why Are These Sushi Cups a Must-Try?
Simplicity at Its Best: With just a few ingredients and straightforward steps, you’ll find making these Baked Salmon Sushi Cups incredibly easy, even for novice cooks.
Delicious Flavor Explosion: The combination of tender salmon and creamy Kewpie mayo delivers a savory taste that melds beautifully with the rice.
Crowd-Pleasing Appeal: Perfect for parties, these bite-sized wonders are sure to impress your guests and spark conversations, making them a hit at any gathering.
Healthy Indulgence: Packed with protein from salmon, these cups present a nutritious alternative to traditional appetizers, ensuring you can indulge guilt-free.
Warm Comfort: Unlike typical sushi, the warm filling and crispy nori offer a delightful twist that adds comfort to this beloved dish. Once you’ve tried these, consider pairing them with Baked Apple Fritters for a sweet contrast at your next get-together!
Baked Salmon Sushi Cups Ingredients
• To embark on your culinary adventure, here’s what you’ll need for these delightful Baked Salmon Sushi Cups:
For the Salmon Mixture
- Salmon – Rich in protein and flavor; feel free to substitute with cooked shrimp for a different seafood twist.
- Light Soy Sauce – Brings umami and a salty kick; try tamari for a gluten-free option.
- Kewpie Mayo – Adds creaminess and unique taste; regular mayo mixed with a dash of rice vinegar works well too.
- Sriracha – Provides a spicy zing; adjust to your desired heat level with a milder sauce if preferred.
- Sesame Oil – Infuses a nutty aroma; can be replaced with olive oil if you desire a different flavor.
For the Sushi Rice Base
- Uncooked Sushi Rice – This sticky rice is essential for holding the cups together; short grain rice can be a substitute.
- Rice Vinegar – Enhances the flavor of the rice; in a pinch, white vinegar will suffice.
- White Sugar – Balances the vinegar’s acidity and adds sweetness; honey or agave syrup can serve as natural alternatives.
For the Cups
- Nori Sheets – Deliver a crispy texture; be sure to cut them into squares before use.
- Cooking Spray – Prevents sticking in the muffin tin; any preferred cooking oil will do.
For Garnishing
- Green Onion – Adds freshness and a pop of color; chives can be used for a milder flavor.
- Furikake – An optional garnish for umami and crunch if you have it on hand; feel free to skip if unavailable.
These tasty Baked Salmon Sushi Cups are not only a delightful treat but a breeze to make!
Step‑by‑Step Instructions for Easy Baked Salmon Sushi Cups
Step 1: Cook the Rice
Begin by cooking the uncooked sushi rice according to the package instructions, typically around 20 minutes. Once done, mix rice vinegar with white sugar until dissolved, and gently fold it into the warm rice for flavor, ensuring it’s well incorporated. Set the seasoned rice aside while you prepare the other ingredients.
Step 2: Preheat the Oven
Preheat your oven to 400℉ (200℃) to ensure it reaches the perfect baking temperature. This step is crucial for achieving a crispy exterior on your Easy Baked Salmon Sushi Cups. While the oven warms, gather your ingredients and muffin tin, making things easier for the assembly process.
Step 3: Prepare the Salmon Mixture
In a mixing bowl, combine cubed salmon, light soy sauce, Kewpie mayo, sriracha, and sesame oil. Use a spatula to mix thoroughly, ensuring every piece of salmon is coated with the flavorful mixture. The contrast of flavors will elevate your Baked Salmon Sushi Cups, making them a savory delight.
Step 4: Cut the Nori Sheets
Take your nori sheets and cut them into squares that will fit the muffin tin’s compartments. Aim for approximately 4×4 inch squares, as these will serve as the vessel for your sushi cups. Preparation is key to a smooth assembly, so get them ready before moving on to the next step.
Step 5: Assemble the Cups
Lightly grease the muffin tin with cooking spray to prevent sticking. Place a nori square at the bottom of each muffin insert, then add a spoonful of seasoned sushi rice, pressing it down firmly to create a base. Make sure the rice fills the nori sheet completely, forming a sturdy foundation for your cup.
Step 6: Add the Salmon Layer
Now, top each rice layer with a generous spoonful of the salmon mixture you prepared earlier. Spread it evenly to ensure each cup gets the same delicious flavor. The vibrant pink of the salmon will provide a lovely contrast against the rice, making your Easy Baked Salmon Sushi Cups visually appealing.
Step 7: Bake the Cups
Place the muffin tin in the preheated oven and bake for about 15 minutes, or until the salmon is cooked through and reaches a light golden color on top. You will notice a delightful aroma filling your kitchen as they bake, signaling that they are nearing completion.
Step 8: Garnish and Serve
Once baked, carefully remove the sushi cups from the oven and let them cool slightly. Garnish with a drizzle of sriracha and a sprinkle of chopped green onions for a burst of flavor and color. Serve your Easy Baked Salmon Sushi Cups warm to fully enjoy the comforting combination of textures and tastes.
Baked Salmon Sushi Cups: Creative Twists
Feel free to mix and match these variations to take your Baked Salmon Sushi Cups to another level of deliciousness!
-
Seafood Swap: Substitute salmon for cooked shrimp or crab for a delightful seafood medley. Each variation brings a unique flavor profile that your guests will love.
-
Brown Rice Base: For a healthier option, swap sushi rice for brown rice. This offers a nutty flavor that pairs beautifully with the salmon’s richness.
-
Flavor Boost: Experiment with different sauces! Try using teriyaki or a homemade mango salsa drizzled on top for a flavor explosion that will surprise your palate.
-
Vegan Alternative: Replace salmon with marinated tofu or tempeh, while ensuring you use vegan mayo to keep it plant-based. You’ll still get that creamy texture without sacrificing taste.
-
Tropical Twist: Add a touch of pineapple chunks into the salmon mixture for a sweet and savory combination that brings a taste of the tropics.
Feeling adventurous? Consider enhancing your presentation with a side of Baked Apple Fritters or some spicy Salmon Alfredo Cozy to round out your appetizer offerings!
-
Spice It Up: If you love heat, add extra sriracha or a sprinkle of chili flakes to your salmon mixture. It adds a delightful kick that complements the sushi cups perfectly.
-
Nori Crunch: To boost texture, top the cups with crispy fried onions or crushed nori after baking for an extra crunch.
These variations not only spice up the recipe but also ensure that you can cater to different likes, making your gathering all the more memorable!
Expert Tips for Baked Salmon Sushi Cups
- Rice Rinsing: Rinse the sushi rice before cooking to remove excess starch, ensuring it becomes sticky and holds together perfectly for your Baked Salmon Sushi Cups.
- Cooling Period: Let the sushi cups cool briefly after baking; this enhances the flavors and makes handling easier.
- Nori Handling: Be gentle with the nori sheets, as they can tear easily. Ensure your cut is precise for a tidy presentation in your sushi cups.
- Taste Adjustments: Feel free to adjust the amount of sriracha in the salmon mixture; start with a little and add more for desired heat in your Baked Salmon Sushi Cups.
- Watch the Bake: Keep an eye on the sushi cups as they bake. If your oven runs hot, they may be done just before the 15-minute mark.
- Serve Fresh: For the best texture, enjoy the sushi cups immediately after baking; reheating can make the nori lose its crispiness.
Make Ahead Options
These Easy Baked Salmon Sushi Cups are perfect for busy home cooks looking to save time during the week! You can prepare the sushi rice and salmon mixture up to 24 hours in advance. Simply cook the sushi rice as instructed, then mix in the rice vinegar and sugar, letting it cool before storing it in an airtight container in the refrigerator. To maintain the quality of the nori, store it separately; this prevents it from becoming soggy. When you’re ready to finish the dish, line your muffin tin with the nori squares, add the prepped sushi rice and salmon mixture, then bake as directed. This way, you’ll have a delicious and easy appetizer ready with minimal effort!
What to Serve with Easy Baked Salmon Sushi Cups
Pairing these delightful salmon sushi cups with complementary dishes transforms a simple appetizer into a complete dining experience filled with flavors and textures.
- Crispy Edamame: These lightly salted, crispy snacks are a healthy pairing that offers a burst of flavor to accompany the sushi cups.
- Seaweed Salad: A refreshing side with a delicate taste and unique texture, this salad adds a light and zesty contrast to the savory salmon.
- Miso Soup: The warm broth and umami flavors of miso soup create a comforting experience, enhancing the delightful tastes of your sushi cups.
- Spicy Tuna Tartare: For a luxurious touch, serve this dish for an extra hit of umami while echoing the sushi theme in an elegant way.
- Pickled Ginger: Zesty and bright, pickled ginger serves as the perfect palate cleanser, balancing the rich flavors of the salmon while enhancing the overall meal.
- Wasabi Peas: These crunchy snacks provide an added kick, enriching the sushi cups and introducing another level of enjoyable snackiness.
- Sake or Sparkling Water: For drinks, consider pairing with ice-cold sake or bubbly sparkling water infused with fresh lime; both will elevate your meal beautifully.
- Matcha Green Tea Cheesecake: Conclude with a slice of this creamy dessert, offering a sweet yet earthy contrast that completes your sushi dinner on a high note.
Storage Tips for Baked Salmon Sushi Cups
Fridge: Store leftover Baked Salmon Sushi Cups in an airtight container for up to 2-3 days to maintain flavor and freshness.
Freezer: For longer storage, freeze sushi cups in a single layer on a baking sheet until solid, then transfer to a freezer bag for up to 2 months.
Reheating: Reheat in the oven at 350℉ (175℃) for about 10 minutes to restore crispness to the nori and warmth to the salmon mixture.
Cooling Before Storing: Allow the sushi cups to cool completely before storing to prevent condensation, which can make them soggy.
Baked Salmon Sushi Cups Recipe FAQs
What is the best way to choose salmon for this recipe?
Absolutely! Opt for fresh salmon with a vibrant color and no dark spots along the flesh. If you’re unable to find fresh salmon, frozen is a suitable alternative—just ensure it’s fully thawed and cleaned before use.
How should I store leftover Baked Salmon Sushi Cups?
To keep them fresh, store leftover Baked Salmon Sushi Cups in an airtight container in the refrigerator for up to 2-3 days. Allow them to cool completely to prevent condensation, which can make them soggy.
Can I freeze Baked Salmon Sushi Cups?
Very! Freeze your sushi cups in a single layer on a baking sheet until solid, around 1-2 hours, then transfer them to a freezer bag. This method helps maintain their shape; they can be stored for up to 2 months.
What should I do if my sushi rice isn’t sticky enough?
I recommend rinsing your sushi rice thoroughly before cooking to remove excess starch, which helps it become sticky. If it still doesn’t hold together well, you can try adding a touch more rice vinegar and sugar after cooking to enhance stickiness!
Are there any dietary considerations I should keep in mind?
Absolutely! If anyone has allergies, be cautious with soy sauce and mayonnaise as they can contain allergens. For a gluten-free option, use tamari instead of soy sauce. If serving to pets, remember that fish and condiments should be kept away from them.
How do I reheat Baked Salmon Sushi Cups for the best texture?
To reheat, preheat your oven to 350℉ (175℃) and place the sushi cups on a baking sheet. Heat them for about 10 minutes. This method will help restore their crispiness and warm the salmon nicely. Enjoy your delicious treats again!
Baked Salmon Sushi Cups: A Warm Twist on Sushi Bliss
Ingredients
Equipment
Method
- Cook the sushi rice according to package instructions, mix rice vinegar with white sugar until dissolved and fold into warm rice.
- Preheat oven to 400℉ (200℃).
- In a mixing bowl, combine cubed salmon, light soy sauce, Kewpie mayo, sriracha, and sesame oil.
- Cut nori sheets into squares that will fit into muffin tin compartments.
- Lightly grease the muffin tin with cooking spray, place a nori square at the bottom of each muffin insert.
- Add a spoonful of seasoned sushi rice on top of the nori and press down firmly.
- Top each rice layer with a spoonful of the salmon mixture.
- Bake in the preheated oven for about 15 minutes, until salmon is cooked.
- Garnish with sriracha and chopped green onions before serving.
Leave a Reply