
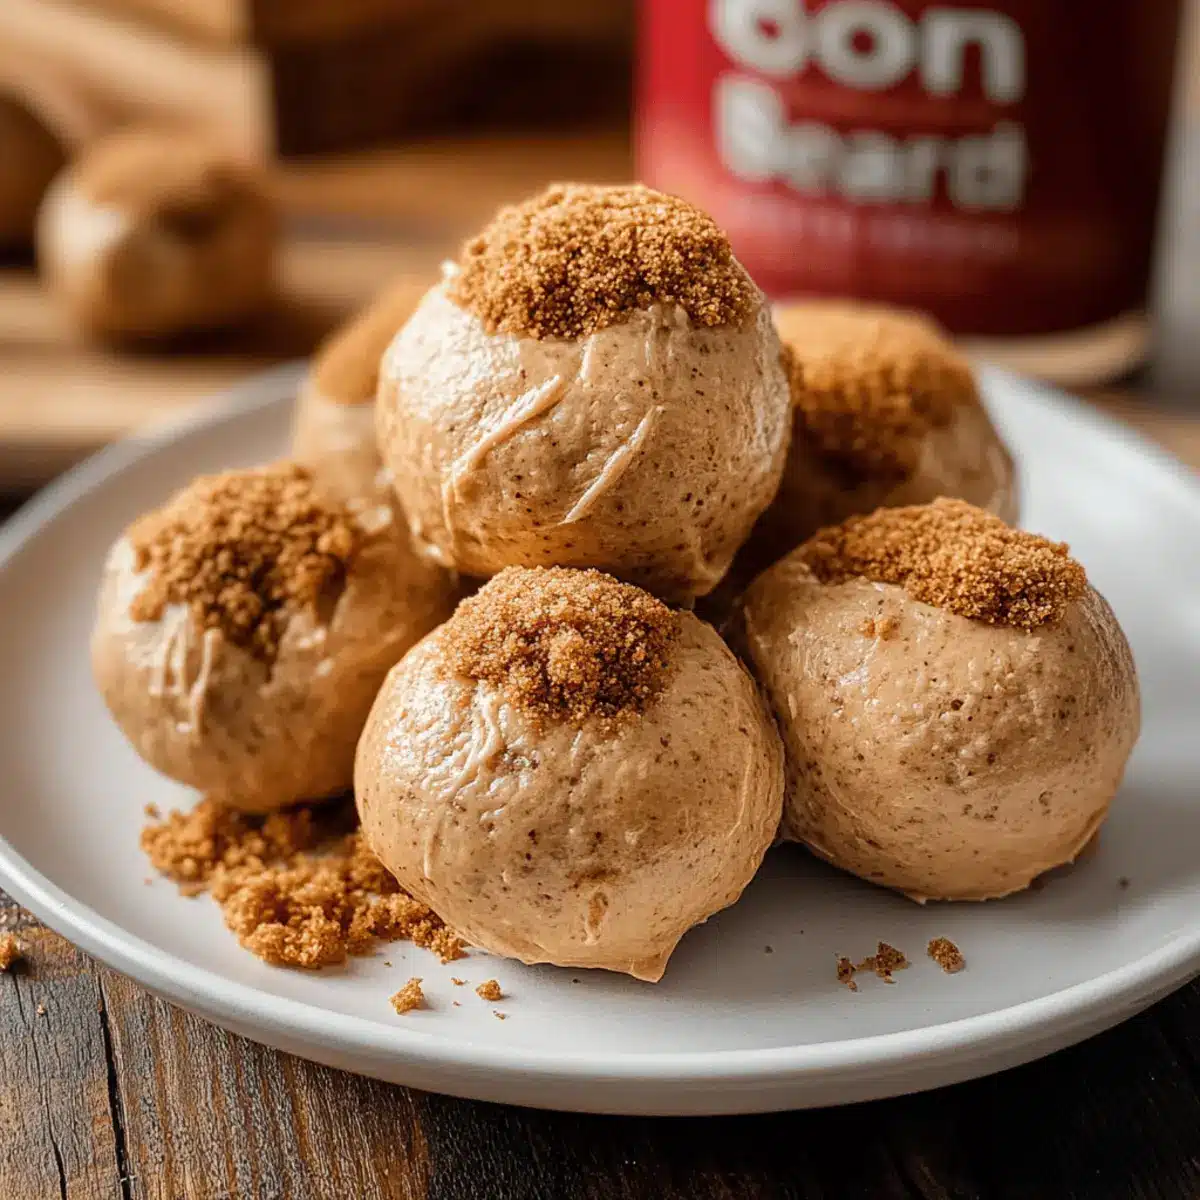
While rummaging through the pantry, I stumbled upon a box of Biscoff cookies, their cinnamon-spiced aroma wafting through the air. This delightful discovery sparked the idea for my latest creation: Biscoff Cheesecake Protein Balls. These no-bake gems pack a delicious punch of high protein goodness, perfect for curbing my sweet tooth after a workout or just as a mid-afternoon pick-me-up. With each bite, I relish the creamy cheesecake texture combined with the rich, caramel flavor that makes Biscoff so irresistible. Plus, they’re as versatile as they are satisfying; feel free to tweak the ingredients to suit your cravings or dietary needs. What creative twist will you add to your batch?
Why Try Biscoff Cheesecake Protein Balls?
Decadent Delight: Each bite of these Biscoff Cheesecake Protein Balls transports you to dessert heaven, blending rich, caramel notes with creamy goodness.
Easy Peasy: No baking is required! Simply mix, roll, and chill for a quick snack that’s ready in no time.
Nutritious Choice: Packed with protein, these healthy snacks are ideal for post-workout recovery or a midday indulgence without the guilt.
Vibrant Versatility: Experiment with your favorite flavors by mixing in chia seeds or swapping Biscoff with other tasty alternatives.
Crowd Favorite: Perfect for sharing at gatherings or meal prep, these protein balls will have everyone asking for seconds. Enjoy them as a topping on yogurt or indulge them on their own! Try them today and bring a sweet twist to your snacking game.
Biscoff Cheesecake Protein Balls Ingredients
For the Protein Balls
- Biscoff Cookies – provide a rich, caramel flavor; feel free to substitute with graham crackers for a similar taste.
- Cream Cheese – adds creaminess to replicate the cheesecake texture; you can use light cream cheese to cut down on calories.
- Protein Powder – essential for boosting protein content; choose a flavor that complements Biscoff, such as vanilla.
- Oats – offer structure and fiber; consider using oat flour for a lower-carb version.
- Nut Butter (e.g., almond or peanut) – provides healthy fats and binds the ingredients together; sunflower seed butter is a great nut-free alternative.
- Honey or Maple Syrup – sweetens the mixture; opt for sugar-free options to reduce sugar content.
- Vanilla Extract – enhances the overall flavor profile.
Enjoy creating these delightful Biscoff Cheesecake Protein Balls and have fun experimenting with variations to suit your taste!
Step‑by‑Step Instructions for Biscoff Cheesecake Protein Balls
Step 1: Mix Dry Ingredients
Begin by preparing a large mixing bowl. Crush about 15–20 Biscoff cookies into fine crumbs, ensuring there are no large pieces. Next, add in 1 cup of oats and 1 scoop of protein powder. Use a whisk to combine these dry ingredients thoroughly, creating a uniform mixture that sets the foundation for your rich Biscoff Cheesecake Protein Balls.
Step 2: Blend Wet Ingredients
In a separate bowl, mix together 8 ounces of softened cream cheese, ½ cup of nut butter, ¼ cup of honey (or maple syrup), and 1 teaspoon of vanilla extract. Using a hand mixer or spatula, blend until smooth and creamy, taking about 2-3 minutes. This luscious mix will perfectly complement the dry ingredients and enhance the cheesecake flavor of your protein balls.
Step 3: Combine Mixtures
Gradually incorporate the dry mixture into the wet ingredients, stirring slowly but firmly until fully combined. The dough should start to come together and feel sticky yet manageable. If the mixture seems too crumbly, add a little extra nut butter or honey to achieve the desired consistency. This step brings the delightful Biscoff Cheesecake Protein Balls to life!
Step 4: Form Balls
Once combined, it’s time to roll your mixture into bite-sized balls. Take small portions of dough (about 1 tablespoon each) and roll them between your palms until smooth and round. Place each ball on a baking sheet lined with parchment paper. Aim for uniform sizes to ensure even texture and flavor in every delightful bite of your Biscoff Cheesecake Protein Balls.
Step 5: Chill
After forming all the balls, place the tray in the refrigerator. Allow the Biscoff Cheesecake Protein Balls to chill for about 30 minutes. This step helps them firm up, making them easier to handle. You’ll know they’re ready when they feel slightly firmer to the touch, ensuring a satisfying bite when you finally indulge in your delicious creation!
Make Ahead Options
These Biscoff Cheesecake Protein Balls are perfect for meal prep enthusiasts! You can combine the dry ingredients (crushed Biscoff cookies, oats, and protein powder) up to 3 days in advance. Just store them in an airtight container in the pantry. The wet mixture (cream cheese, nut butter, honey, and vanilla) can be prepared and kept refrigerated for up to 24 hours before combining. To maintain the creamy texture, ensure your cream cheese is at room temperature prior to mixing. When you’re ready to serve, simply combine the dry and wet ingredients, form the balls, and chill them for 30 minutes to achieve that delightful firmness. With these make-ahead options, you’ll enjoy guilt-free indulgence with minimal effort!
Tips for the Best Biscoff Cheesecake Protein Balls
- Room Temperature Cream Cheese: Ensure your cream cheese is at room temperature for a smooth blend with other ingredients, resulting in creamy protein balls.
- Taste Test Sweetness: Adjust the sweetness by tasting the mixture before rolling into balls; everyone’s preference varies, so make it your own!
- Moisture Adjustment: If the mixture seems too dry or crumbly, add a little extra nut butter or honey; this helps the Biscoff Cheesecake Protein Balls hold together better.
- Even Sizing: Roll the balls into uniform sizes for consistent texture and flavor in every bite. This step also makes for easy portion control.
- Chill Effectively: Don’t skip the chilling step; allowing the balls to set in the fridge for at least 30 minutes makes them firmer and more enjoyable to eat.
How to Store and Freeze Biscoff Cheesecake Protein Balls
Fridge: Store your Biscoff Cheesecake Protein Balls in an airtight container in the refrigerator for up to 1 week to maintain their freshness and flavor.
Freezer: For longer storage, freeze the protein balls in a freezer-safe bag or container for up to 1 month. Allow them to thaw in the fridge before enjoying.
Reheating: There’s no need to reheat, but you can enjoy them chilled straight from the fridge or room temperature for a delightful treat.
Portion Control: If you’re meal prepping, consider separating the balls into individual servings for easy grab-and-go snacks throughout the week!
What to Serve with Biscoff Cheesecake Protein Balls?
Elevate your snacking experience with delightful companions that will perfectly complement the rich flavors of these protein-packed gems.
- Creamy Greek Yogurt: A dollop adds a tangy contrast that enhances the sweetness of the protein balls, making it a wholesome snack duo.
- Fruity Smoothie: Blend your favorite fruits with some spinach and almond milk for a refreshing drink that balances the indulgence of Biscoff.
- Nutty Trail Mix: A handful of trail mix brings crunch and healthy fats, offering a delightful textural contrast to these chewy protein balls.
- Dark Chocolate Drizzle: A light drizzle brings an elegant touch and a hint of richness, amplifying the overall flavor experience when paired together.
- Fresh Fruit Salad: A colorful mix of berries and melons adds a refreshing zing, lightening up the indulgent treat while providing vitamins and freshness.
- Chai Tea Latte: Warm, spiced tea can perfectly complement the caramel notes in the protein balls, creating a comforting snack moment.
- Coconut Milk: Drizzle coconut milk over your protein balls for a tropical twist that enhances the creamy texture and adds a refreshing layer.
- Cinnamon Oatmeal: Hearty oatmeal with a sprinkle of cinnamon pairs beautifully, providing a warm and nourishing side for a sweet and wholesome indulgence.
- Honey or Maple Syrup Dip: A small bowl of honey or maple syrup can serve as a delightful dip that enhances your protein balls, adding a touch of extra sweetness when desired.
- Iced Coffee: This invigorating drink offers a nice caffeine kick that pairs well with the sweet and creamy protein balls, making for a revitalizing afternoon treat.
Biscoff Cheesecake Protein Balls Variations
Feel free to let your creativity flow and personalize these protein balls to match your cravings and dietary needs!
-
Chocolate Twist: Add 2 tablespoons of cocoa powder for a rich chocolate flavor, elevating your indulgence even further.
-
Nutty Delight: Swap almond or peanut butter with sunflower seed butter to create a delightful nut-free version that everyone can enjoy.
-
Berry Boost: Mix in a handful of dried cranberries or chopped dark chocolate for a fruity or decadent burst in every bite.
-
Gluten-Free Crunch: Substitute Biscoff cookies with gluten-free graham crackers or digestive biscuits for a satisfying crunch without the gluten.
-
Protein Power-Up: Use flavored protein powder like chocolate or salted caramel instead of vanilla for a tasty variation that complements the Biscoff.
-
Seeds for Success: Stir in 2 tablespoons of chia seeds or flaxseeds for an extra boost of omega-3s and a pleasant crunch in texture.
-
Dairy-Free Alternative: Replace cream cheese with a dairy-free alternative like coconut cream or cashew cream, maintaining the luscious texture while keeping it dairy-free.
-
Spicy Kick: For the adventurous, add a sprinkle of cinnamon and a pinch of cayenne pepper to give your protein balls an unexpected zesty flavor that pairs beautifully with Biscoff.
Don’t forget to explore delightful creations like Strawberry Crunch Cheesecake or indulge in the rich layers of Millionaires Cheesecake—the possibilities are endless!
Biscoff Cheesecake Protein Balls Recipe FAQs
What type of Biscoff cookies should I use?
You can use regular Biscoff cookies for that signature caramel flavor. If you can’t find them, feel free to substitute with graham crackers or digestive biscuits for a similar taste profile.
How should I store Biscoff Cheesecake Protein Balls?
Store your Biscoff Cheesecake Protein Balls in an airtight container in the refrigerator for up to 1 week. This keeps them fresh and delicious, so they’re always ready for a quick snack!
Can I freeze Biscoff Cheesecake Protein Balls?
Absolutely! To freeze, place the protein balls in a single layer on a baking sheet and freeze until solid. Then, transfer them to a freezer-safe bag or container. They can be stored in the freezer for up to 1 month. When you’re ready to enjoy, simply let them thaw in the fridge overnight.
What can I do if my mixture is too crumbly?
If your mixture feels too dry or crumbly, don’t worry! You can resolve this by adding an extra tablespoon of nut butter or honey. Mix it in gradually until the consistency becomes sticky and holds together well. This will help your Biscoff Cheesecake Protein Balls firm up nicely!
Are Biscoff Cheesecake Protein Balls suitable for people with nut allergies?
If you or someone you’re serving has a nut allergy, you can simply swap the nut butter for sunflower seed butter. This will still give you that creamy texture while keeping it safe for those avoiding nuts.
How can I modify the recipe for dietary preferences?
Definitely! You can use light cream cheese to cut calories, select a sugar-free syrup for sweetness, or switch out the protein powder flavor to better suit your taste. Feel free to get creative and tailor the Biscoff Cheesecake Protein Balls to fit your dietary needs and cravings!
Biscoff Cheesecake Protein Balls for Guilt-Free Indulgence
Ingredients
Equipment
Method
- Mix dry ingredients: Crush Biscoff cookies, then combine with oats and protein powder in a mixing bowl.
- Blend wet ingredients: In a separate bowl, blend cream cheese, nut butter, honey/maple syrup, and vanilla extract until smooth.
- Combine mixtures: Gradually mix dry ingredients into the wet, stirring until the dough starts to come together.
- Form balls: Roll the mixture into bite-sized balls and place them on a parchment-lined baking sheet.
- Chill: Refrigerate the protein balls for about 30 minutes until firm.
Leave a Reply