
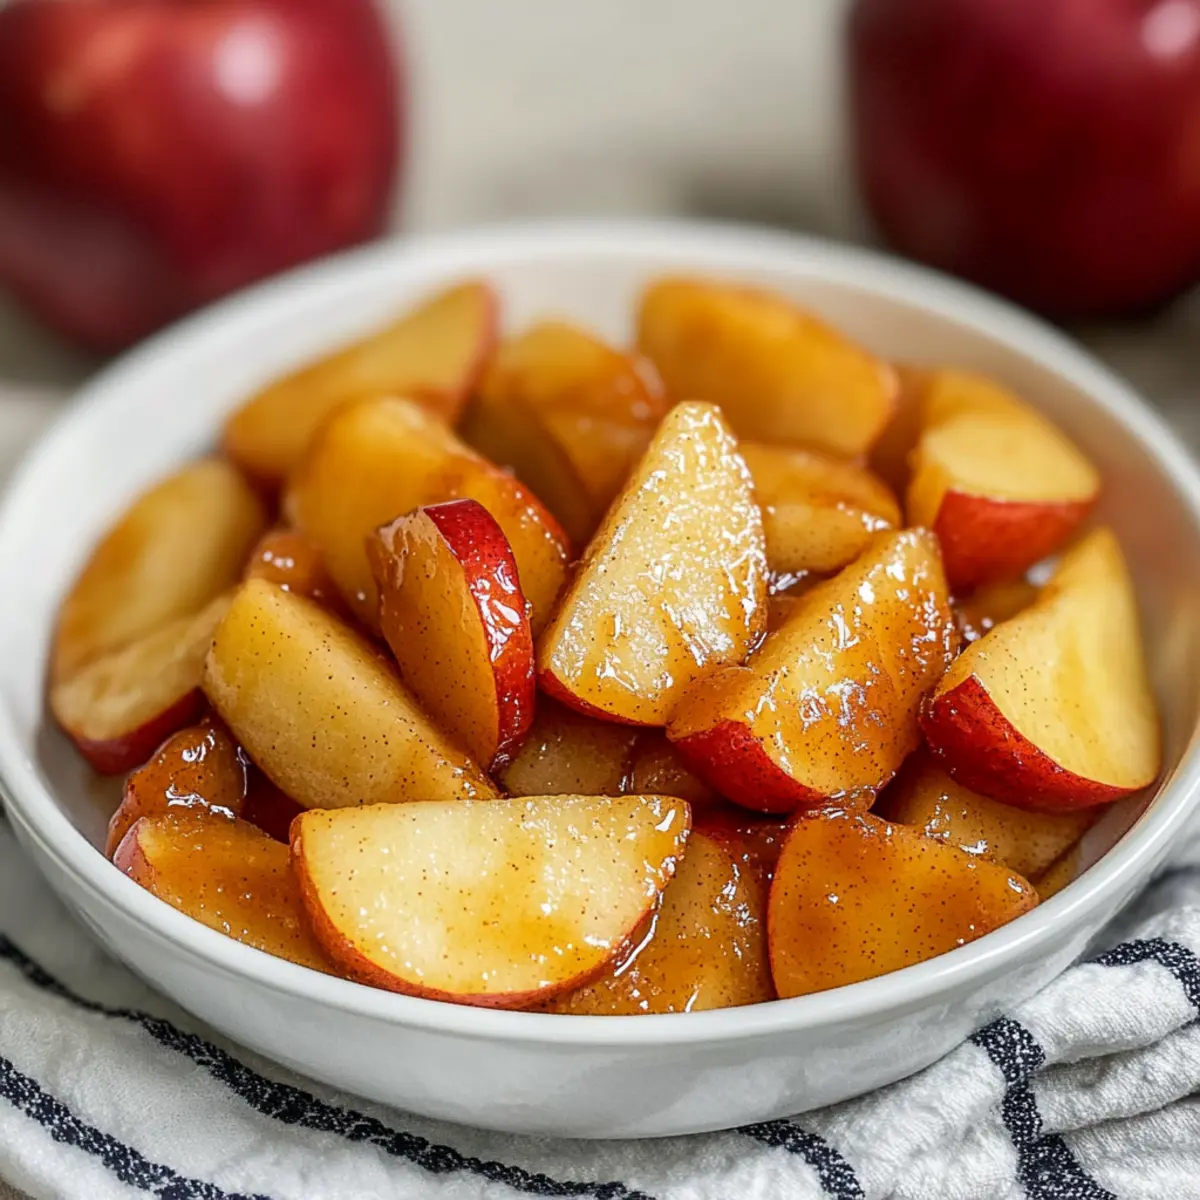
As I stood by the stove, the kitchen filled with the fragrant symphony of butter melting into warm cinnamon, I couldn’t help but smile. This is the magic of quick, homemade comfort food. My go-to recipe for caramelized apples is not only a delightful way to elevate ordinary meals, but it also transforms simple snacking into a gourmet experience. With just a few ingredients, these tender, sweet apples crowned with a hint of cinnamon can top pancakes, sweeten a bowl of oatmeal, or even shine alone as a delectable treat. Plus, they’re ready in mere minutes, making them the perfect solution when you’re craving something comforting yet uncomplicated. Are you ready to indulge in this sweet delight and discover just how versatile caramelized apples can be?
Why are caramelized apples a must-try?
Quick and Easy: This recipe takes just minutes, making it perfect for busy mornings or spontaneous snack cravings.
Delightful Versatility: Whether as a topping for pancakes, ice cream, or enjoyed alone, these apples elevate any dish effortlessly.
Burst of Flavor: The combination of sweet apples and warm cinnamon creates an irresistible aroma and taste that will impress friends and family.
Healthy Indulgence: With minimal ingredients, you’ll enjoy a comforting treat that’s rich in fiber and far better than fast food.
Culinary Creativity: Experiment with different spices or sweeteners to personalize your caramelized apples, ensuring they suit your taste preferences perfectly.
Try this delightful recipe today and maybe pair it with a warm bowl of oatmeal for a fulfilling breakfast!
Caramelized Apples Ingredients
• Get ready to create a delicious treat!
For the Apples
- Apples – Choose firm varieties like Gala, Braeburn, or Honeycrisp for the best texture; avoid soft apples to prevent them from becoming mushy.
- Lemon Juice – About 1 teaspoon adds brightness and prevents browning; adjust according to your taste.
For the Caramel
- Brown Sugar – This sweetens and helps create the delicious caramel; you can substitute it with honey or maple syrup based on your sweetness preference.
- Cinnamon – Use up to ½ teaspoon to enhance the warm flavor profile; feel free to adjust according to your taste.
Get ready to whip up those Caramelized Apples that will bring joy to your kitchen!
Step‑by‑Step Instructions for Caramelized Apples
Step 1: Prepare the Apples
Start by peeling, coring, and slicing your chosen firm apples, ideally Gala, Braeburn, or Honeycrisp, into uniform pieces. In a mixing bowl, toss the apple slices with about 1 teaspoon of lemon juice to prevent browning, followed by brown sugar and cinnamon. Ensure each slice is evenly coated for a harmonious flavor in your caramelized apples.
Step 2: Cook the Apples
Place a medium skillet over medium-low heat and melt a tablespoon of butter until it sizzles gently. Add the apple mixture, spreading it out in a single layer. Cook for about 6-8 minutes, stirring occasionally, until the apples become tender and the brown sugar mixture thickens into a syrupy consistency. Look for the apples to have softened, and the color to deepen, setting the stage for a delicious treat.
Step 3: Serve
Once your caramelized apples are cooked to perfection, remove them from the heat. You can enjoy them warm immediately, or let them cool and store in a jar for later use. If you choose to save them, a good stir before serving will revive their delightful texture. These caramelized apples are versatile, perfect for topping pancakes, yogurt, or ice cream, or simply relishing on their own.
Make Ahead Options
These caramelized apples are perfect for meal prep, allowing you to enjoy their delightful sweetness any night of the week. You can slice and toss the apples with lemon juice, brown sugar, and cinnamon up to 24 hours in advance. Store them in an airtight container in the refrigerator to prevent browning and maintain their fresh flavor. When you’re ready to enjoy, simply melt butter in a skillet and add your prepped mixture; cook for about 6-8 minutes until tender. With this make-ahead option, you’ll have delicious caramelized apples ready in a flash, making your meal times simpler and more satisfying!
Expert Tips for Caramelized Apples
-
Choose the Right Apples: Firm varieties like Gala or Honeycrisp work best to avoid mushiness. Softer apples won’t hold their shape and can turn to puree.
-
Adjust Sweetness: If you’re using tart apples like Granny Smith, increase the brown sugar slightly to balance the flavors. Don’t hesitate to taste as you go!
-
Cooking Temperature Matters: Keep the heat at medium-low; too high and the sugar may burn before the apples soften. This ensures a perfect caramelized finish.
-
Storing Simply: Store leftover caramelized apples in an airtight container in the fridge for up to a week. Reheat gently to maintain their delightful texture before serving.
-
Get Creative with Spices: Experiment with adding nutmeg, ginger, or flavored extracts like vanilla for a unique twist on traditional caramelized apples.
What to Serve with Quick Cinnamon-Caramelized Apples?
Imagine delightful pairings that bring out the warmth and sweetness of your caramelized apples—perfect for creating a comforting meal full of flavor!
-
Fluffy Pancakes: These are a classic canvas for your caramelized apples, soaking up the sweet juices for an unforgettable breakfast treat.
-
Warm Oatmeal: Mixing in these luscious apples transforms your morning oatmeal into a cozy, indulgent dish that’s both satisfying and comforting.
-
Vanilla Ice Cream: Top your favorite ice cream with caramelized apples for a simple yet divine dessert that balances warmth and chill perfectly.
-
Savory Breakfast Sausages: The sweetness of caramelized apples complements the savory notes of breakfast sausage, creating a well-rounded, hearty breakfast experience.
-
Homemade Yogurt Parfait: Layer the caramelized apples in yogurt with granola for a fresh, crunchy breakfast option that feels indulgent yet healthy.
-
Nutty Granola Bars: Enhance your homemade granola bars with caramelized apples for a sweet and chewy afternoon snack loaded with flavor.
-
Hot Apple Cider: Sip on this spiced drink alongside your apples to amplify the comforting aroma and warmth of your meal.
-
Chocolate Cake: For dessert, rich chocolate pairs beautifully with caramelized apples, adding depth and a luxurious finish to your dining experience.
How to Store and Freeze Caramelized Apples
Fridge: Store in an airtight container in the refrigerator for up to 1 week. This will keep your caramelized apples fresh and ready for snacking or topping.
Freezer: For longer storage, freeze the caramelized apples in a freezer-safe bag for up to 3 months. Lay them flat to save space and ensure even freezing.
Reheating: When ready to enjoy, reheat in a skillet over medium-low heat or gently microwave in short bursts, stirring in between, until warmed through.
Serving Tip: Stir well before serving to redistribute the caramel sauce, ensuring that each bite is just as delicious as the first!
Caramelized Apples Variations & Substitutions
Feel free to get creative with these caramelized apples to suit your taste and dietary needs!
-
Spice Swap: Try nutmeg or allspice for a different flavor profile that adds warmth and depth.
-
Flavored Extract: Add a splash of vanilla or almond extract for a unique twist that elevates the sweetness.
-
Sweetener Alternatives: Swap brown sugar for honey or maple syrup, adjusting the amount based on personal sweetness preferences.
-
Fruit Fusion: Mix in slices of pears or peaches for a delightful fruit medley that complements the apples beautifully.
-
Nutty Crunch: Toss in chopped walnuts or pecans during cooking for an added crunch and flavor contrast.
-
Cinnamon Level: Feel free to adjust how much cinnamon you use based on your love for warmth; or even try a sprinkle of cocoa powder for a chocolatey twist!
-
Add Some Heat: Enhance the flavor with a pinch of cayenne pepper for a surprising kick that contrasts sweetness beautifully.
As you explore these variations, you might find inspiration for pairing them with other favorites like warm oatmeal or creamy yogurt, creating a heartwarming dish perfect for any occasion!
Caramelized Apples Recipe FAQs
Which apples are best for caramelizing?
Absolutely! For the best results, choose firm varieties like Gala, Braeburn, or Honeycrisp. These apples hold their shape and provide a sweet flavor. Softer apples, such as McIntosh, may turn mushy and lose texture during cooking.
How should I store leftover caramelized apples?
I often keep my caramelized apples in an airtight container in the fridge, where they can last up to 1 week. Just make sure to reheat gently before serving to revive their luscious texture and flavor.
Can I freeze caramelized apples?
Yes, you can! To freeze, allow the caramelized apples to cool completely, then transfer them to a freezer-safe bag. Lay it flat to save space, and they will last up to 3 months. When you’re ready to use them, simply thaw in the fridge overnight and reheat as desired.
What if my caramelized apples are too sweet?
If you find the apples too sweet, especially if you used a sweeter variety, feel free to add a splash of lemon juice or even a dash of salt to balance the flavors. The acidity helps counteract the sweetness, making it more enjoyable.
Can I make this recipe vegan?
Absolutely! For a vegan version, substitute regular butter with plant-based alternatives like coconut oil or vegan butter. The remainder of the recipe should work beautifully without any other adjustments.
How can I enhance the flavor of my caramelized apples?
Very! To add an exciting twist, try incorporating spices like nutmeg or allspice alongside the cinnamon, or even include a splash of vanilla extract while cooking. These little touches elevate the flavor profile, adding warmth and depth to your caramelized apples.
Deliciously Easy Caramelized Apples for Comforting Toppings
Ingredients
Equipment
Method
- Peel, core, and slice the apples into uniform pieces. Toss with lemon juice, brown sugar, and cinnamon.
- Melt butter in a skillet over medium-low heat. Add the apple mixture and cook for 6-8 minutes until tender.
- Remove from heat and serve warm or store in a jar for later use, stirring before serving.
Leave a Reply