
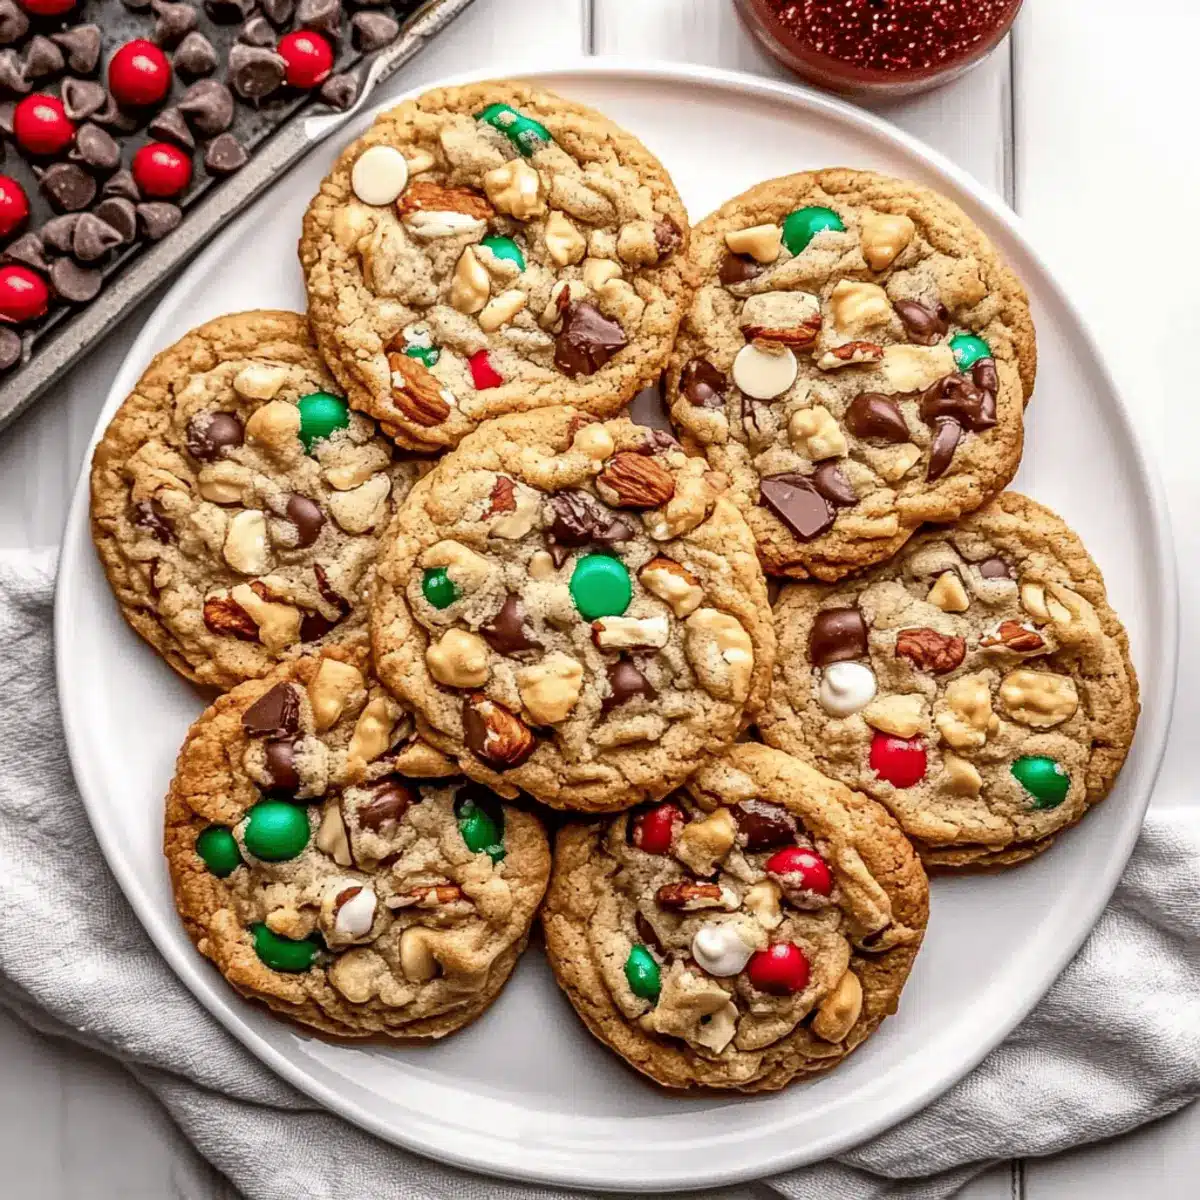
Have you ever wondered how to capture the essence of the holidays in a single bite? These Christmas Kitchen Sink Cookies are the answer—a delightful fusion of flavors and textures that truly embodies the spirit of festive gatherings. Chewy and buttery, they’re packed with chocolate chips, crunchy nuts, and hearty oats, making them not just a treat, but a blank canvas for your creativity. Whether you’re whipping up a batch for a cozy night in or impressing guests at a holiday party, these customizable cookies are a crowd-pleaser that will warm your heart. With quick prep and endless variations, you can tailor them to fit your family’s tastes or experiment with fun add-ins. What special twist will you add to yours?
Why Choose Christmas Kitchen Sink Cookies?
Unmatched Versatility: These cookies are a playground for your creativity! Mix in your favorite nuts, chocolates, or dried fruits to make them uniquely yours.
Time-Saving Treat: Quick to whip up, they’re perfect for those last-minute holiday gatherings or cozy nights at home.
Crowd Favorite: The mix of chewy oats and crunchy nuts makes them a hit with family and friends—just watch them disappear!
Nostalgic Experience: Baking these cookies brings back warm memories of festive traditions, making your kitchen feel like a holiday wonderland.
Perfect Pairing: Serve them with hot cocoa or coffee for a delightful holiday treat that warms the heart. Explore more delicious cookie variations like Cinnamon Roll Cookies or the unique flavors of Pumpkin Smores Cookies for more festive inspiration!
Christmas Kitchen Sink Cookies Ingredients
For the Batter
- Flour – Provides structure; use all-purpose flour for stability, or swap it for gluten-free flour for a gluten-free version.
- Sugar – Adds sweetness and contributes to browning; brown sugar can be used for a chewier texture.
- Butter – Essential for moisture and flavor; use softened butter for better blending.
For the Mix-Ins
- Chocolate Chips – Adds richness and sweetness; choose semi-sweet or dark chocolate based on preference.
- Nuts – Provide crunch and depth; pecans or walnuts are popular, and can be omitted for nut-free versions.
- Oats – Adds texture and heartiness; quick oats are preferable for better incorporation.
- Optional Add-ins – Consider adding dried fruits like cranberries or unique chocolates for personalized flavor.
These Christmas Kitchen Sink Cookies are not just delicious but also a canvas for your holiday creativity!
Step‑by‑Step Instructions for Christmas Kitchen Sink Cookies
Step 1: Prepare the Dough
In a large mixing bowl, cream together 1 cup of softened butter with 1 cup of brown sugar and 1/2 cup of granulated sugar until light and fluffy, about 3-4 minutes. This should create a pale mixture. Add in 2 large eggs, one at a time, followed by 2 teaspoons of vanilla extract, ensuring everything is well combined and smooth.
Step 2: Mix Dry Ingredients
In another bowl, whisk together 2 1/4 cups of all-purpose flour, 1 teaspoon of baking soda, and 1/2 teaspoon of salt until evenly incorporated. Gradually add the dry mixture into the creamy butter mixture, mixing on low speed until just combined. Be careful not to overmix, as this will keep your Christmas Kitchen Sink Cookies chewy and tender.
Step 3: Add Oats and Mix-ins
Stir in 2 cups of quick oats, 1 cup of chocolate chips, and any other delightful mix-ins you desire, such as chopped nuts or dried fruits. Use a spatula to fold the ingredients gently, ensuring an even distribution throughout the dough. The dough will be thick and chunky, filled with festive textures!
Step 4: Shape Cookies
Preheat your oven to 350°F (175°C) and prepare a baking sheet lined with parchment paper. Using a cookie scoop or tablespoon, portion the dough into rounded balls, placing them onto the baking sheet with about 2 inches of space between each. This allows the cookies to spread properly while baking.
Step 5: Bake the Cookies
Bake the cookies in the preheated oven for 10-12 minutes, until the edges are golden brown but the centers remain soft. You’ll know they’re ready when they look slightly puffed and just set. Remove them from the oven and allow the aroma of your Christmas Kitchen Sink Cookies to fill your home!
Step 6: Cool and Enjoy
Let the cookies sit on the baking sheet for about 5 minutes to firm up before transferring them to a wire rack. This cooling step ensures they maintain their chewy texture. Once completely cooled, serve them and enjoy the delightful mixture of flavors and textures from your holiday baking!
Make Ahead Options
These Christmas Kitchen Sink Cookies are perfect for busy home cooks looking to streamline their holiday baking! You can prepare the cookie dough up to 3 days in advance. Simply mix the dough as directed, then shape it into balls and refrigerate them, ensuring they’re covered tightly to maintain their freshness. When you’re ready to bake, place the chilled dough on a baking sheet and follow the baking instructions; there’s no need to thaw—just add a minute or two to the baking time for maximum freshness! This way, you’re always just a few minutes away from delicious, homemade cookies that capture the essence of the holidays with minimal effort!
How to Store and Freeze Christmas Kitchen Sink Cookies
Room Temperature: Store cookies in an airtight container at room temperature for up to 1 week to keep them soft and fresh.
Fridge: For slightly longer freshness, keep your Christmas Kitchen Sink Cookies in the refrigerator for up to 2 weeks; ensure they’re well-wrapped to maintain texture.
Freezer: Freeze cookies individually wrapped in plastic wrap, then placed in a freezer-safe bag, for up to 3 months. Thaw at room temperature before enjoying.
Reheating: If cookies lose their chewiness, pop them in the microwave for 10-15 seconds to warm them up and restore that fresh-baked goodness.
Expert Tips for Christmas Kitchen Sink Cookies
-
Perfect Dough Consistency: Use room temperature butter for a smooth, well-blended dough—this is key for your Christmas Kitchen Sink Cookies’ chewy texture.
-
Mixing Caution: Avoid overmixing once the flour is added; this keeps your cookies soft and tender instead of tough.
-
Even Baking: Space cookies at least 2 inches apart on the baking sheet to allow for proper spreading while baking.
-
Cooling Time: Let cookies cool on the baking sheet for a few minutes before transferring them to a wire rack, ensuring they set perfectly.
-
Flavor Twists: Don’t hesitate to experiment with spices like cinnamon or even a touch of espresso powder to elevate the flavors of your Christmas Kitchen Sink Cookies!
What to Serve with Christmas Kitchen Sink Cookies
Imagine your kitchen filled with the warm, sweet scent of baked cookies, the perfect backdrop for a festive gathering or cozy night in.
-
Hot Chocolate: A rich, creamy cup of cocoa enhances the sweetness, making every bite a delightful experience.
-
Vanilla Ice Cream: The creaminess of ice cream perfectly balances the chewy texture of the cookies, creating a decadent treat.
-
Coffee: A warm cup of coffee brings a comforting bitterness that beautifully contrasts the sweetness of the cookies, making it a fantastic pairing.
-
Milk: Classic and nostalgic, a cold glass of milk adds a refreshing touch and enhances the cookie’s flavors.
-
Fruit Salad: A colorful mix of fresh fruits provides a refreshing counterpoint to the rich, buttery goodness of the cookies. The brightness of the fruits can elevate your dessert experience. Pair it with a drizzle of honey for an extra layer of sweetness!
-
Cheese Platter: Soft cheeses, like brie, add a creamy texture that pairs well with the cookies’ chunkiness. Consider adding nuts and hard cheeses to create an exciting flavor landscape!
-
Festive Punch: A bubbly cranberry or pomegranate punch can add a festive flair, bringing holiday cheer to your cookie spread.
-
Spiced Tea: The warmth of spiced tea offers an aromatic experience that complements the Christmas Kitchen Sink Cookies beautifully, enhancing their cozy vibes.
Serve up your cookies and let the pairing adventures begin!
Christmas Kitchen Sink Cookies Variations
Feel free to explore these delightful modifications and make these cookies uniquely yours!
-
Nut-Free: Omit nuts altogether or replace them with seeds like pumpkin or sunflower for crunch without the allergens. They’ll still be delicious and packed with flavor!
-
Gluten-Free: Substitute all-purpose flour with a gluten-free blend to accommodate dietary needs without sacrificing taste. It’s a great way to share these cookies with everyone!
-
Spicy Kick: Add 1 teaspoon of cinnamon or a pinch of cayenne pepper for a warm, spicy undertone that elevates the festive feel. It’s a simple way to create a cozy, holiday vibe.
-
Dried Fruit Twist: Incorporate dried cranberries or cherries for a tart, fruity contrast to the sweetness. This adds an unexpected burst of flavor that pairs beautifully with chocolate.
-
Chocolate Overload: Use a mix of chocolate types—try dark, milk, and white chocolate chips for an indulgent treat perfect for any chocolate lover. A little decadence never hurt anyone!
-
Texture Variation: Swap quick oats with crisped rice for an unexpected crunch that adds a fun twist. You’ll enjoy the delightful contrast in textures!
-
Flavor Infusions: Substitute almond extract for vanilla for a rich, nutty flavor that enhances the overall taste. It’s a small change that can lead to a big difference!
-
Holiday Spirited: Fold in some crushed peppermint candies or sprinkle them on top before baking for a festive finish. Just wait until you see how magical they look and taste!
Feel inspired? These variations are just the beginning! As a fun bonus, once you’ve mastered these cookies, why not try whipping up some yummy Cinnamon Roll Cookies or share a batch of delightful Pumpkin Smores Cookies? Happy baking!
Christmas Kitchen Sink Cookies Recipe FAQs
What type of flour should I use for Christmas Kitchen Sink Cookies?
Absolutely! For the best structure, all-purpose flour is ideal in this recipe. However, if you’re looking for a gluten-free version, you can substitute it with a 1:1 gluten-free baking mix, which often contains a blend of various gluten-free flours. Just ensure it’s a blend that includes xanthan gum for proper texture!
How long can I store Christmas Kitchen Sink Cookies?
Very! When stored in an airtight container at room temperature, these cookies will stay fresh and delicious for about 1 week. If you want them to last a bit longer, they can also be refrigerated for up to 2 weeks; just make sure they are well-wrapped to avoid drying out.
Can I freeze Christmas Kitchen Sink Cookies?
Absolutely! Freezing is a great option to enjoy these cookies later. To freeze, individually wrap each cookie in plastic wrap, then place them in a freezer-safe bag. They can be stored this way for up to 3 months. When you’re ready to enjoy, simply thaw them at room temperature for a few hours, and you’ll have fresh-tasting cookies again!
What should I do if my cookie dough is too dry?
Very good question! If you find that your dough seems dry, it could be due to too much flour. Start by adding a tablespoon of milk or water at a time until you reach the desired consistency. Make sure to avoid overmixing, as that can also toughen your cookies. Aim for a slightly thick but manageable dough that holds together when scooped.
Are there any dietary considerations for Christmas Kitchen Sink Cookies?
Indeed! If you’re making these cookies for someone with nut allergies, you can simply omit the nuts or substitute them with seeds like pumpkin or sunflower seeds for that added crunch without the allergens. Additionally, for vegans, you can replace the butter with coconut oil and use flax eggs as a substitute for the eggs—just mix 1 tablespoon of flaxseed meal with 3 tablespoons of water and let it sit for a few minutes to thicken.
What’s the best way to achieve chewy cookies?
To get that delightful chewiness that makes Christmas Kitchen Sink Cookies so irresistible, make sure you use room temperature, softened butter, and mix until light and fluffy! Avoid overmixing after adding flour, as this can lead to tough cookies. Lastly, baking them just long enough to golden at the edges while keeping the center soft will emphasize that perfect chewy texture.
Christmas Kitchen Sink Cookies: Your New Holiday Favorite
Ingredients
Equipment
Method
- Cream butter with brown and granulated sugar until light and fluffy.
- Add eggs one at a time, then mix in vanilla extract.
- Whisk together flour, baking soda, and salt; gradually mix into the wet ingredients.
- Fold in oats, chocolate chips, and any additional mix-ins.
- Preheat oven to 350°F (175°C) and portion dough onto a baking sheet.
- Bake for 10-12 minutes until edges are golden and centers are soft.
- Cool on baking sheet for 5 minutes before transferring to a wire rack.
Leave a Reply