
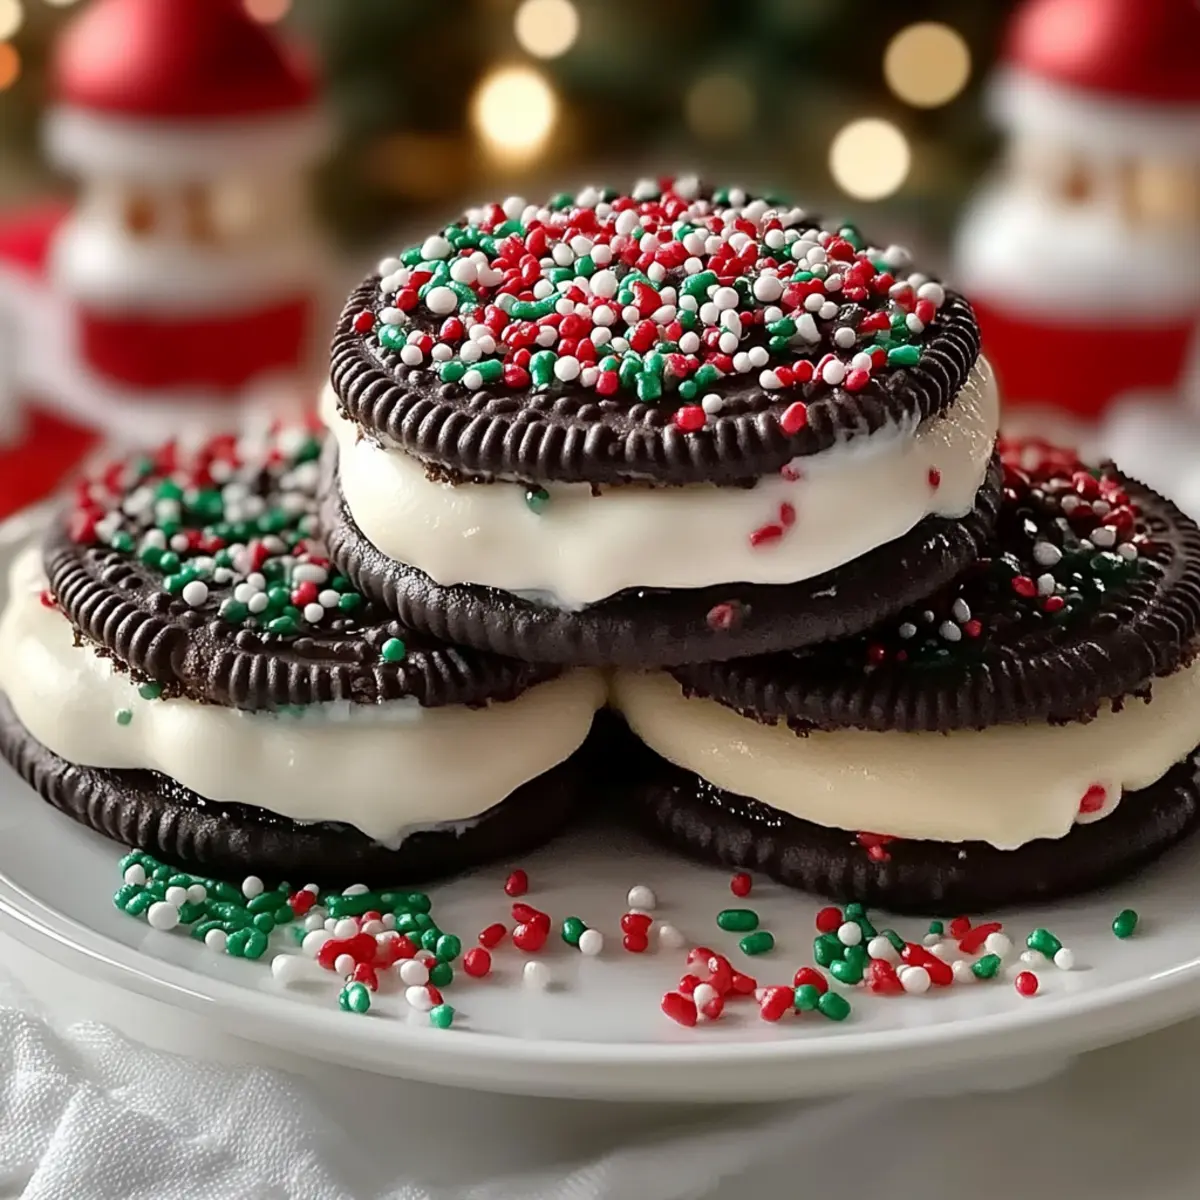
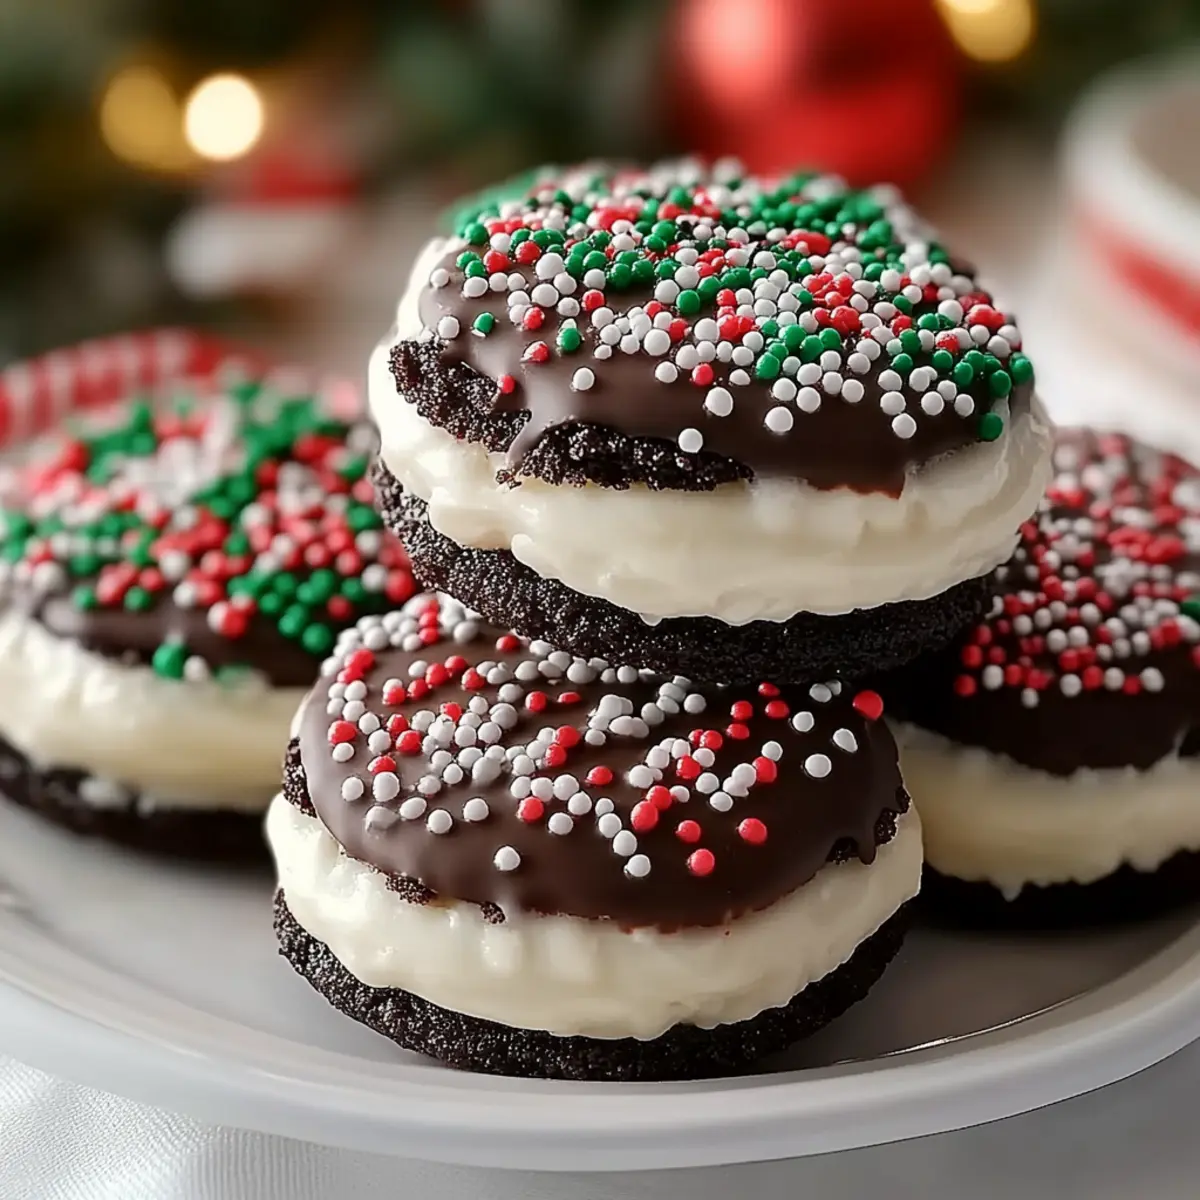
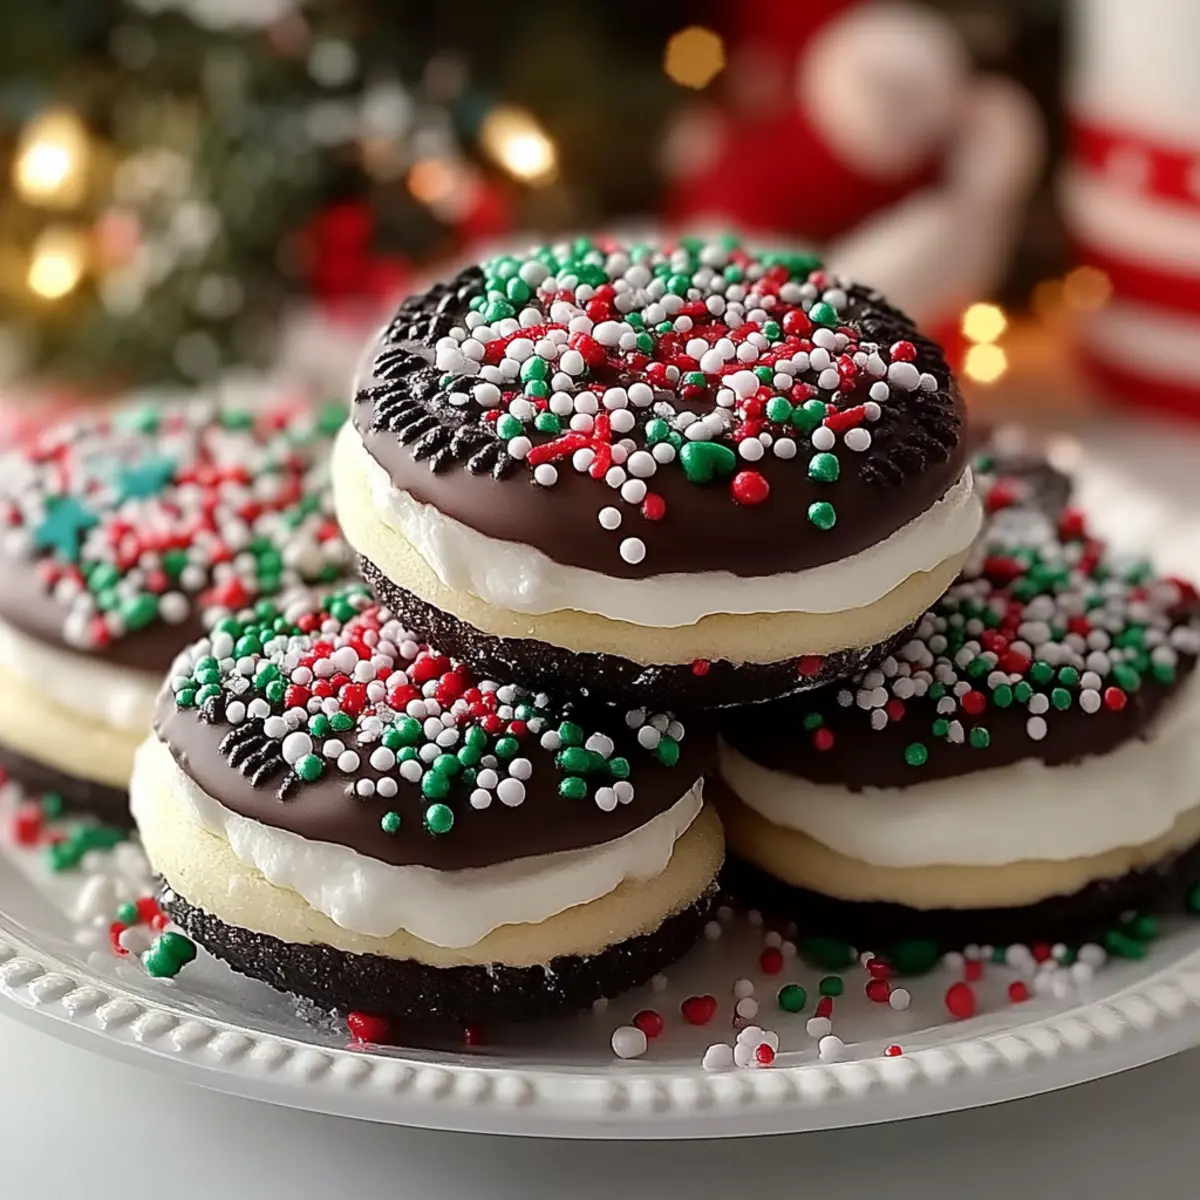
As I walked past a cozy kitchen filled with the scent of chocolate and sweet nostalgia, I couldn’t help but smile at the memories of festive baking. This year, I’m excited to share my delightful Christmas Oreos—a quick and customizable holiday treat that’s sure to spread warmth and cheer at any gathering. These scrumptious cookies combine the beloved crunch of Oreos with a creamy filling, enveloped in a rich chocolate coating that you can adorn with festive sprinkles or crushed candy canes. Not only are they a fun activity for the whole family, but they also make for a perfect addition to cookie exchanges or a sweet surprise for unexpected guests. Ready to dive into a treat that’s as easy to make as it is to enjoy? Let’s craft these festive delights together!
Why Are Christmas Oreos a Must-Try?
Irresistible Festive Fun: These Christmas Oreos bring joy to holiday baking with their easy-to-follow steps and customizable decorations.
Perfect for Sharing: Ideal for cookie exchanges or last-minute gifts, these treats are a guaranteed crowd-pleaser.
Rich, Sweet Flavor: The delightful combination of cream, chocolate, and toppings offers a holiday flavor explosion in every bite.
Family-Friendly Activity: Get the kids involved! Decorating these cookies is a fantastic way to bond and unleash creativity.
Quick Prep Time: With minimal preparation, you’ll have these sweet treats ready in no time, making them a hassle-free choice for busy holidays.
Elevate your festivities and treat your loved ones to these delightful bites—check out our tips for serving suggestions to make your gatherings even merrier!
Christmas Oreos Ingredients
For the Cookies
- Oreos – Use regular or double-stuffed to achieve your desired creaminess.
For the Coating
- Chocolate (Dark or Milk) – Choose based on your flavor preference, with dark chocolate adding richness and milk chocolate offering sweetness.
For the Decorations
- Festive Decorations (Sprinkles, Crushed Candy Canes) – Use these to enhance your cookies’ holiday spirit and visual appeal.
For the Filling (Optional)
- Cream Cheese or Melted White Chocolate – This fancy filling alternative adds a creamy texture and unique twist to your Christmas Oreos.
Get ready to indulge in these delightful Christmas Oreos, the perfect sweet treat for the festive season!
Step‑by‑Step Instructions for Christmas Oreos
Step 1: Prep the Oreos
Start by carefully separating the Oreos; you can choose to leave the cream filling intact or scrape it out if you prefer a lighter treat. Place the Oreo halves on a baking sheet lined with parchment paper to prepare for coating. This step ensures that your Christmas Oreos will be easy to handle and ready for the delicious chocolate coating ahead.
Step 2: Melt the Chocolate
In a microwave-safe bowl, melt your chosen chocolate (dark or milk) in 30-second intervals, stirring after each session until smooth and fully melted. Aim for a creamy consistency without any lumps, which typically takes about 1-2 minutes total. The perfect temperature should allow the chocolate to be smooth enough for dipping but not so hot that it splatters.
Step 3: Coat the Oreos
Using a fork, dip each Oreo half into the melted chocolate, ensuring it’s fully covered. Gently shake off any excess chocolate to create a nice, even layer. This method will help avoid clumps and lets you achieve that professional finish on your Christmas Oreos. Transfer them back to the parchment-lined baking sheet once coated.
Step 4: Add Festive Decorations
While the chocolate is still wet on your coated Oreos, sprinkle them generously with your chosen festive decorations, such as colorful sprinkles or crushed candy canes. This adds a delightful holiday touch, ensuring that each of your Christmas Oreos looks as beautiful as they taste. Allow your creativity to shine in this step!
Step 5: Let Them Set
Place the decorated Oreos on the baking sheet in the refrigerator for about 15-20 minutes or until the chocolate is completely hardened. This crucial step ensures that your chocolate coating firms up perfectly for those satisfying bites of your Christmas Oreos. Once set, they’ll be ready to share with friends and family!
Step 6: Store or Serve
Once your Christmas Oreos are set and fully cooled, store them in an airtight container to maintain freshness. They can be kept at room temperature or in the fridge, depending on your preference. These treats are perfect for serving during holiday gatherings or as delightful gifts for loved ones. Indulge in the festive spirit!
Christmas Oreos: Fun Flavor Twists
Feel free to get creative and make these Christmas Oreos truly your own with some delightful variations!
-
Dairy-Free: Use dairy-free chocolate and vegan Oreos to ensure everyone can enjoy these festive treats. The swaps will still give you that beloved crunch!
-
Minty Fresh: Mix in peppermint extract into the melted chocolate for a refreshing minty flavor, perfect for those who love a little extra holiday zing.
-
Nutty Crunch: Add crushed nuts, like almonds or walnuts, as a topping for a delightful crunch that complements the sweetness superbly. It’s a fun texture twist that everyone will love!
-
Spicy Kick: For those who love heat, sprinkle some cayenne pepper or chili powder on top for a surprising kick in your sweet treats. It’s a bold combination that delivers a festive flair!
-
Flavor Infusion: Swap out the Oreos for flavored varieties, such as peanut butter or lemon, to create a completely different taste experience. Each bite will be a delightful surprise!
-
Gourmet Touch: Drizzle with white chocolate or caramel after coating for a beautiful, delicious finish that takes these cookies to a whole new level.
-
Decadent Ganache: Instead of melting chocolate, make a rich ganache with heavy cream and chocolate for a luxurious, silky coating. Just heat until smooth and dip away!
-
Seasonal Sprinkles: Use sprinkles tailored to other holidays like Valentine’s Day or Halloween to keep this recipe fresh all year round; it’s perfect for celebrations beyond Christmas!
Explore these original twists to personalize your Christmas Oreos, complementing them with hot cocoa or as part of a larger dessert platter. Dive into unique creations!
What to Serve with Christmas Oreos
Warm your heart and brighten your holiday table with delightful pairings that perfectly complement these festive treats.
-
Hot Cocoa: A classic pairing, rich hot cocoa enhances the sweetness of the Oreos, creating a cozy treat perfect for chilly nights.
-
Eggnog: This creamy, spiced drink echoes festive flavors, offering a rich and indulgent contrast to the crunchy Oreos.
-
Fruit Platter: Fresh fruits like strawberries or oranges provide a refreshing balance to the sugary cookies, adding a burst of color and flavor.
-
Cheesecake Bites: Small, creamy bites of cheesecake create a luscious texture that pairs beautifully with the sweet crunch of the Oreos.
-
Gingerbread Cookies: The spiced flavor of gingerbread brings a warm holiday taste that compliments the sweetness of the Christmas Oreos excellently.
-
Sparkling Cider: Bright and bubbly, sparkling cider adds a festive touch, making it a delightful beverage to accompany your festive cookie platter.
-
Christmas Cake Pops: Cute and fun, these cake pops add an extra element of sweetness, making your dessert offerings even more festive.
-
Nutty Biscotti: Crunchy biscotti dipped in coffee or hot chocolate provides a satisfying texture contrast while tying the festive theme together.
Elevate your holiday gatherings by creatively pairing these treats, ensuring every moment is filled with joy and deliciousness!
How to Store and Freeze Christmas Oreos
Room Temperature: Store your Christmas Oreos in an airtight container at room temperature for up to 5 days to maintain their freshness and deliciousness.
Fridge: If you prefer a colder treat, these cookies can be kept in the refrigerator for up to 2 weeks. Just ensure they’re sealed tightly to prevent them from absorbing other odors.
Freezer: For longer storage, freeze your Christmas Oreos in an airtight container or a freezer bag for up to 2 months. Layer with parchment paper to prevent sticking.
Reheating: While you can enjoy them straight from the freezer, if you want to soften them up, allow them to thaw at room temperature for about 20 minutes before indulging in these festive delights.
Make Ahead Options
These Christmas Oreos are perfect for busy home cooks looking to save time during the holiday season! You can prepare the Oreo halves and even melt the chocolate up to 3 days in advance, storing the components separately in airtight containers in the refrigerator. This way, you’ll have everything ready to go when you’re ready to coat and decorate. Simply coat the Oreo halves in the melted chocolate, sprinkle your festive decorations, and allow them to set for about 15-20 minutes. By prepping ahead, you can ensure that your Christmas Oreos will be just as delicious as if they were made fresh, leaving you more time to enjoy the celebrations with loved ones!
Expert Tips for Christmas Oreos
-
Melt Slowly: Always melt chocolate on low heat to prevent burning and achieve that silky smooth texture perfect for coating.
-
Ensure Coverage: Use a fork to dip Oreos for even chocolate coverage, preventing messy hands and clumps on your Christmas Oreos.
-
Decorate Immediately: Apply your festive decorations right after coating while the chocolate is still wet; this helps the toppings stick better.
-
Cool Properly: Place coated Oreos in the refrigerator to set for at least 15-20 minutes; this time ensures a firm chocolate coating.
-
Store Smartly: Keep your finished Christmas Oreos in an airtight container. They’ll stay fresh for days and are quick to grab for unexpected guests!
Christmas Oreos Recipe FAQs
What type of Oreos should I use?
You can use regular or double-stuffed Oreos for your Christmas Oreos. If you love an extra creamy texture, double-stuffed is a delightful option! Just make sure they’re fresh for the best flavor.
How should I store my Christmas Oreos?
Store your Christmas Oreos in an airtight container at room temperature for up to 5 days. If you’d like to keep them fresh longer, you can refrigerate them for up to 2 weeks, ensuring they’re tightly sealed to prevent them from taking on any other odors.
Can I freeze Christmas Oreos for later?
Absolutely! To freeze your Christmas Oreos, place them in an airtight container or freezer bag. Make sure to layer them with parchment paper to prevent sticking. They will stay fresh for up to 2 months. When you’re ready to enjoy them, just let them thaw at room temperature for about 20 minutes.
What if my chocolate coating isn’t smooth?
If your chocolate is clumpy or doesn’t melt smoothly, it may have been overheated. Always melt chocolate on low heat in short intervals, stirring frequently. If it does clump, add a teaspoon of vegetable oil to the chocolate and stir until smooth for a better coating experience.
Are these Christmas Oreos safe for pets?
No, the chocolate in Christmas Oreos is not safe for dogs or cats, as chocolate is toxic to pets. Be sure to keep these festive treats out of their reach and enjoy them yourself!
Can I customize the decorations?
Of course! I often recommend switching up the decorations to match different holiday themes or to suit personal tastes. Sprinkles, crushed nuts, or even edible glitter can transform these Christmas Oreos into a fun and unique creation for any festive occasion!

Delicious Christmas Oreos: Sweet Festive Treats Made Easy
Ingredients
Equipment
Method
- Step 1: Prep the Oreos - Carefully separate Oreos, leaving cream filling intact or scraping it out. Place on a baking sheet lined with parchment paper.
- Step 2: Melt the Chocolate - Melt chosen chocolate in a microwave-safe bowl in 30-second intervals until smooth.
- Step 3: Coat the Oreos - Dip each Oreo half into melted chocolate, shake off excess, and return to baking sheet.
- Step 4: Add Festive Decorations - Sprinkle on decorations while the chocolate is wet.
- Step 5: Let Them Set - Refrigerate for 15-20 minutes until chocolate is hardened.
- Step 6: Store or Serve - Store in an airtight container at room temperature or in the fridge.
Leave a Reply