
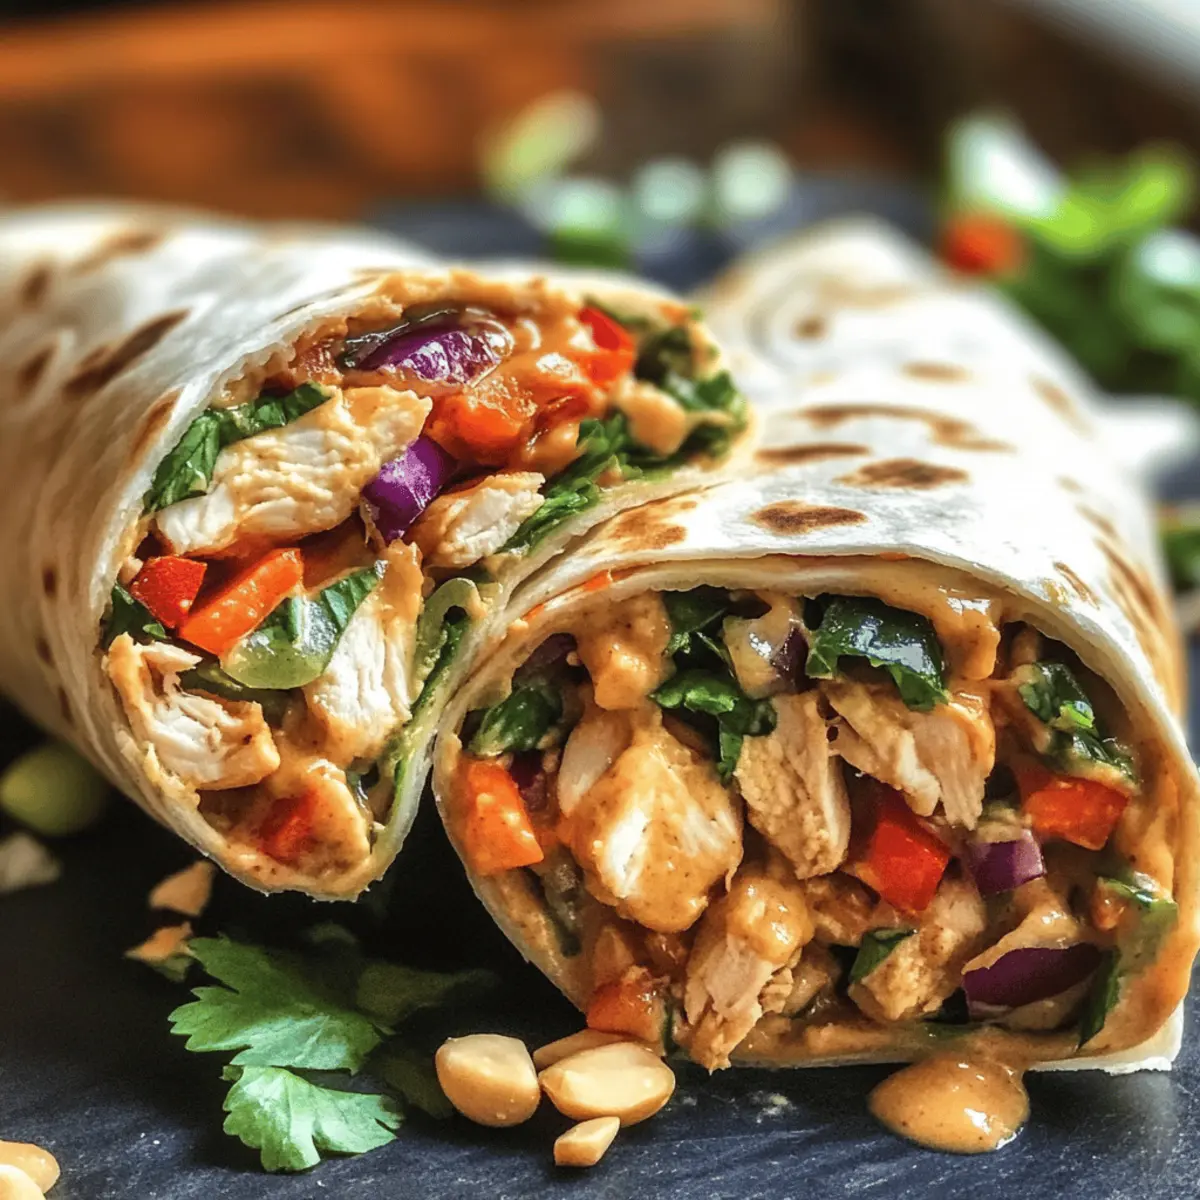
In just 15 minutes, my kitchen transforms into a bustling Thai street market, with the tantalizing aroma of these Quick & Easy Thai Peanut Chicken Wraps wafting through the air. These vibrant wraps combine tender chicken with crunchy veggies, all slathered in a creamy homemade peanut sauce that’s simply irresistible. Perfect for busy weeknights or a quick lunch, they offer a flavor-packed meal that satisfies without the stress of complicated prep. Plus, you can easily customize them to suit dietary needs, whether you’re looking for gluten-free or vegetarian options. How do you like your wraps—spicy or mild?
Why Are These Wraps So Irresistible?
Quick Cooking: Whip these Thai Peanut Chicken Wraps together in just 15 minutes, perfect for the busiest of weeknights.
Flavor Explosion: The creamy peanut sauce, combined with succulent chicken and fresh veggies, creates a delicious harmony of flavors that are sure to please.
Customizable: Whether you prefer vegetarian options or need a peanut-free alternative, this recipe adapts seamlessly to your dietary needs.
Crowd-Pleaser: Family and friends will rave about these wraps, making them a fantastic choice for gatherings or quick lunches.
Nutritionally Balanced: Packed with lean protein, healthy fats, and plenty of veggies, these wraps deliver a balanced meal that supports your well-being.
Easy Assembly: Ready to roll? These wraps are simple to assemble and perfect for meal prep, allowing you to enjoy deliciousness on the go!
Thai Peanut Chicken Wraps Ingredients
For the Peanut Sauce
• Peanut Butter – Adds creaminess and flavor; substitute with sunflower seed butter or tahini for a peanut-free version.
• Low-Sodium Soy Sauce – Provides umami and saltiness; use tamari for a gluten-free option.
• Brown Sugar or Honey – Offers sweetness to balance the flavors; maple syrup can be used as a vegan alternative.
• Rice Wine Vinegar – Adds acidity to the sauce; can be swapped with apple cider vinegar if necessary.
• Minced Garlic – Enhances flavor; fresh garlic is recommended for the best taste.
• Minced Ginger – Contributes warmth and depth; fresh ginger is preferred for stronger flavor.
• Sriracha Sauce – Adds heat; adjust quantity based on heat preference; omit for a milder taste.
For the Wrap Filling
• Cooked Chicken – Main protein source; adds heartiness; rotisserie chicken is a time-saving option.
• Coleslaw Mix – Provides crunch and nutrition; substitute with shredded cabbage or fresh spinach for variety.
• Grated Carrot (optional) – Offers sweetness and nutrition; can be omitted if not desired.
• Chopped Cilantro – Adds freshness; substitute with parsley for a similar effect.
• Roasted, Salted Peanuts – Bring crunch and nutty flavor; omit for a nut-free version or replace with seeds.
For Assembling the Wraps
• Tortillas – Holds the filling together; opt for low-carb wraps or lettuce for a lighter option.
Step‑by‑Step Instructions for Thai Peanut Chicken Wraps
Step 1: Prepare the Sauce
In a medium bowl, whisk together 1/4 cup of peanut butter, 2 tablespoons of low-sodium soy sauce, 1 tablespoon of brown sugar, 1 tablespoon of rice wine vinegar, 1 minced garlic clove, 1 teaspoon of minced ginger, and 1 teaspoon of sriracha. Aim for a smooth consistency, adding a splash of water if needed to achieve your desired thickness. Set aside to let the flavors meld while you prepare the filling.
Step 2: Mix the Filling
In a large mixing bowl, combine shredded cooked chicken, 2 cups of coleslaw mix, 1/2 cup of grated carrot (if using), 1/4 cup of chopped cilantro, and 1/3 cup of roasted, salted peanuts. Drizzle your prepared peanut sauce generously over the filling mixture. Toss everything together until well coated and the flavors are evenly distributed. Allow it to rest for about 5 minutes to enhance the flavors.
Step 3: Warm the Tortillas
To prepare your tortillas, wrap them in a damp paper towel and microwave for 30 seconds until they are warm and pliable. This step makes assembling your Thai Peanut Chicken Wraps easier, as it prevents the tortillas from cracking. If you prefer, you can lightly warm them on a skillet over medium heat for about 30 seconds per side.
Step 4: Assemble the Wraps
Take a warm tortilla and place 1/2 to 3/4 cup of the filling mixture in the center. Carefully fold in the sides and then roll up tightly from the bottom, ensuring all the filling is enclosed. Repeat this process for each tortilla, laying them seam-side down on a plate to keep them secure. If desired, use parchment paper or aluminum foil to wrap each for easier transport.
Step 5: Serve Immediately
Arrange your delicious Thai Peanut Chicken Wraps on a platter and serve them promptly to maintain their freshness and crispness. These wraps are best enjoyed right after assembly, allowing you to taste the vibrant flavors and delightful textures. Consider pairing them with a cucumber salad or a light soup for a complete meal experience.
Expert Tips for Thai Peanut Chicken Wraps
- Serve Fresh: Enjoy your Thai Peanut Chicken Wraps immediately after assembly for the best texture and flavor. Waiting too long can lead to sogginess.
- Separate Ingredients: Store filling and tortillas separately until ready to serve to maintain the wraps’ crunch and freshness.
- Warm Tortillas: Heating tortillas briefly in the microwave or on a skillet makes them pliable and easier to wrap without tearing.
- Adjust Spice: Customize the heat level by varying the amount of sriracha; start with a small amount and add more gradually to find your perfect balance.
- Add Veggies: Experiment with additional vegetables like bell peppers or radishes to enhance flavor and nutrition in your wraps.
- Easy Transport: Wrap each assembled Thai Peanut Chicken Wrap in parchment paper or foil for a convenient, mess-free way to enjoy them on the go.
How to Store and Freeze Thai Peanut Chicken Wraps
Fridge: Keep assembled Thai Peanut Chicken Wraps in an airtight container for up to 2 days. To maintain freshness, separate the filling and tortillas until ready to eat.
Freezer: For longer storage, place individual wraps in foil or plastic wrap and freeze for up to 3 months. Thaw in the refrigerator overnight before reheating.
Reheating: When ready to enjoy, heat thawed wraps in the microwave for about 30–60 seconds or in a skillet over low heat until warmed through.
Make-Ahead: Prepare the filling and peanut sauce in advance, storing them in separate containers in the fridge for up to 3 days. Assemble the wraps just before serving for maximum freshness.
What to Serve With Thai Peanut Chicken Wraps
Transform your dinner into a flavorful feast by pairing these delightful wraps with complementary dishes that enhance every bite.
- Cucumber Salad: A crunchy, refreshing side that balances the savory richness of the wraps, adding a crisp bite to your meal.
- Tom Yum Soup: This fragrant, tangy broth complements the Thai flavors beautifully, making for a comforting and aromatic pairing.
- Steamed Jasmine Rice: Lightly fragrant rice absorbs the creamy peanut sauce beautifully, providing a lovely contrast in texture and flavor.
- Grilled Vegetable Skewers: Colorful veggies, charred to perfection, add depth and a smoky flavor while maintaining a satisfying crunch that enhances the wraps.
- Mango Salsa: Sweet and vibrant, a fresh mango salsa provides a fruity contrast that brightens up every bite of the savory wraps.
- Thai Iced Tea: The creamy, sweet notes of this iconic drink balance the heat from the sriracha, creating a splendid beverage pairing.
- Fresh Spring Rolls: Light, filled with herbs and veggies, they bring a similar flavor profile to the wraps but offer a different texture experience.
- Peanut Butter Cookies: For dessert, these treats echo the peanut flavor in the wraps but offer a sweet ending to your Thai-themed dinner.
- Rice Noodle Salad: Tossed in a light dressing, this dish adds a delightful chewiness and more fresh veggies to your meal, enriching the experience.
Thai Peanut Chicken Wraps Variations
Customize your Thai Peanut Chicken Wraps with these delightful variations to suit your taste and dietary needs!
-
Vegetarian: Substitute chicken with pressed and cubed firm tofu or chickpeas for a satisfying plant-based protein option. This twist offers a lovely texture and keeps the dish flavorful.
-
Peanut-Free: Use sunflower seed butter or tahini instead of peanut butter to keep the creamy texture without the peanuts. This change opens up a world of flavors while catering to those with allergies.
-
Gluten-Free: Opt for tamari instead of soy sauce and choose gluten-free tortillas or lettuce wraps. It’s a simple switch that still brings all the deliciousness to the table!
-
Low-Carb: Turn these wraps into lovely lettuce wraps by using large leaves of butter or romaine lettuce instead of tortillas. Each bite is crisp, refreshing, and perfect for anyone watching their carbs.
-
Crunchy Additions: Toss in extra veggies like bell peppers, bean sprouts, or radishes for a delightful crunch. This little boost not only adds texture but also enhances the wraps’ nutritional profile.
-
Spicy Kick: For those who crave some heat, add sliced jalapeños or increase the sriracha in the sauce. Adjust the spice level to your personal preference for an exciting flavor explosion.
-
Sweet Twist: Introduce sweetness by adding mango or sliced apples to the filling. This surprising mix of sweet and savory will take your wraps to a whole new level!
-
Herb Swap: If you’re not a fan of cilantro, substitute it with fresh parsley or basil for a different aromatic flavor. Each herb brings its own personality, making your wraps just the way you like them.
Feel free to experiment with these variations, and if you’re in the mood for more delicious options check out these Chopped Chicken Bacon or Garlic Parmesan Chicken for more delightful meal ideas!
Make Ahead Options
These Thai Peanut Chicken Wraps are a fantastic option for meal prep that saves you valuable time during busy weeks! You can prepare the filling and the delicious peanut sauce up to 3 days in advance, storing them separately in airtight containers in the refrigerator to maintain freshness. This prevents the tortillas from becoming soggy. When you’re ready to enjoy your wraps, simply warm the tortillas for 30 seconds in the microwave and then assemble with your prepped filling. Drizzle with the sauce just before serving to keep everything deliciously fresh and flavorful, ensuring you have quick, satisfying meals without the hassle of last-minute preparation!
Thai Peanut Chicken Wraps Recipe FAQs
How do I select ripe ingredients for these wraps?
Absolutely! When choosing ingredients, look for fresh, crunchy vegetables for the coleslaw mix—firm, vibrant colors are key. For the chicken, ensure it’s cooked and can be shredded easily; rotisserie chicken is a fantastic option as it’s both flavorful and hassle-free. If you’re buying ginger, select ones that are smooth and firm to the touch with no dark spots.
How should I store leftover Thai Peanut Chicken Wraps?
Very! Place any leftover assembled wraps in an airtight container, and they’ll stay fresh for up to 2 days in the fridge. For the best results, I recommend keeping the filling separate from the tortillas until you’re ready to eat. This way, they’ll maintain their wonderful crunch.
Can I freeze Thai Peanut Chicken Wraps?
Of course! To freeze, wrap each assembled wrap individually in aluminum foil or plastic wrap, and they’ll last up to 3 months in the freezer. When you’re ready to enjoy them, thaw them in the refrigerator overnight. For reheating, simply microwave them for 30-60 seconds or warm them in a skillet until heated through.
What should I do if my peanut sauce is too thick?
No worries! If your peanut sauce is thicker than you want, simply add a small amount of water—one tablespoon at a time—until you reach your desired consistency. Whisk it well after each addition to ensure it’s nicely blended. You can also tweak the flavors by adding a dash more soy sauce or a sprinkle of sugar if needed.
Are there any dietary considerations for pets or allergies with these wraps?
Definitely! Since these wraps contain peanuts, they are a no-go for those with peanut allergies. If you have pets, keep these wraps out of reach, as ingredients like garlic and onions can be harmful to them. For a nut-sensitive option, try using sunflower seed butter or tahini in place of peanut butter. Always check labels for allergens, especially if you’re using premade sauces or wraps.
Can vegetarian or gluten-free variations be made?
Absolutely! To make these wraps vegetarian, switch out chicken for either cubed firm tofu or chickpeas. Just ensure they’re seasoned well. For a gluten-free option, you can simply replace the soy sauce with tamari and choose gluten-free tortillas. Feel free to pack them with your favorite veggies for even more flavor!
Delicious Thai Peanut Chicken Wraps Ready in 15 Minutes
Ingredients
Equipment
Method
- In a medium bowl, whisk together the peanut butter, low-sodium soy sauce, brown sugar, rice wine vinegar, minced garlic, minced ginger, and sriracha. Set aside.
- In a large mixing bowl, combine shredded chicken, coleslaw mix, grated carrot, chopped cilantro, and peanuts. Drizzle peanut sauce over mixture and toss well.
- Warm tortillas in a damp paper towel in the microwave for 30 seconds or on a skillet over medium heat for about 30 seconds per side.
- Take a warm tortilla and fill it with 1/2 to 3/4 cup of the filling mixture. Fold in the sides and roll tightly from the bottom.
- Serve immediately on a platter, pairing with cucumber salad or light soup if desired.
Leave a Reply