
The sizzling sound of crispy chicken frying transports me straight to the streets of Japan, where unique flavors come alive. Today, I’m thrilled to share my recipe for Chicken Katsu Musubi—a delightful fusion of deliciousness that transforms your lunch and snack game. Imagine perfectly golden, crunchy chicken nestled atop soft sushi rice, all wrapped in a savory sheet of nori. Not only is this Chicken Katsu Musubi incredibly easy to make, but it also delivers a comforting bite that’s perfect for anyone eager to ditch fast food for something fresh and satisfying. Whether you’re preparing it for a family meal or an afternoon treat, you’ll love how simple yet impressive this dish is. Ready to discover how to create this culinary masterpiece at home? Let’s dive in!
Why is Chicken Katsu Musubi a Must-Try?
Crispy Texture: The airy panko breadcrumbs create a golden, crunchy exterior that perfectly complements the tender chicken inside.
Flavor Fusion: Combining Japanese and Hawaiian elements, this dish surprises with umami richness from tonkatsu sauce and the subtle ocean flavor of nori.
Quick and Easy: With minimal prep time, you can whip this up in less than 30 minutes, making it a perfect weeknight dinner or lunch choice.
Versatile Snack: Enjoy it on its own or serve with edamame or miso soup for a complete meal that everyone will love.
Budget-Friendly: Using simple ingredients means you can create gourmet results without breaking the bank, ideal for home cooks looking to impress their family and friends.
If you’re excited about easy-to-make and satisfying meals, check out my Chopped Chicken Bacon or explore more savory options like Garlic Parmesan Chicken for your next cooking adventure!
Chicken Katsu Musubi Ingredients
• Dive into this flavorful adventure with the essentials for Chicken Katsu Musubi.
For the Chicken
- Boneless Skinless Chicken Thighs – Juicy and flavorful; substitute with chicken breast or tofu for a lighter option.
- Large Eggs – Binds the batter for crispiness; use egg substitute if vegan.
- All-Purpose Flour – Creates the batter; swap for gluten-free flour if needed.
- Salt – Enhances flavor; adjust based on taste preference.
- Ground Black Pepper – Adds warmth; use white pepper for a different twist.
- Panko Breadcrumbs – Delivers a deliciously crispy texture; regular breadcrumbs will work if panko isn’t available.
- Neutral Oil – Key for frying, ensuring crispiness; canola or vegetable oil is best.
For Assembly
- Nori Sheets – Wraps the musubi, enhancing flavor and providing structure; use lettuce leaves for a lower-carb option.
- Cooked Sushi Rice – The chewy base; consider brown rice for a healthier alternative.
- Tonkatsu Sauce – Rich umami flavor that complements the chicken; teriyaki sauce can be a sweeter substitute.
Enjoy crafting your Chicken Katsu Musubi with these simple yet essential ingredients!
Step‑by‑Step Instructions for Chicken Katsu Musubi
Step 1: Prepare Chicken
Start by placing the boneless skinless chicken thighs between two sheets of plastic wrap. Using a meat mallet, pound the chicken to an even ½-inch thickness, ensuring uniform cooking. This step guarantees that your Chicken Katsu Musubi has a tender and juicy filling. Set the prepared chicken aside and get ready for the batter.
Step 2: Make Batter
In a shallow dish, combine the large eggs, all-purpose flour, salt, and ground black pepper. Whisk until you achieve a slightly loose batter that has a nice, smooth consistency. This batter will help create a crispy coating for the chicken when frying. As your batter is ready, prepare your panko breadcrumbs in another bowl for the next step.
Step 3: Coat Chicken
Take each piece of the pounded chicken and first dredge it in the egg batter, ensuring it’s fully coated. Next, dip it into the panko breadcrumbs, pressing gently to form an even coating that will crisp up beautifully. Repeat this process for each piece of chicken, setting them aside on a plate as they await frying.
Step 4: Fry Chicken
Heat a generous amount of neutral oil in a large skillet over medium-high heat until it reaches 350°F. Carefully add the coated chicken pieces to the hot oil and fry them for 4-6 minutes per side, cooking until they turn a deep golden brown and reach an internal temperature of 165°F. Once cooked, transfer the chicken to a wire rack to cool slightly.
Step 5: Assemble Musubi
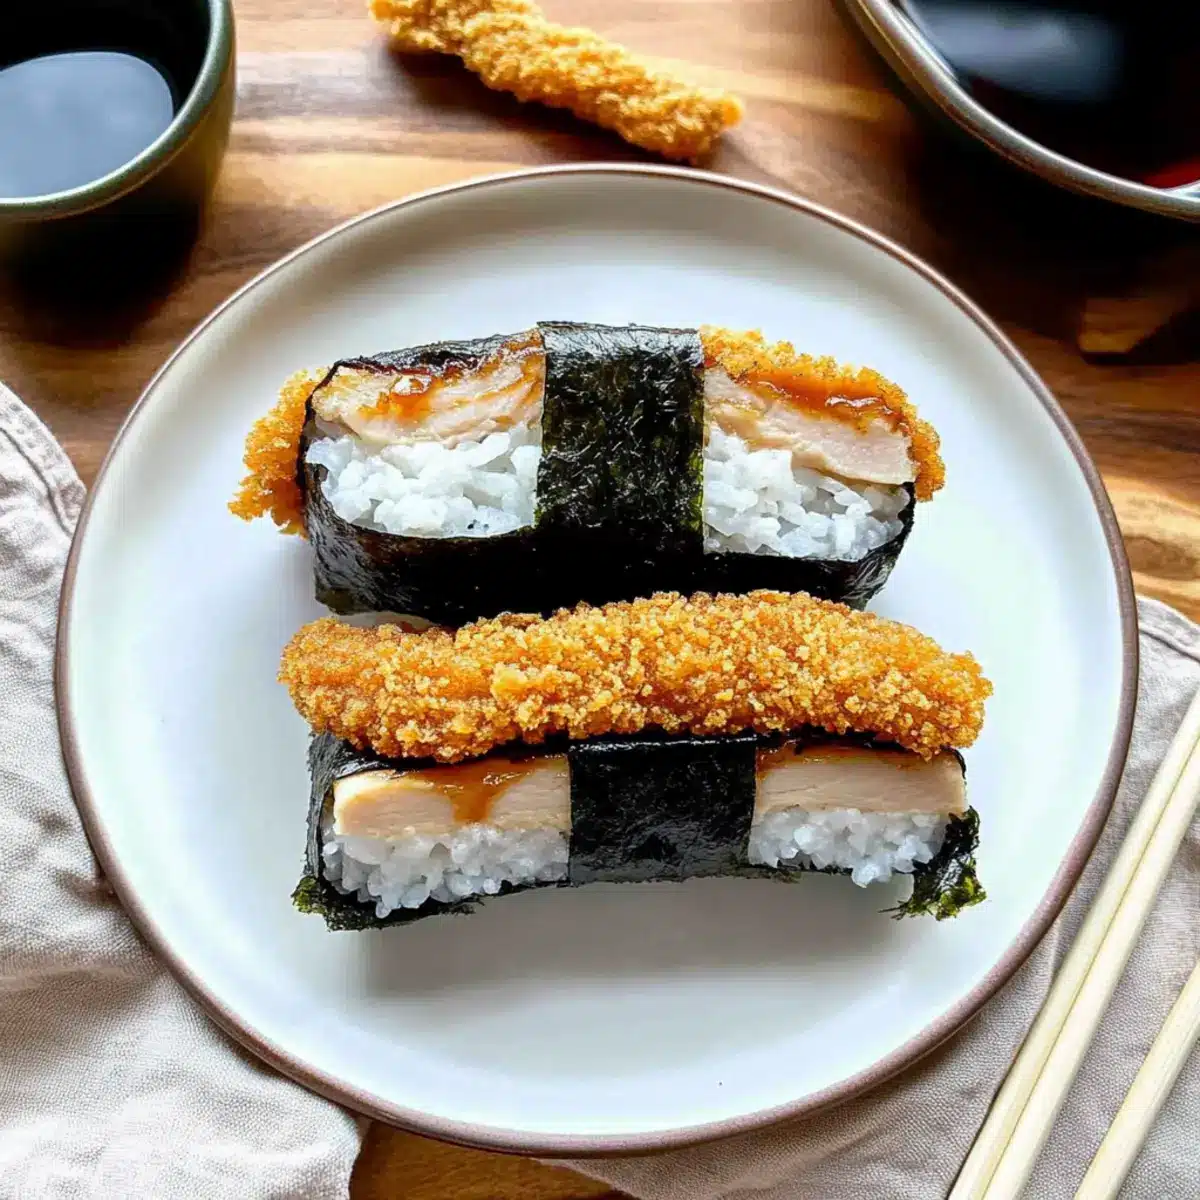
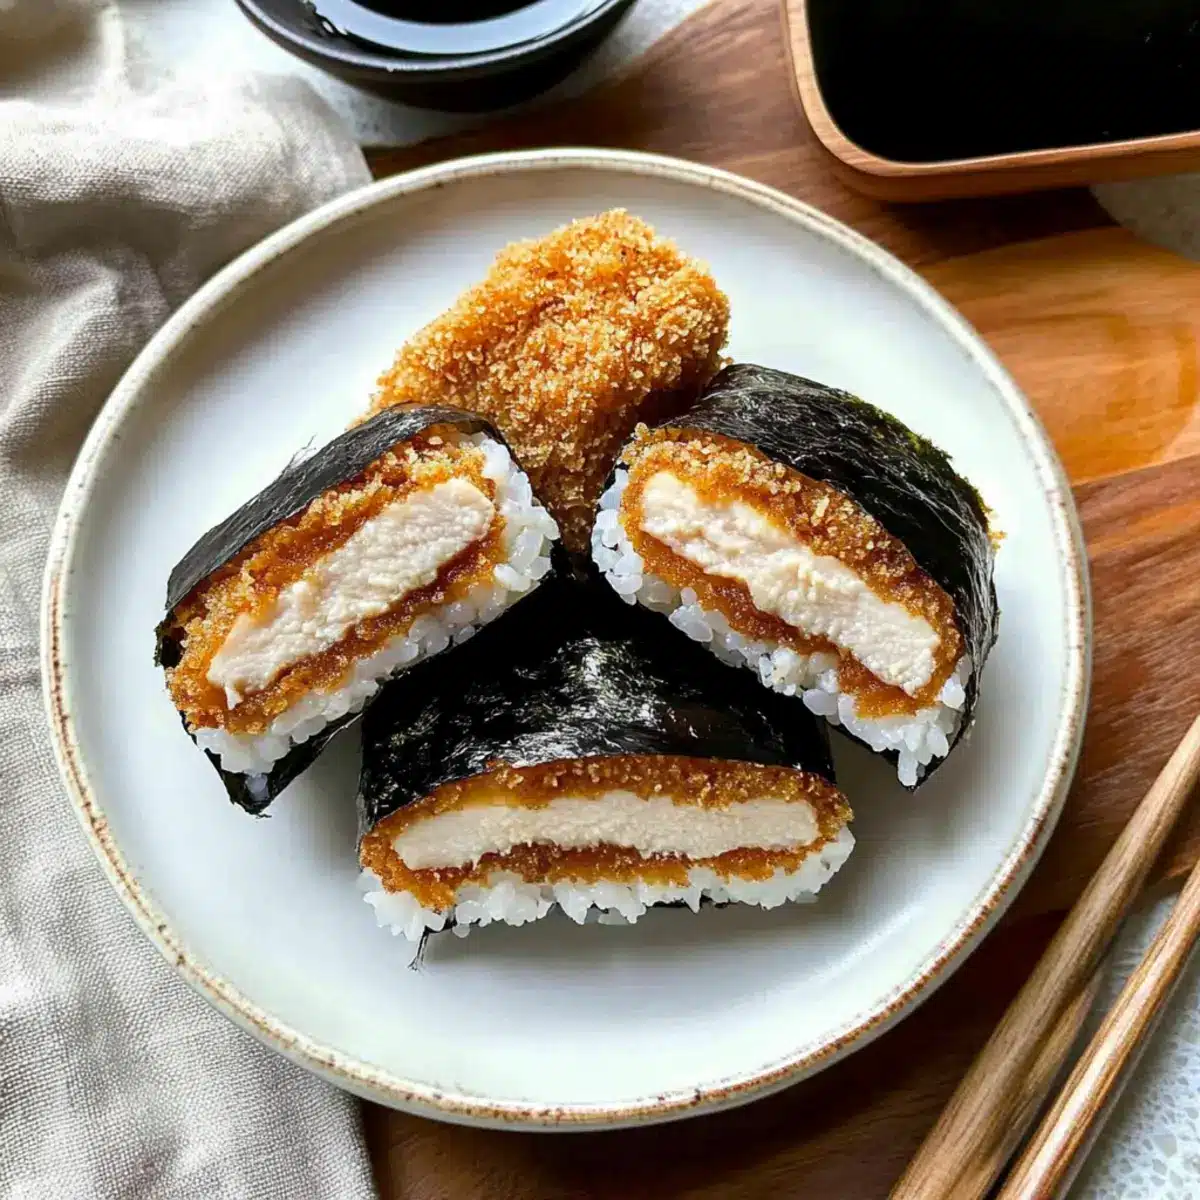
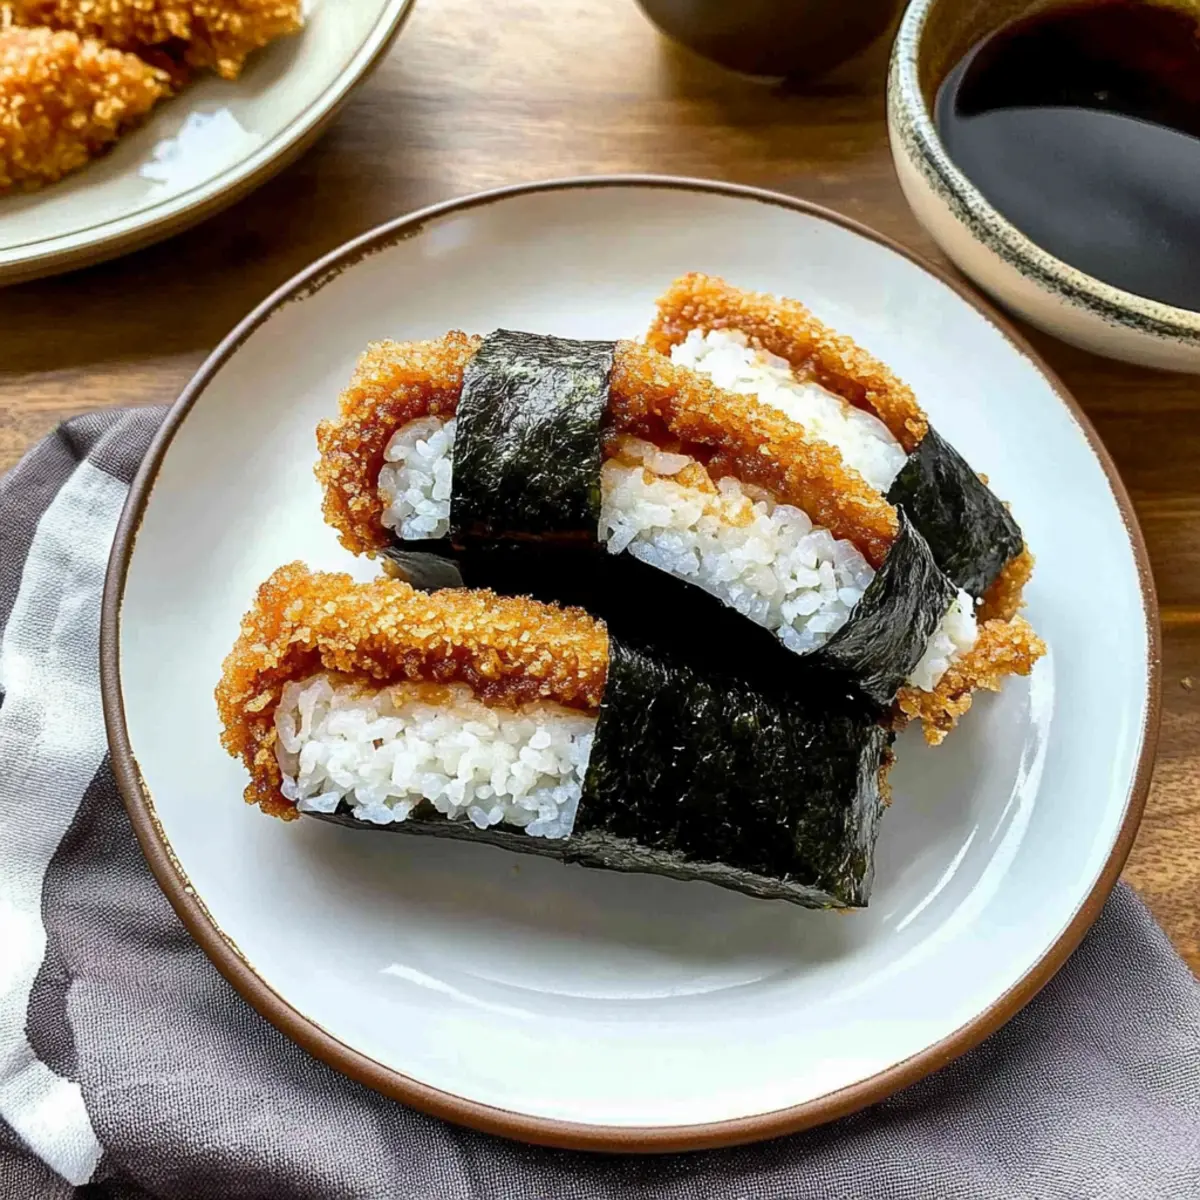
To assemble your Chicken Katsu Musubi, moisten the inside of a Spam can or musubi mold to prevent sticking. On a clean surface, place a sheet of nori, then fill the mold with ½ cup of cooked sushi rice. Press the rice down firmly to create a solid base. Drizzle tonkatsu sauce over the rice, and top with a piece of your crispy fried chicken.
Step 6: Wrap and Seal
Now, carefully wrap the nori around the musubi, ensuring it envelops the rice and chicken completely. Use a little water on the edges of the nori to seal it in place, creating a neat package. Allow the Chicken Katsu Musubi to sit for a minute so it holds its shape, then slice it into pieces for easy serving. Enjoy this delightful fusion dish that’s perfect for lunch or snack time!

How to Store and Freeze Chicken Katsu Musubi
Fridge: Store any leftover Chicken Katsu Musubi in an airtight container for up to 1 day. This keeps them fresh, but be aware that the nori may become soft.
Freezer: If you want to freeze the musubi, wrap them tightly in plastic wrap and place in a freezer bag. They can be frozen for up to 3 months.
Reheating: To enjoy previously stored musubi, reheat the chicken in a skillet over medium heat until crispy again before assembling. The rice can be warmed in the microwave.
Assembling Fresh: For the best experience, assemble and serve Chicken Katsu Musubi fresh for optimal flavor and texture.
Make Ahead Options
These Chicken Katsu Musubi are perfect for meal prep enthusiasts! You can prepare the crispy chicken up to 24 hours in advance by frying it and then storing it in an airtight container in the refrigerator. For optimal quality, place a paper towel in the container to absorb excess moisture, keeping the chicken just as delicious without becoming soggy. You can also cook the sushi rice ahead of time and refrigerate it for up to 3 days. When you’re ready to serve, simply reheat the chicken in a skillet to restore its crispiness, assemble your musubi, and enjoy a quick and satisfying meal that fits perfectly into your busy schedule!
Chicken Katsu Musubi Customization
Feel free to let your creativity shine as you customize your Chicken Katsu Musubi to suit your palate!
- Pork Katsu: Swap the chicken for pork cutlets for a delightful twist that’s just as delicious. The pork will bring a rich, savory flavor to the dish.
- Avocado Addition: Layer fresh avocado slices inside the musubi for a creamy texture that contrasts beautifully with the crispy chicken. It adds a refreshing taste that will elevate your lunch experience.
- Cucumber Crunch: Add thinly sliced cucumber for an extra crunch and freshness. This veggie adds a lovely pop of color and a crisp bite to balance the dish.
- Spicy Kick: Drizzle some sriracha or chili garlic sauce between the rice and chicken for a spicy boost. This adds a vibrant layer of heat that will awaken the taste buds.
- Rice Seasoning: For a traditional touch, season your sushi rice with rice vinegar and a pinch of sugar to enhance the flavor profile. The subtle sweetness will complement the salty notes of the tonkatsu sauce.
- Brown Rice Base: Substitute white sushi rice with brown rice for a healthier, nuttier version that brings up the fiber content and adds a delightful chewiness.
- Lettuce Wrap: For a low-carb option, wrap your chicken and rice in crisp lettuce leaves instead of nori. It provides a refreshing crunch and reduces carbs without sacrificing flavor.
For more delicious twists and ideas, don’t forget to check out my Thai Peanut Chicken for inspiration or try some BBQ Chicken Mac if you’re in the mood for a fusion comfort food! Let these variations spark your creativity and lead you to a delightful meal experience.
What to Serve with Chicken Katsu Musubi
Elevate your meal experience by pairing your Chicken Katsu Musubi with delightful sides that balance and enhance its crispy, savory flavors.
-
Edamame: A simple and nutritious side, these steamed soybeans add a pleasing pop of freshness and complement the rich musubi wonderfully.
-
Miso Soup: Savory and warm, this classic Japanese soup brings umami depth that enhances the overall dining experience, making it feel like a full meal.
-
Pickled Vegetables: Crunchy and tangy, pickles like takuan or pickled radish cleanse the palate beautifully, contrasting with the richness of the musubi.
-
Seaweed Salad: Light and refreshing, this salad provides a lovely texture contrast while further embracing the sea flavors of the nori.
-
Japanese Potato Salad: Creamy and slightly sweet, potato salad adds heartiness to your plate and pairs well with the crunch of the katsu.
-
Cucumber Salad: Chilled and crisp, a simple cucumber salad dressed in rice vinegar enhances the dish with a refreshing bite, perfect after the rich chicken.
-
Sweet Soy Glaze: Drizzling any leftovers with sweet soy sauce or teriyaki sauce can elevate the flavors and add a deliciously sticky finish to each bite.
-
Green Tea: Sip on hot or iced green tea to cleanse your palate and complement the flavors of your musubi, making your meal feel even more special.
Expert Tips for Chicken Katsu Musubi
-
Maintain Oil Temperature: Use a thermometer to keep the oil at 350°F for perfect frying. If it’s too hot, the coating may burn; too cold, and it won’t crisp up.
-
Proper Rice Packing: When filling the mold, press the sushi rice firmly but gently to ensure it holds together without becoming mushy. This helps your Chicken Katsu Musubi hold its shape.
-
Crispier Coating: For an extra crunchy texture, double-coat the chicken by dipping it again in the batter and then in panko before frying.
-
Seal the Nori Well: Make sure to moisten the nori edges with water to properly seal them, preventing the musubi from falling apart during handling or eating.
-
Serve Fresh: Enjoy your Chicken Katsu Musubi immediately after assembly for the best texture. If storing, keep the chicken separate until ready to eat to retain crispness.
Chicken Katsu Musubi Recipe FAQs
How do I select the best chicken for the Chicken Katsu Musubi?
Absolutely! For the juiciest and most flavorful results, I recommend using boneless skinless chicken thighs. They provide great moisture and tenderness. If you prefer a lighter option, chicken breast can work well too. If you’re vegetarian, tofu can be a fantastic substitute for a delicious plant-based twist.
What is the best way to store leftover Chicken Katsu Musubi?
To keep your Chicken Katsu Musubi fresh, store any leftovers in an airtight container in the fridge for up to 1 day. However, note that the nori may become a bit soft. For the best taste, I usually suggest enjoying them right after assembly.
Can I freeze Chicken Katsu Musubi, and how?
Yes, you can freeze Chicken Katsu Musubi! Wrap each piece tightly in plastic wrap and then place them in a freezer bag. They can be stored in the freezer for up to 3 months. When you’re ready to enjoy them, reheat the chicken in a skillet over medium heat until crispy again before assembling. The rice can be warmed in the microwave for the best results.
What should I do if the coating on my chicken is not crispy?
If the coating isn’t crispy, the oil temperature might have been too low. Make sure you heat the oil to 350°F before frying. A common trick is to double-coat the chicken: dip it in the batter, coat with panko, then dip it again in the batter and a second layer of panko for an extra crunch.
Can I make this recipe gluten-free?
Very! To make a gluten-free version of Chicken Katsu Musubi, swap the all-purpose flour with a gluten-free flour blend and use gluten-free panko breadcrumbs. This way, everyone can enjoy this dish without any worry!
Is Chicken Katsu Musubi dog-friendly?
While chicken is typically safe for dogs, avoid giving them the nori and tonkatsu sauce, as these may not be suitable for their diet. Always check with your vet before introducing new foods to your pet’s meals!
Crispy Chicken Katsu Musubi for a Crunchy Lunch Delight
Ingredients
Equipment
Method
- Start by placing the boneless skinless chicken thighs between two sheets of plastic wrap. Using a meat mallet, pound the chicken to an even ½-inch thickness.
- In a shallow dish, combine the large eggs, all-purpose flour, salt, and ground black pepper. Whisk until you achieve a slightly loose batter.
- Dredge each pounded chicken piece in the egg batter, then dip it into the panko breadcrumbs.
- Heat neutral oil in a large skillet over medium-high heat until it reaches 350°F. Add the coated chicken and fry for 4-6 minutes per side.
- To assemble, moisten a Spam can or musubi mold. Place a sheet of nori, fill with ½ cup sushi rice, drizzle tonkatsu sauce, and top with crispy chicken.
- Wrap the nori around the musubi, sealing it with a little water. Allow to sit for a minute, then slice for serving.
Leave a Reply