
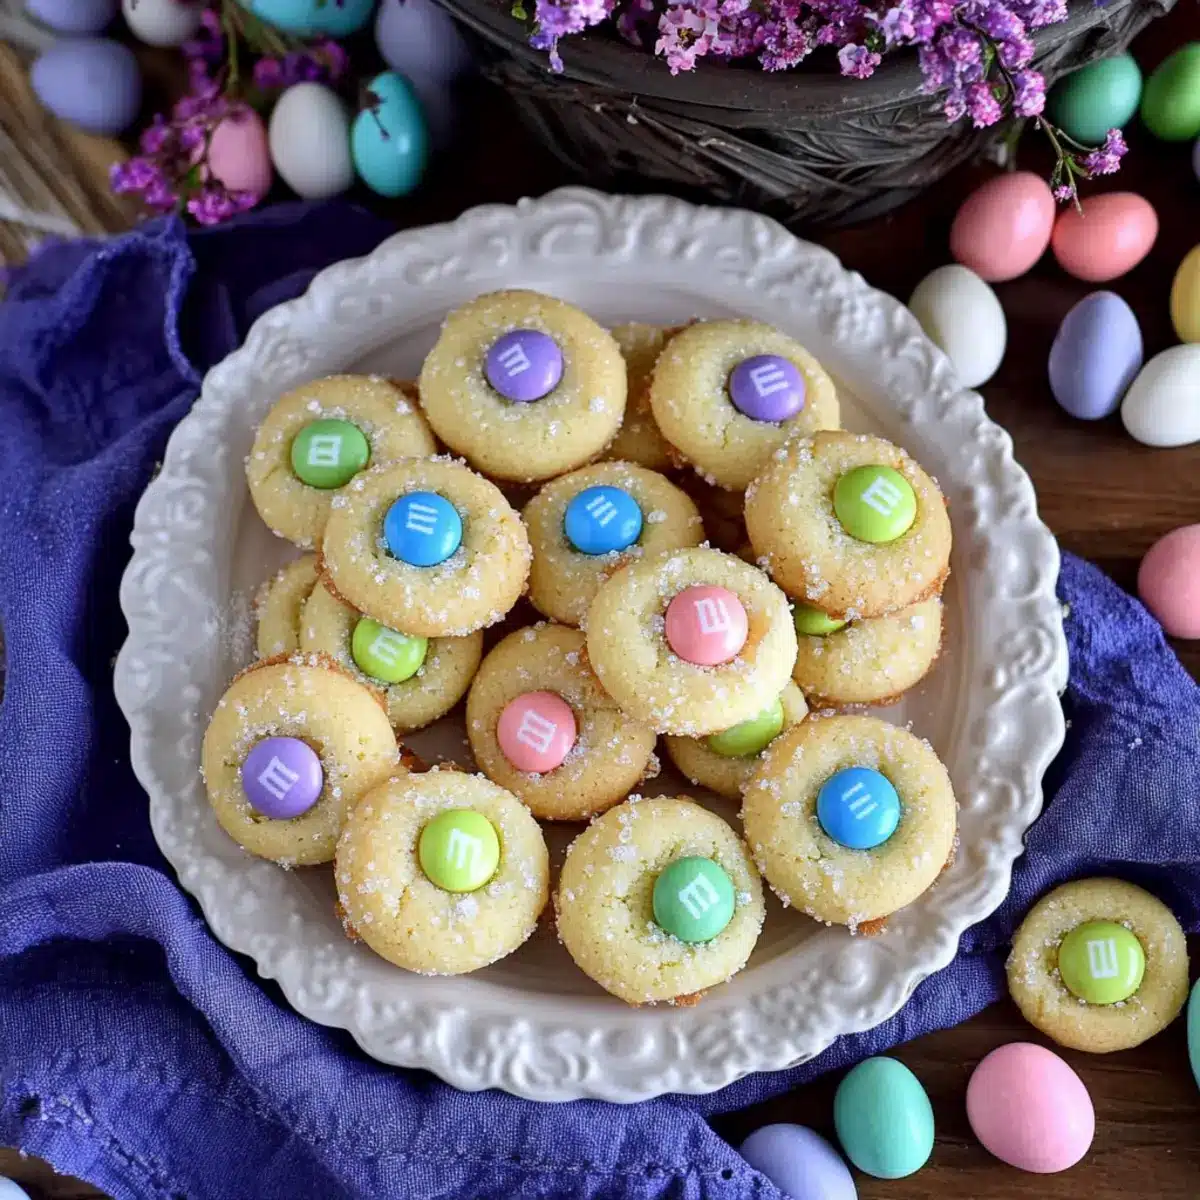
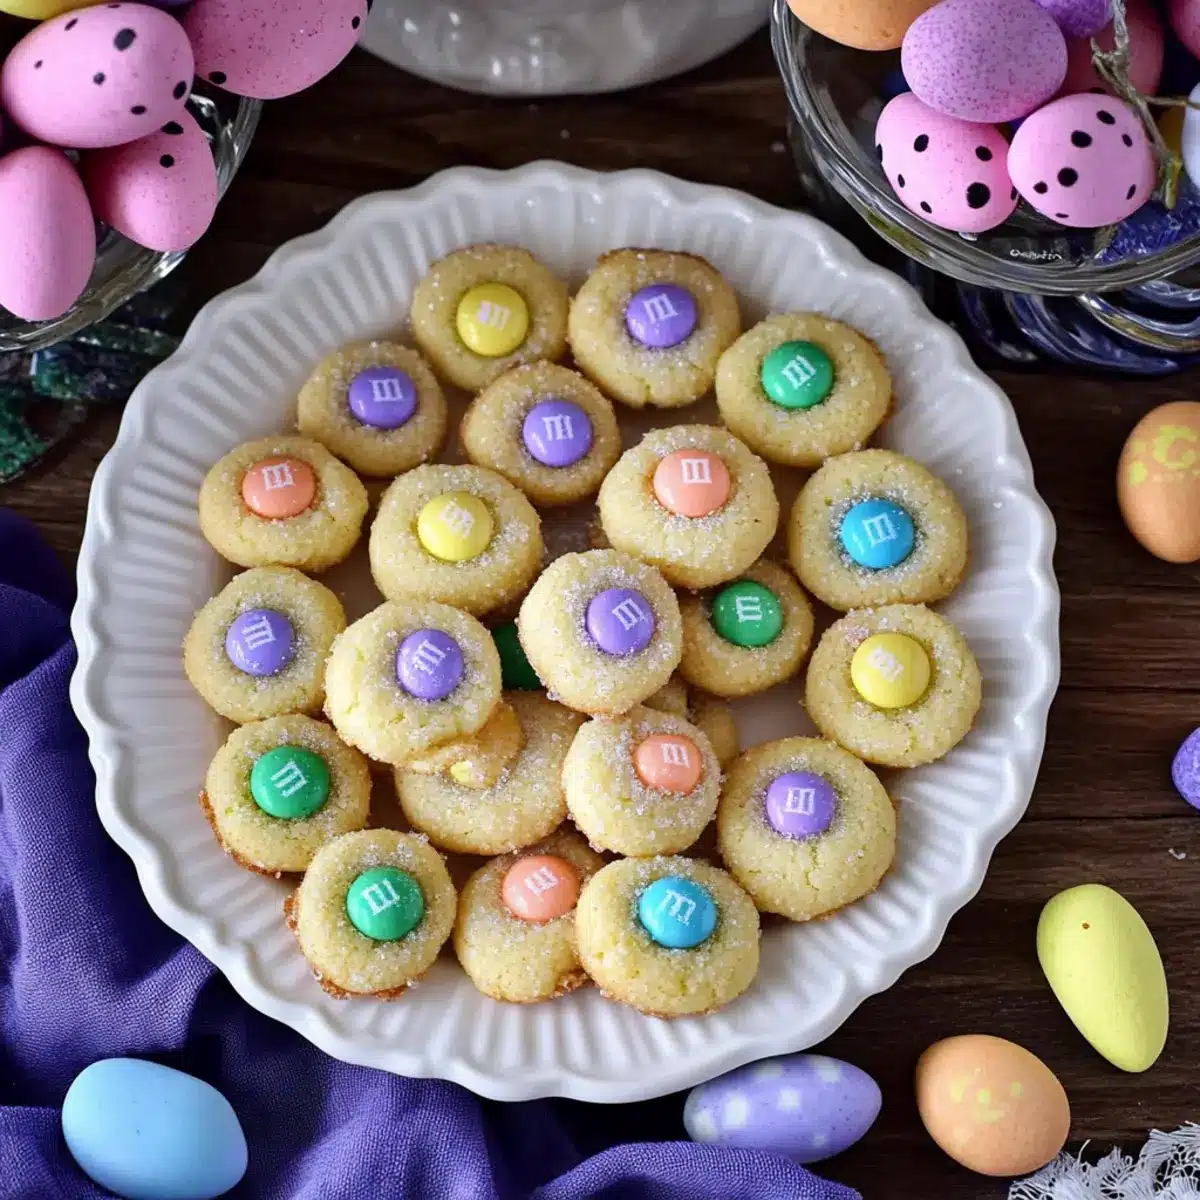
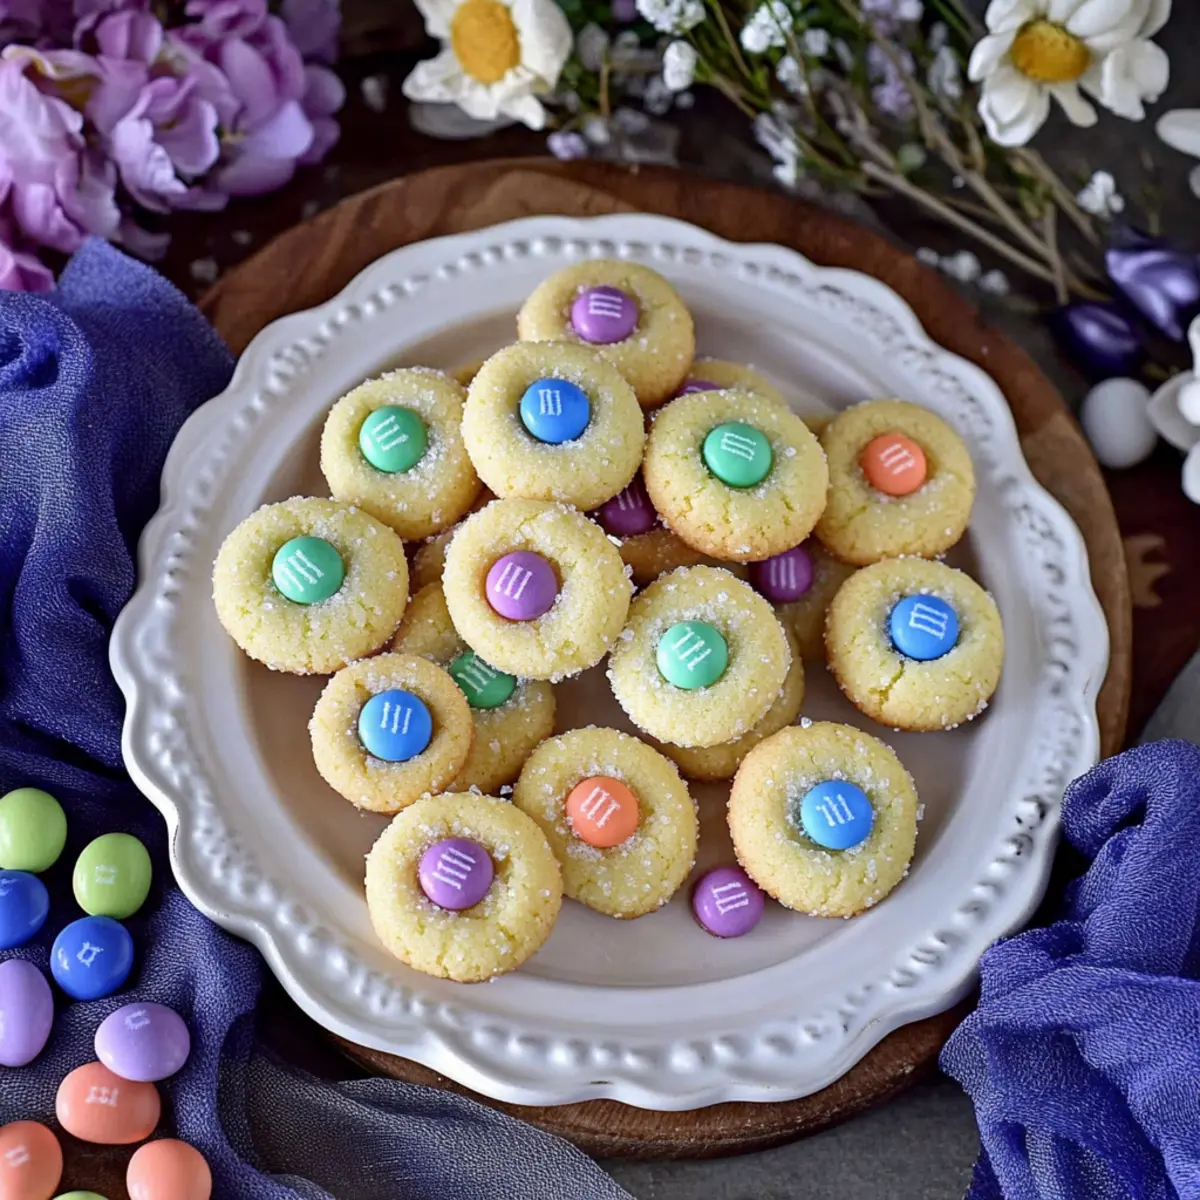
As I prepared for Easter this year, the delightful vision of colorful treats danced in my mind. Enter my Easter Bunny Button Cookies—tiny, one-bite wonders that bring a wave of festive joy to any gathering. These cookies, with their soft texture and vibrant pastel M&M centers, are not only kid-friendly but also a fantastic option for DIY gifts. In just a few simple steps, you can whip up these charming cookies that embody the spirit of the holiday while satisfying your sweet cravings. With their inviting appearance and delightful taste, they’re perfect for sharing or keeping all to yourself! Curious about how to make a batch of these festive delights? Let’s hop into the recipe!
Why Are These Cookies Perfect for Easter?
Colorful Appeal: These Easter Bunny Button Cookies are not just delicious; their vibrant pastel colors make them visually stunning, adding a fun touch to any spring celebration.
Kid-Friendly Fun: With their bite-sized nature, they’re perfect for kids and adults alike! Everyone loves these mini treats that are easy to grab and enjoy.
Simple to Make: The process is quick and straightforward, allowing even novice bakers to create impressive cookies without a hassle.
Ideal for Gifting: Package them in decorative bags as delightful gifts for friends and family, just like my Cinnamon Roll Cookies!
Party Pleaser: They’re a crowd favorite at gatherings, guaranteed to bring smiles and compliments from guests.
Get ready to experience a delightful treat that captures the essence of Easter in every bite!
Easter Bunny Button Cookies Ingredients
For the Dough
• Butter – Adds richness and tenderness; substitute with margarine for a dairy-free option.
• Sugar – Sweetens and structures the cookies; brown sugar can enhance moisture and flavor.
• Egg Yolks – Contributes to rich flavor and texture; no substitutes for this unique consistency.
• Vanilla Extract – Brings warmth and flavor to the dough; almond extract can offer a unique twist.
• All-Purpose Flour – Provides the foundation of the cookies; swap with gluten-free all-purpose flour for a gluten-free treat.
For the Coating
• Sanding Sugar – Adds a crunchy texture and sparkling appeal; try pearl sugar for a different look, but avoid granulated sugar as it melts.
For the Topping
• Chocolate M&M Candy – Serves as the colorful candy center that makes these cookies irresistible; other candy-coated chocolates or seasonal treats can be substituted.
Prepare these ingredients and jump into the baking adventure of making delightful Easter Bunny Button Cookies!
Step‑by‑Step Instructions for Easter Bunny Button Cookies
Step 1: Preheat and Prep
Begin by preheating your oven to 350°F (175°C). While it’s warming up, prepare a baking sheet by lining it with parchment paper or a silicone mat to ensure easy cookie removal later. This step is crucial to achieving that perfect golden edge on your Easter Bunny Button Cookies while preventing any sticking.
Step 2: Cream Butter and Sugar
In a mixing bowl, combine softened butter and sugar. Use an electric mixer on medium speed to beat them together until the mixture is light and fluffy, about 2-3 minutes. This process incorporates air, which is key for the cookies’ delightful texture. Scrape down the sides as needed to ensure an even mix.
Step 3: Add Egg Yolks and Vanilla
Next, add the egg yolks and vanilla extract to the creamed butter and sugar mixture. Beat on low speed until everything is well combined and smooth, about 1-2 minutes. The rich flavors from the yolks and vanilla will enrich the dough, setting the perfect foundation for your Easter Bunny Button Cookies.
Step 4: Incorporate Flour
Gradually add the all-purpose flour to the mixture, mixing at low speed until just incorporated—avoid over-mixing to keep the cookies light. Stop as soon as no flour is visible, which should take about 1 minute. This gentle mixing will help maintain the tender texture of your cookies.
Step 5: Portion and Shape the Dough
Take about one teaspoon of dough and roll it into a ball in your hands. Once shaped, gently roll each ball in sanding sugar until it’s completely coated. Place the dough balls about two inches apart on your prepared baking sheet, which allows them room to spread as they bake to form your charming Easter Bunny Button Cookies.
Step 6: Add the M&M Candy
Firmly press one chocolate M&M candy into the center of each dough ball. This step not only makes the cookies visually appealing but also ensures a delightful burst of sweetness in every bite. The candy should be nestled snugly in the dough to create a beautiful, colorful accent on your cookies.
Step 7: Bake to Perfection
Place the baking sheet in your preheated oven and bake for approximately 10 minutes, or until the edges of the cookies are lightly golden. Keep a close eye—overbaking can lead to a harder texture. As they bake, your kitchen will fill with the warm, inviting aroma of your Easter Bunny Button Cookies.
Step 8: Cool and Enjoy
After baking, let the cookies cool on the baking sheet for 3-5 minutes. This cooling period allows them to set properly before transferring to a wire rack. Once fully cooled, you can enjoy these delightful treats or package them beautifully for gifting.

Easter Bunny Button Cookies Variations
Invite a dash of creativity into your baking with these delightful twists on the classic Easter Bunny Button Cookies!
-
Vegan Swap: Use coconut oil and a flax egg for a vegan alternative. This keeps the cookies soft while catering to dietary preferences.
-
Flavor Infusion: Try orange or lemon zest in the dough for a vibrant citrus note. It brightens the cookies and complements the sweetness beautifully.
-
Nutty Delight: Add chopped nuts, like almonds or walnuts, into the dough for an extra crunch. This variation creates a delightful textural contrast that’s sure to please.
-
Dark Chocolate: Swap the M&M candies for dark chocolate-covered candies for a richer flavor. This twist elevates the cookie experience with a more sophisticated sweetness.
-
Seasonal Themes: Use different holiday candies to match the season. From pumpkin candies for fall to heart-shaped candies for Valentine’s Day, the possibilities are endless!
-
Stuffed Surprise: Consider stuffing the cookie with a small piece of chocolate or caramel in the center. It creates an exciting melty surprise that will delight every bite!
-
Spiced Cookies: Add a sprinkle of cinnamon or nutmeg to the dough for a warm, spicy flavor. This twist adds a cozy touch, perfect for springtime gatherings.
-
Colorful Coating: Experiment with colorful sprinkles instead of sanding sugar for a fun finish. They add a festive touch that appeals to kids and the young at heart, just like my Chocolate Oat Cookies.
Feel free to mix and match these ideas as you personalize your Easter Bunny Button Cookies!
Make Ahead Options
These delightful Easter Bunny Button Cookies are perfect for busy home cooks looking to save time during the holiday rush! You can prepare the dough up to 24 hours in advance; simply mix, shape into balls, and roll in sanding sugar, then refrigerate them on the baking sheet covered with plastic wrap. For the best flavor and texture, ensure they’re tightly sealed—this prevents drying out. When you’re ready to bake, press the M&M candies into the dough without needing to defrost. Simply pop them in the preheated oven for about 10 minutes, and you’ll have fresh, festive cookies waiting to brighten your spring celebrations!
How to Store and Freeze Easter Bunny Button Cookies
Room Temperature: Store cookies in an airtight container at room temperature for up to 5 days to keep them soft and fresh, ensuring they’re ready to enjoy whenever the sweet cravings strike.
Fridge: If you prefer storing in the fridge, keep them in an airtight container for up to 7 days. This can enhance their chewiness, but may slightly alter their texture.
Freezer: These delightful Easter Bunny Button Cookies can be frozen for up to 2 months! Place them in a single layer on a baking sheet to freeze, then transfer to a freezer-safe bag or container.
Reheating: To enjoy them warm, simply microwave for about 10-15 seconds or let them sit at room temperature for a short time before indulging in their sweet goodness again.
What to Serve with Easter Bunny Button Cookies
These colorful delights are a joyful addition to any table, perfect for enhancing your festive gatherings.
-
Light Fruit Salad: Fresh, zesty fruits like strawberries and oranges provide a refreshing contrast to the sweetness of the cookies. The vibrant colors echo the joyful spirit of Easter celebrations.
-
Vanilla Ice Cream: A scoop of creamy vanilla ice cream adds a cool, smooth richness that balances the cookie’s soft texture. This delightful pairing transforms your dessert into an indulgent treat.
-
Chocolate Milk: Rich chocolate milk is a nostalgic classic that harmonizes beautifully with the cookies’ sweetness. Its creamy texture makes it a favorite among kids and adults, bringing a smile to everyone at the table.
-
Easter Egg Brownies: For an extra sweet touch, serve your Easter Bunny Button Cookies alongside fudgy brownies topped with mini chocolate eggs. The combination of flavors and textures creates a wonderful dessert platter.
-
Sparkling Lemonade: Effervescent lemonade with a hint of sweetness complements the cookies nicely. Its bright flavor enhances the festive atmosphere, perfect for sipping while indulging in delightful treats.
-
Cream Cheese Frosting: Offer a side of whipped cream cheese frosting for dipping. The rich, tangy flavor offers a delightful contrast, creating a fun interactive dessert experience for all ages.
-
Carrot Cake Bites: These muffins are moist, lightly spiced, and filled with shredded carrots. Their sweetness and soft texture are a perfect complement, celebrating the Easter theme beautifully.
Expert Tips for Easter Bunny Button Cookies
-
Dough Consistency Check: Ensure the dough isn’t too dry or too sticky. Add a splash of cream if necessary to achieve the right texture for your Easter Bunny Button Cookies.
-
Avoid Over-Mixing: Be gentle when incorporating flour into the dough. Over-mixing can lead to denser cookies, so stop as soon as you see no flour.
-
Press Candies Firmly: When adding the M&M candy, make sure to press them in firmly. This helps secure them in place and creates a delightful surprise in every bite!
-
Keep an Eye on Baking: Watch the cookies closely as they bake. Undercooking will keep them soft while cooking them too long can make them hard; aim for just lightly golden edges.
-
Cool for Best Results: Allow the cookies to cool on the baking sheet to firm up before transferring. This prevents breakage and ensures they keep their lovely shape.
Easter Bunny Button Cookies Recipe FAQs
How do I select ripe ingredients for my Easter Bunny Button Cookies?
Absolutely! Freshness is key for great flavor. Choose butter that’s properly softened (but not melted) for easy mixing. Eggs should be fresh—check the date on the carton. For the sugar, any form will work, but know that brown sugar can add extra moisture. As for the M&M candies, pick those in bright colors to make your cookies pop!
What is the best way to store Easter Bunny Button Cookies?
To keep these delightful cookies fresh, store them in an airtight container at room temperature for up to 5 days. If you’d like to keep them longer, refrigerate them in an airtight container for up to 7 days. You can also freeze them—place the cookies in a single layer on a baking sheet, freeze, then transfer to a freezer-safe bag or container where they’ll last up to 2 months.
How do I freeze Easter Bunny Button Cookies?
Freezing is a great option! After baking, allow the cookies to cool completely. Then, place them in a single layer on a baking sheet to freeze for about 1-2 hours. Once firm, transfer them to a freezer-safe container or bag, separating layers with parchment paper. This way, you can enjoy fresh-tasting cookies any time you like!
What can I do if my dough is too sticky or too dry?
Very good question! If your dough is too sticky, it may need a bit more flour; add it one tablespoon at a time until you achieve a workable consistency. On the other hand, if it’s too dry, add a splash of heavy cream or milk to moisten it up. Remember, a good dough is slightly tacky but still holds its shape!
Are there any allergy considerations for Easter Bunny Button Cookies?
Yes, keep in mind that these cookies contain butter and eggs, which may not be suitable for those with dairy or egg allergies. You can substitute with dairy-free margarine and egg replacements like a flaxseed egg (1 tablespoon ground flaxseed mixed with 2.5 tablespoons water) for a vegan version. Always check for allergen information if sharing with others!
How can I customize the flavors of my Easter Bunny Button Cookies?
The more, the merrier! You can switch up the extracts by using almond or lemon instead of vanilla for a unique twist. Feel free to use different types of candies on top—seasonal treats around holidays can make them even more special. Just be sure to preserve the base recipe for that soft, tender cookie texture!
Easter Bunny Button Cookies: Irresistible Sweet Bites for Spring
Ingredients
Equipment
Method
- Preheat your oven to 350°F (175°C) and prepare a baking sheet lined with parchment paper.
- In a mixing bowl, combine softened butter and sugar. Beat until light and fluffy for about 2-3 minutes.
- Add egg yolks and vanilla extract to the mixture, and beat on low speed until well combined.
- Gradually add all-purpose flour, mixing on low speed until just incorporated, avoiding over-mixing.
- Roll about one teaspoon of dough into a ball and coat in sanding sugar. Place on the prepared baking sheet.
- Press one chocolate M&M candy into the center of each dough ball.
- Bake for approximately 10 minutes until the edges are lightly golden. Monitor closely to avoid overbaking.
- Let the cookies cool on the baking sheet for 3-5 minutes before transferring to a wire rack to cool completely.
Leave a Reply