
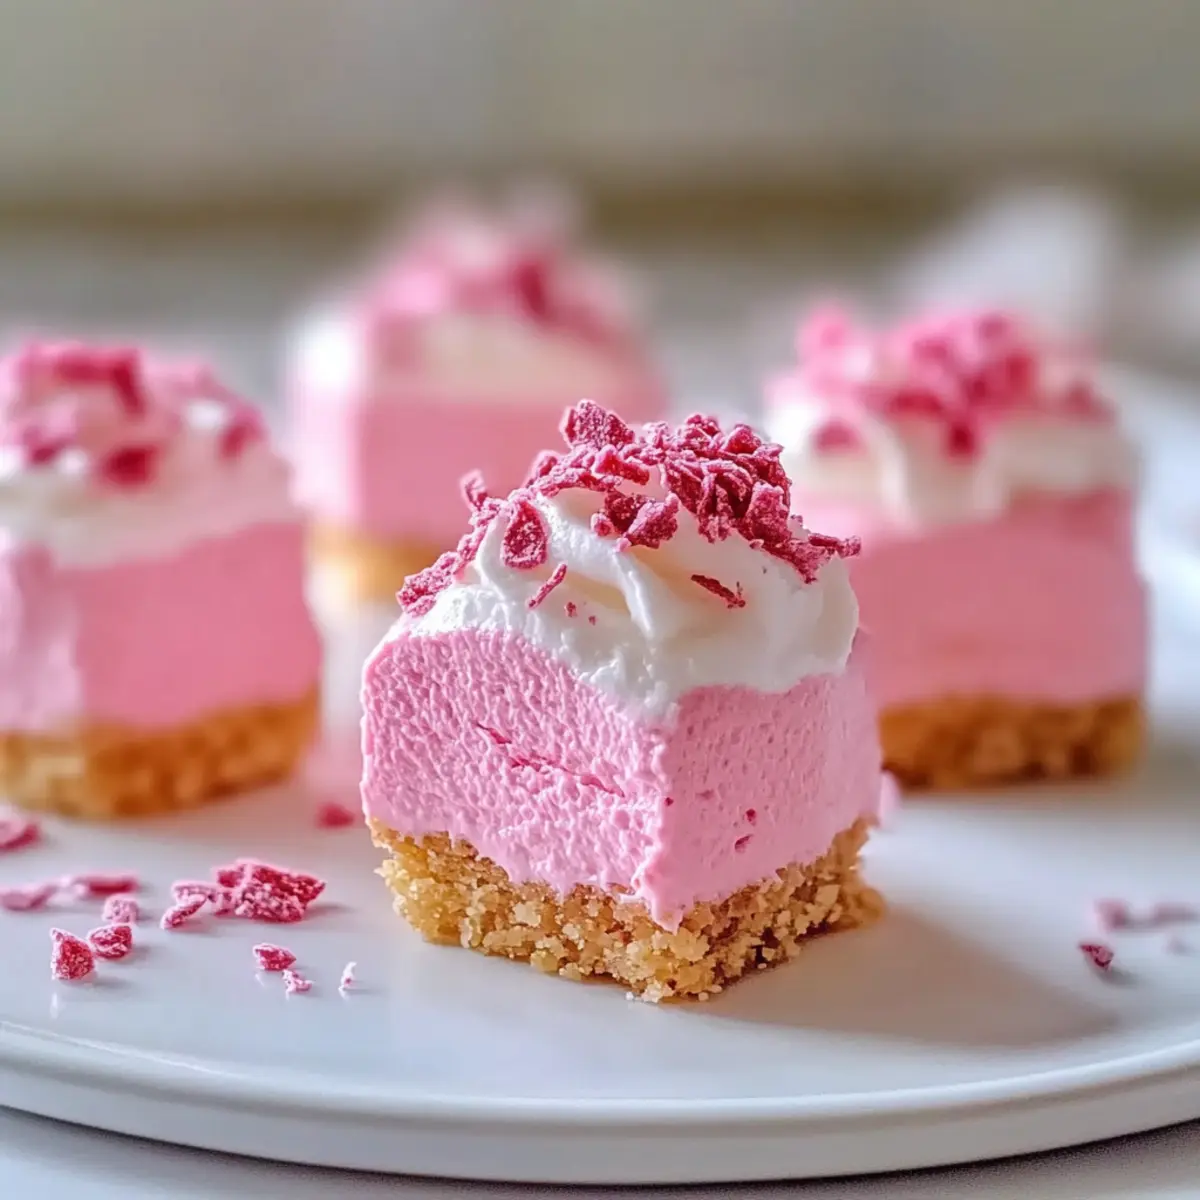
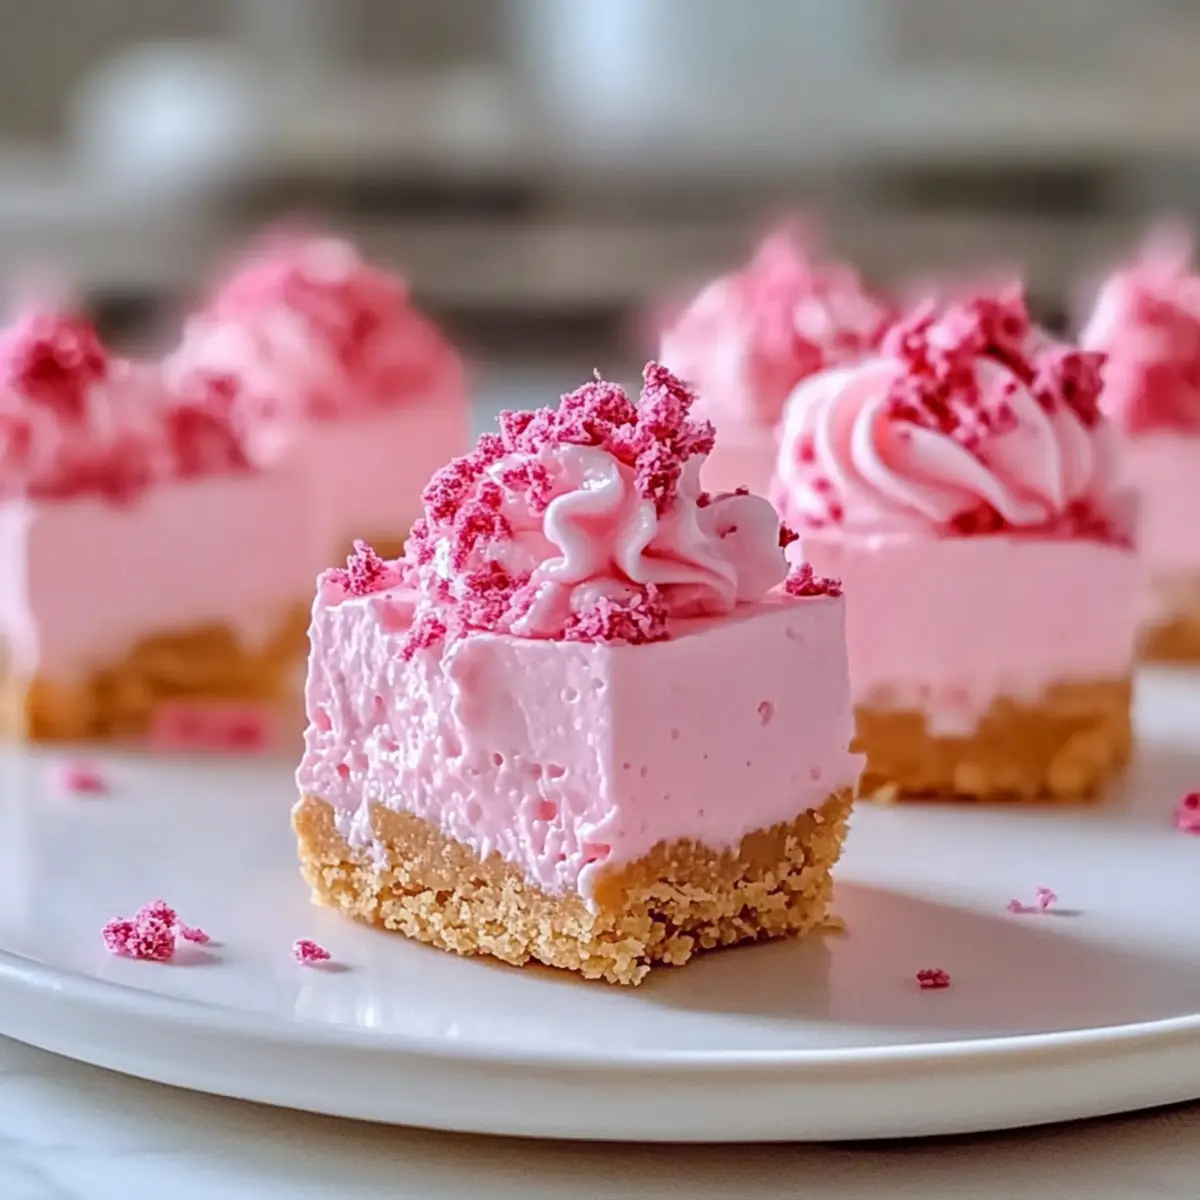
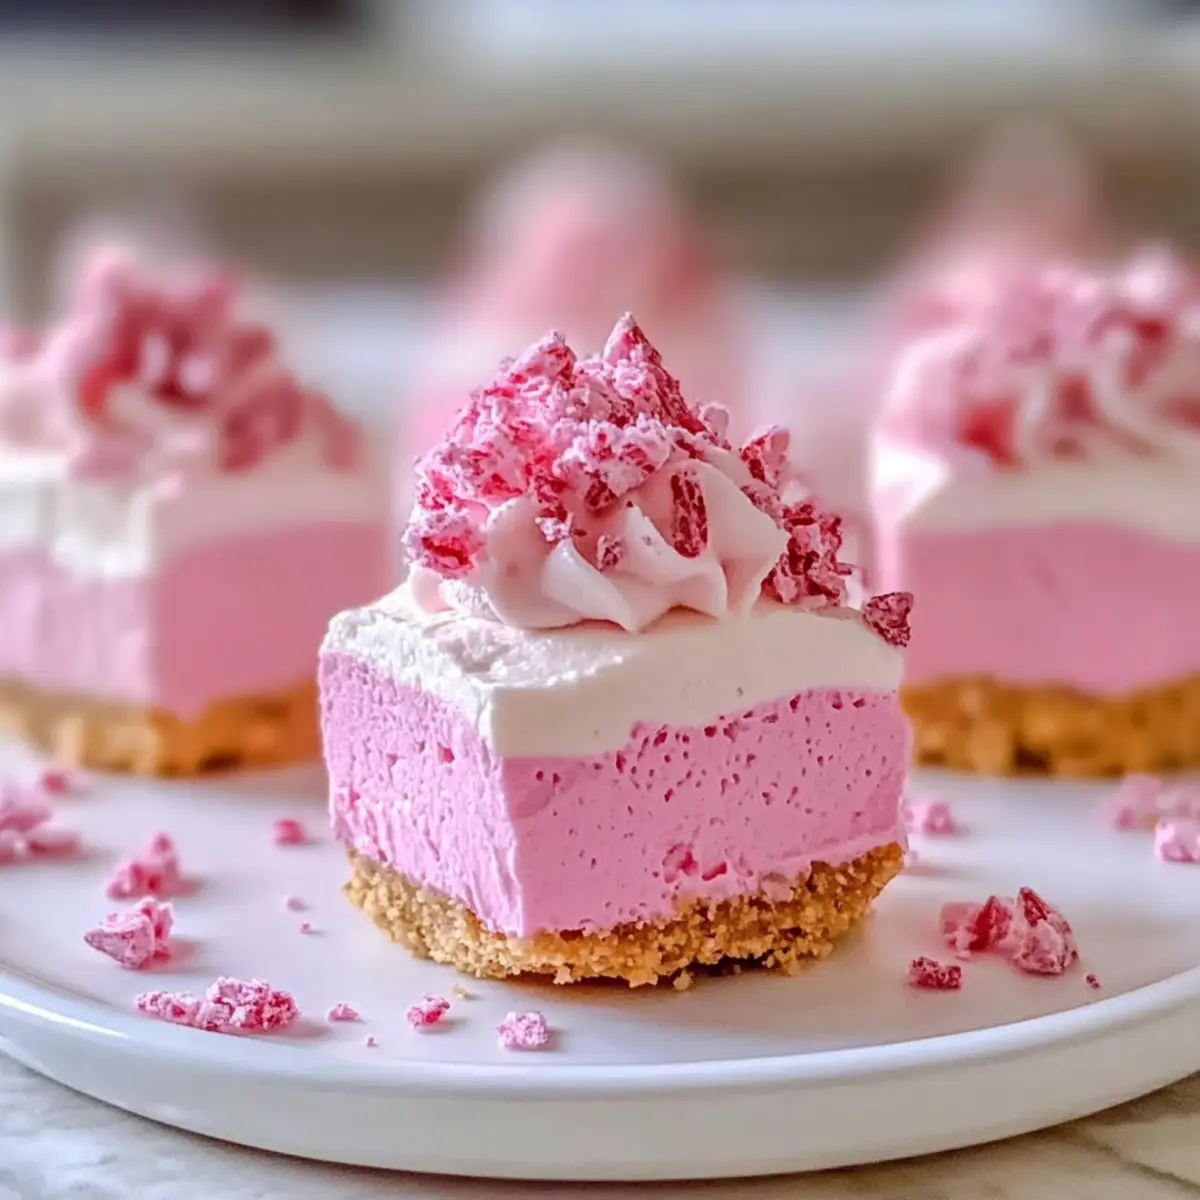
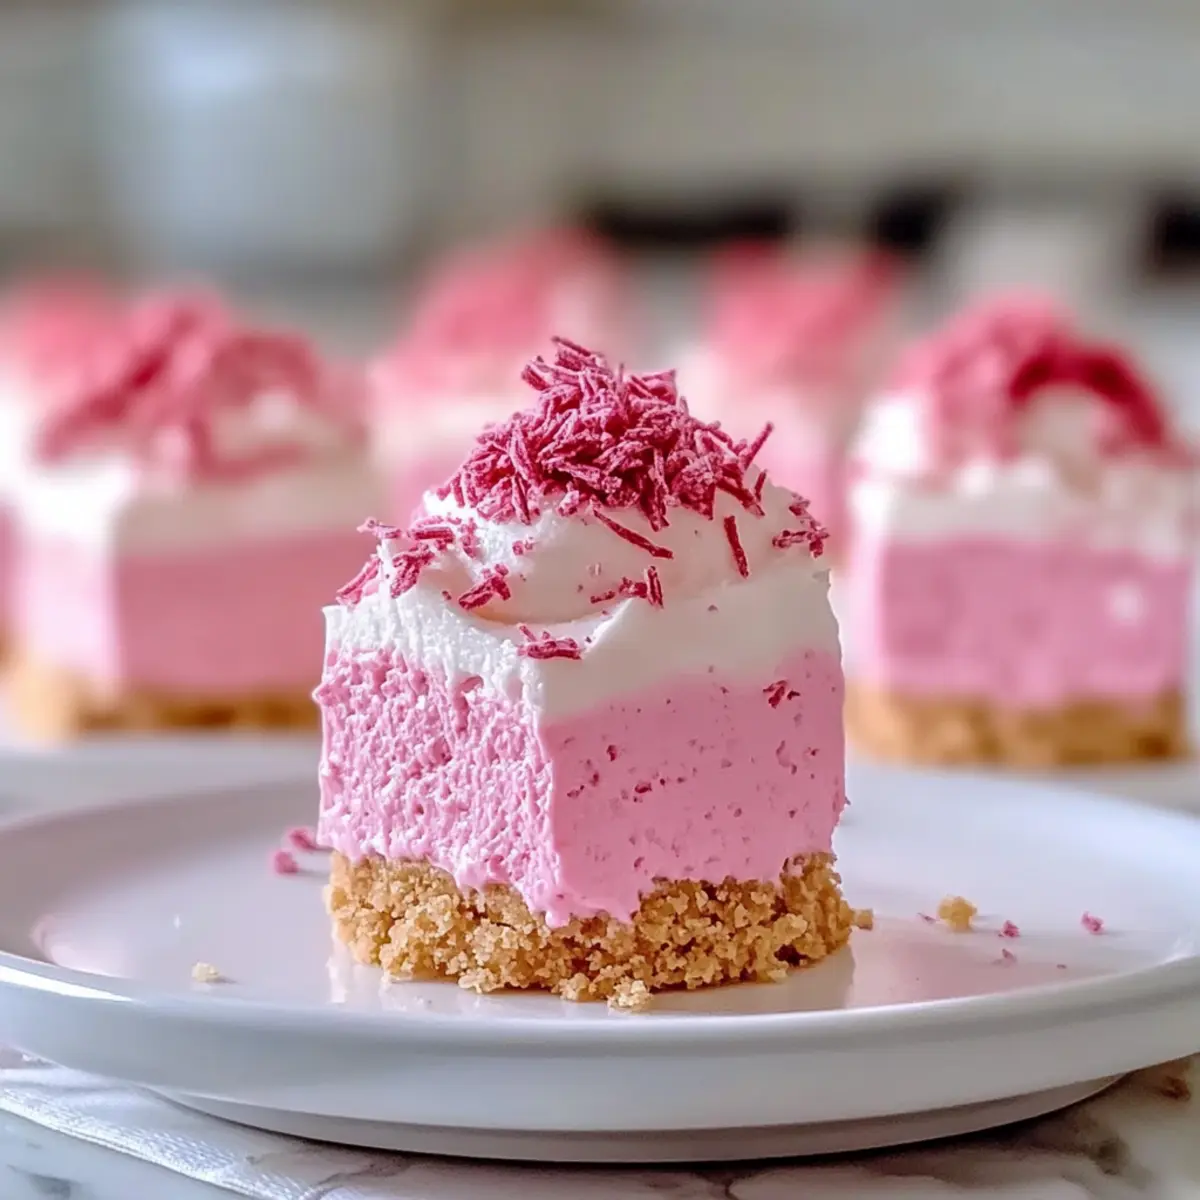
As I stirred the vibrant pink mixture, I couldn’t help but smile at the whimsical delight unfolding before me. These No-Bake Pink Velvet Cheesecake Bites are not just desserts; they’re a cheerful invitation to indulge. With their creamy, dreamy texture and a striking color that brightens any occasion, these bites make the perfect centerpiece for gatherings or cozy nights in. The best part? They come together in a flash and are easily customizable to suit various dietary preferences, like gluten-free or even dairy-free options. As you savor each velvety bite, you’ll uncover the joy of homemade treats that bring a touch of festive magic to your table. Curious about how these delightful little gems come together? Let’s dive right in!
Why Are These Cheesecake Bites So Irresistible?
Effortless Preparation: Crafting these No-Bake Pink Velvet Cheesecake Bites is a breeze, perfect for anyone looking to whip up a delightful treat without the fuss.
Guilty Pleasure: The creamy filling combined with a crumbly crust creates an indulgent experience you won’t want to miss.
Customizable Options: Whether you need gluten-free or dairy-free options, these bites easily adapt to fit your needs while still being delicious.
Crowd-Pleasing Appeal: Their vibrant pink hue naturally draws attention and gets everyone excited; they’re bound to be a hit at any gathering.
Versatile Serving: Pair them with fresh berries or a drizzle of chocolate, and watch them transform into an even more festive dessert!
For more sweet inspirations, check out these Cinnamon Apple Bites or the indulgent Millionaires Cheesecake Indulge.
Pink Velvet Cheesecake Bites Ingredients
For the Filling
• Cream Cheese – Provides that signature creamy texture; low-fat options work wonderfully too!
• Confectioners’ Sugar – Sweetens the filling perfectly; granulated sugar can also do the trick.
• Vanilla Extract – Enhances the overall flavor; consider almond extract for a fun twist!
• Pink Food Coloring – Adds a vibrant hue; opt for natural food coloring as a healthier choice.
For the Crust
• Graham Cracker Crumbs – Creates a delightful base; digestive biscuits can be used as a substitute.
• Unsalted Butter – Binds the crust together; coconut oil is a great dairy-free alternative.
These delightful Pink Velvet Cheesecake Bites are sure to bring joy to your gatherings!
Step‑by‑Step Instructions for Pink Velvet Cheesecake Bites
Step 1: Prepare Baking Dish
Start by lining an 8-inch square baking dish with parchment paper, ensuring it fits snugly to prevent sticking. This layer will help you easily lift out the cheesecake bites once they’re set. Aim for a clean edge around the perimeter so the bites can be cut neatly.
Step 2: Mix Filling
In a large mixing bowl, beat together the cream cheese and confectioners’ sugar using an electric mixer on medium speed. Continue mixing for about 2-3 minutes, or until the mixture is smooth and creamy without lumps. This will give your Pink Velvet Cheesecake Bites a delightful texture.
Step 3: Flavoring
Next, add vanilla extract and a few drops of pink food coloring to the cream cheese mixture. Blend well for another minute until everything is fully combined and the mixture takes on that charming pink hue. Adjust the coloring to your liking, creating a shade that’s irresistible.
Step 4: Prepare Crust
In a separate bowl, combine graham cracker crumbs with melted unsalted butter, mixing until the texture resembles wet sand. This will ensure a cohesive crust that holds together beautifully. If you’re opting for a dairy-free version, use melted coconut oil instead of butter for the crust.
Step 5: Assemble
Press the crumb mixture firmly into the bottom of your prepared baking dish, creating an even layer. Follow this by spreading the cream cheese mixture evenly over the crust, smoothing the top with a spatula. Make sure the filling reaches all corners for consistent bites.
Step 6: Chill
Transfer the baking dish to the refrigerator and chill for at least 4 hours, but ideally overnight. This step is crucial for allowing the cheesecake filling to firm up properly. You’ll know it’s ready when it feels set to the touch and holds its shape.
Step 7: Serve
Once chilled, remove the cheesecake from the dish using the parchment paper. Cut into bite-sized pieces to create your Pink Velvet Cheesecake Bites. Serve these delightful treats chilled, and consider garnishing with fresh berries or a drizzle of chocolate for an extra touch of elegance.
Pink Velvet Cheesecake Bites Variations
Feel free to let your creativity shine with these delightful variations that will elevate your Pink Velvet Cheesecake Bites to new heights!
-
Dairy-Free: Replace regular cream cheese with vegan cream cheese for a dairy-free treat that’s just as delicious.
-
Gluten-Free: Swap out graham cracker crumbs for gluten-free options, ensuring everyone can enjoy these bites.
-
Chocolate Drizzle: Add a luxurious touch by drizzling melted chocolate on top for an indulgent finish.
-
Berry Infusion: Mix in crushed berries right into the cheesecake filling for a fruity burst of flavor with every bite.
-
Citrus Burst: Incorporate lemon or lime zest into the filling for a refreshing zing that perfectly balances the sweetness.
-
Mini Bites: Serve your cheesecake mixture in mini cupcake liners, creating adorable, individual bites that are perfect for parties.
By exploring these variations, you’ll have countless ways to delight your family and friends with your culinary skills. If you’re looking for more dessert inspiration, don’t forget to check out these perfectly sweet Cinnamon Apple Bites and the rich Millionaires Cheesecake Indulge.
How to Store and Freeze Pink Velvet Cheesecake Bites
-
Fridge: Keep your Pink Velvet Cheesecake Bites in an airtight container for up to 1 week. This will preserve their creamy texture while ensuring they’re always ready for a quick indulgence.
-
Freezer: These delightful bites can be frozen for up to 3 months. To prevent sticking, layer parchment paper between each bite before placing them in an airtight container.
-
Thawing: When ready to enjoy, simply transfer the bites to the fridge for a few hours to thaw. This gradual thawing method helps maintain their delicious creamy consistency.
-
Reheating: There’s no need to heat these no-bake treats; they’re best served chilled, straight from the fridge for that perfect melt-in-your-mouth experience!
Expert Tips for Pink Velvet Cheesecake Bites
-
Room Temperature Cream Cheese: Start with cream cheese at room temperature for smoother mixing, avoiding lumps in your filling for the best Pink Velvet Cheesecake Bites.
-
Chill Adequately: Ensure you chill the bites for at least 4 hours or overnight to achieve the perfect texture. If too soft, consider more chilling time or adding extra confectioners’ sugar.
-
Mind Your Measurements: Accurately measure the graham cracker crumbs and butter for a cohesive crust. Too much butter can lead to a soggy base.
-
Color Adjustment: Add pink food coloring gradually to control the shade better. Starting with a small amount helps you achieve your desired vibrancy without overshooting.
-
Serving Suggestions: Enhance your bites with fresh berries or a light dusting of powdered sugar to elevate presentation and add delightful flavor contrasts!
What to Serve with No-Bake Pink Velvet Cheesecake Bites
Elevate your dessert experience by pairing these charming bites with delightful accompaniments that enhance their creamy richness and vibrant flavor.
-
Fresh Berries: The tartness of strawberries or raspberries contrasts beautifully with the sweetness, adding a burst of freshness to each bite.
-
Light Whipped Cream: A dollop of lightly sweetened whipped cream adds a fluffy texture that perfectly complements the creamy cheesecake bites.
-
Chocolate Drizzle: Drizzling melted chocolate over your bites introduces a rich, decadent touch that elevates their indulgence to new heights.
-
Mint Leaves: Fresh mint leaves add a refreshing element that brightens the dessert and provides a visually appealing contrast against the pink bites.
-
Sparkling Rosé: Pairing with sparkling rosé brings a bubbly elegance that enhances the festive atmosphere of your gathering, making every bite even more special.
-
Lemon Zest: Sprinkling a hint of lemon zest on top can introduce a refreshing citrusy zing, which beautifully balances the creaminess of the cheesecake.
-
Coconut Flakes: For a tropical twist, sprinkle toasted coconut flakes over the bites, offering a delightful crunch and an additional layer of flavor.
-
Vanilla Ice Cream: Serve alongside a scoop of vanilla ice cream for a delightful temperature contrast; the creamy cold perfectly matches the bites.
Creating a well-rounded dessert spread makes every bite of the Pink Velvet Cheesecake Bites feel even more indulgent and enjoyable.
Make Ahead Options
These No-Bake Pink Velvet Cheesecake Bites are perfect for busy home cooks looking to save time while planning for gatherings! You can prepare the filling and crust up to 3 days in advance: simply mix your cream cheese filling and sandwich it between layers of graham cracker crust, pressing it into the baking dish firmly. Once assembled, cover the dish tightly with plastic wrap and refrigerate until you’re ready to serve. For the best texture, chill the bites overnight, ensuring they set beautifully. When it’s time to enjoy, simply cut them into bite-sized pieces and garnish as desired, and you’ll have a festive treat with minimal last-minute effort!
No-Bake Pink Velvet Cheesecake Bites Recipe FAQs
What is the best way to select ripe cream cheese?
Absolutely! When selecting cream cheese, look for packages that are cold and have no signs of dents or damage. I recommend pressing your finger gently against the packaging; it should feel firm yet slightly pliable. Opt for brands that are carefully rated for flavor and texture if possible, as a high-quality cream cheese will elevate your Pink Velvet Cheesecake Bites.
How do I store Pink Velvet Cheesecake Bites?
To keep your delightful Pink Velvet Cheesecake Bites fresh, store them in an airtight container in the refrigerator for up to 1 week. Make sure they are well-sealed; otherwise, they can dry out or absorb odors from other foods in the fridge.
Can I freeze these cheesecake bites, and if so, how?
Yes, you can! To freeze your Pink Velvet Cheesecake Bites, layer them between sheets of parchment paper inside an airtight container. This prevents them from sticking together. They’ll stay fresh in the freezer for up to 3 months. When you’re ready to enjoy, simply move them to the fridge to thaw for a few hours before serving.
What if my filling turns out too soft?
Very good question! If you find the filling is too soft after chilling, don’t panic. You can add a tablespoon or two of confectioners’ sugar to help stabilize the texture. Mix well and then place back in the fridge for an additional hour or so, until it firms up a bit. Ensure to check that your cream cheese was at room temperature to begin with, as this can also affect the texture.
Are these cheesecake bites suitable for people with dairy allergies?
Definitely! For a dairy-free option, simply substitute regular cream cheese with a vegan cream cheese alternative. This will maintain the creamy texture you love, ensuring that everyone at your gathering can enjoy these scrumptious Pink Velvet Cheesecake Bites without worry.
Delicious Pink Velvet Cheesecake Bites for Effortless Indulgence
Ingredients
Equipment
Method
- Start by lining an 8-inch square baking dish with parchment paper.
- In a large mixing bowl, beat together the cream cheese and confectioners' sugar using an electric mixer on medium speed for about 2-3 minutes.
- Add vanilla extract and a few drops of pink food coloring to the cream cheese mixture, blending well for another minute.
- In a separate bowl, combine graham cracker crumbs with melted unsalted butter, mixing until it resembles wet sand.
- Press the crumb mixture firmly into the bottom of your prepared baking dish.
- Spread the cream cheese mixture evenly over the crust, smoothing the top with a spatula.
- Transfer to the refrigerator and chill for at least 4 hours, ideally overnight.
- Once chilled, use the parchment paper to remove the cheesecake, and cut into bite-sized pieces.
Leave a Reply